Thanksgiving is just around the corner and I am posting some of my old favorites for the American Day of Feasting. I’ve made changes in many of the recipes to give them a new and improved twist. My favorite change is the Golden Cornbread I used for the Cornbread and Andouille Sausage Stuffing. I find the flavor and texture are a bit more sophisticated and delicious compared to the recipe I’ve used in the past. I changed the Roasted Corn Pudding to Roasted Corn and Sweet Pea Pudding. I came up with this recipe change for a dinner I recently had with my dear friends who do not eat onions and peppers but love corn and peas. I also changed the seasoning from southwest flavors to the more subtle Sunny Paris seasoning I get from Penzeys. Go to www.penzeys.com for ordering. I also changed the cheese to shredded Mozzarella cheese instead of Cheddar and Jack Cheeses.
For the Brussels Sprouts I used pancetta instead of bacon. Love this change because the pancetta does not overpower the delicate flavor of the Brussels Sprouts.
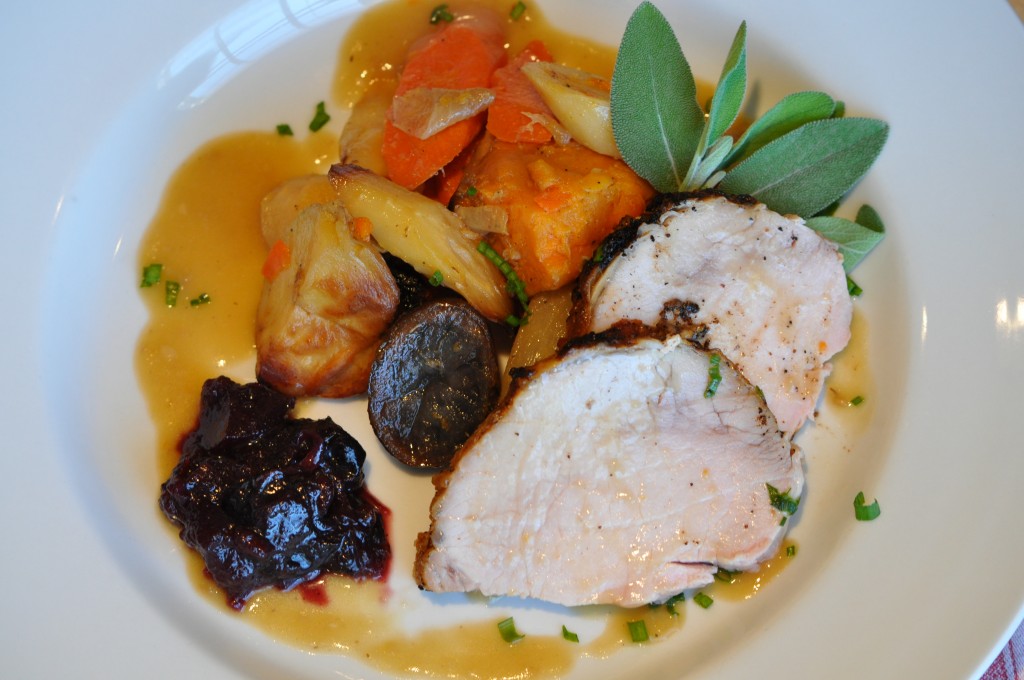
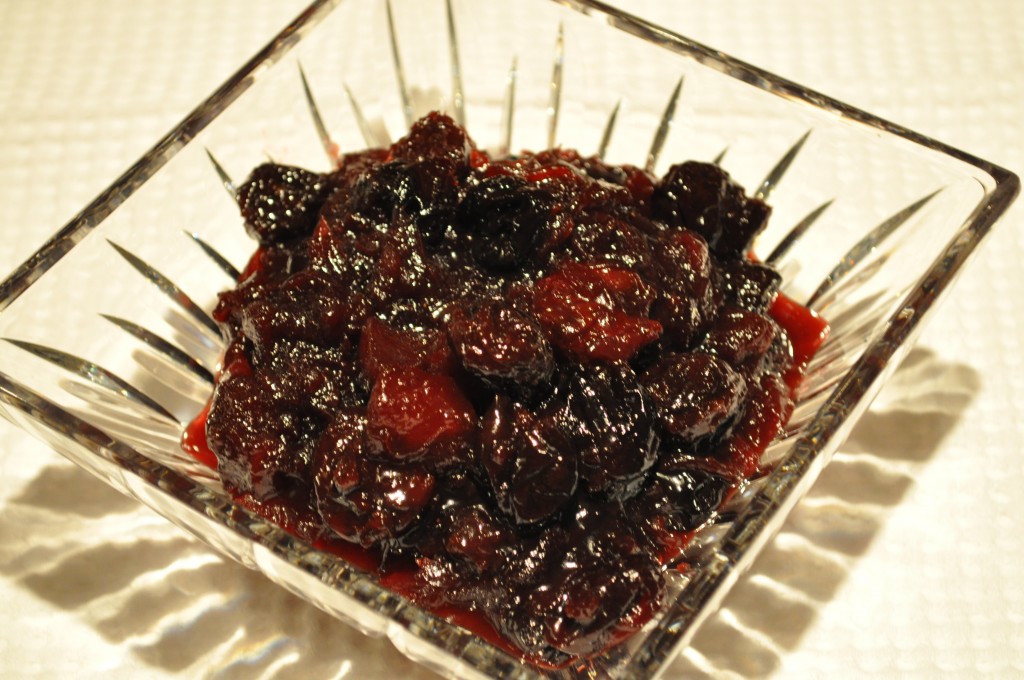
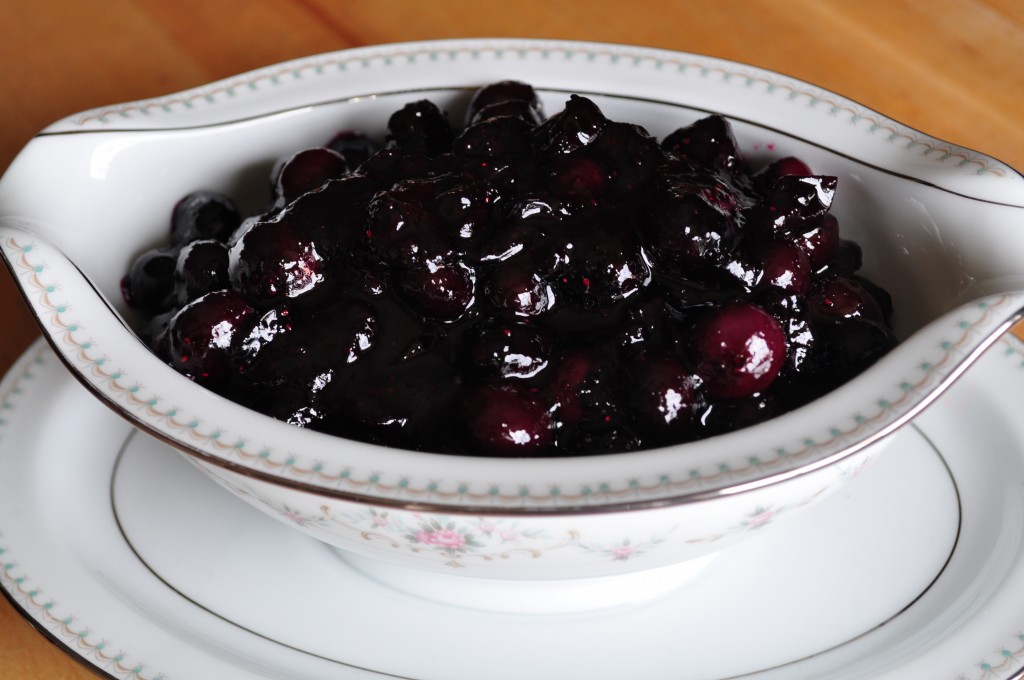
Another huge change is in the Cranberry Sauce. For years I have been using Kumquats but decided to try something different since no Kumquats could be found. Instead I used a California orange and a Ruby Red Grapefruit. I used the peel and the juice. I made it yesterday and I am quite pleased with the end result.
Thanksgiving Feast
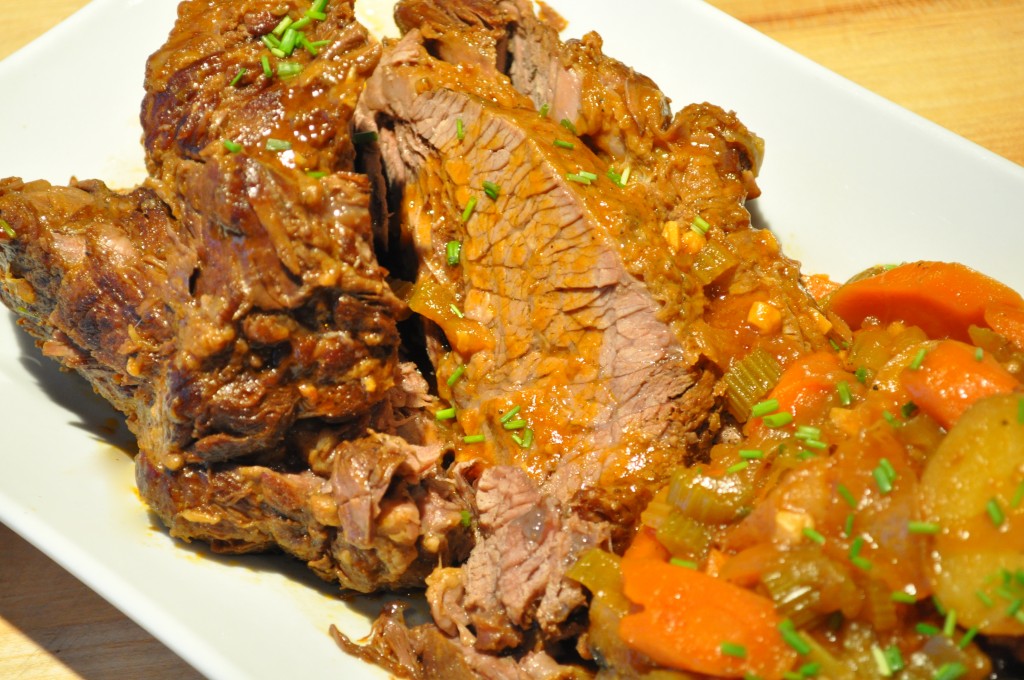
Roast Turkey with Golden Cornbread and Andouille Sausage Stuffing
Roasted Corn and Sweet Pea Pudding
Brussels Sprouts with Pearl Onions and Pancetta
Sweet Potato Casserole with Pecan Streusel Topping
Cranberry Citrus Compote
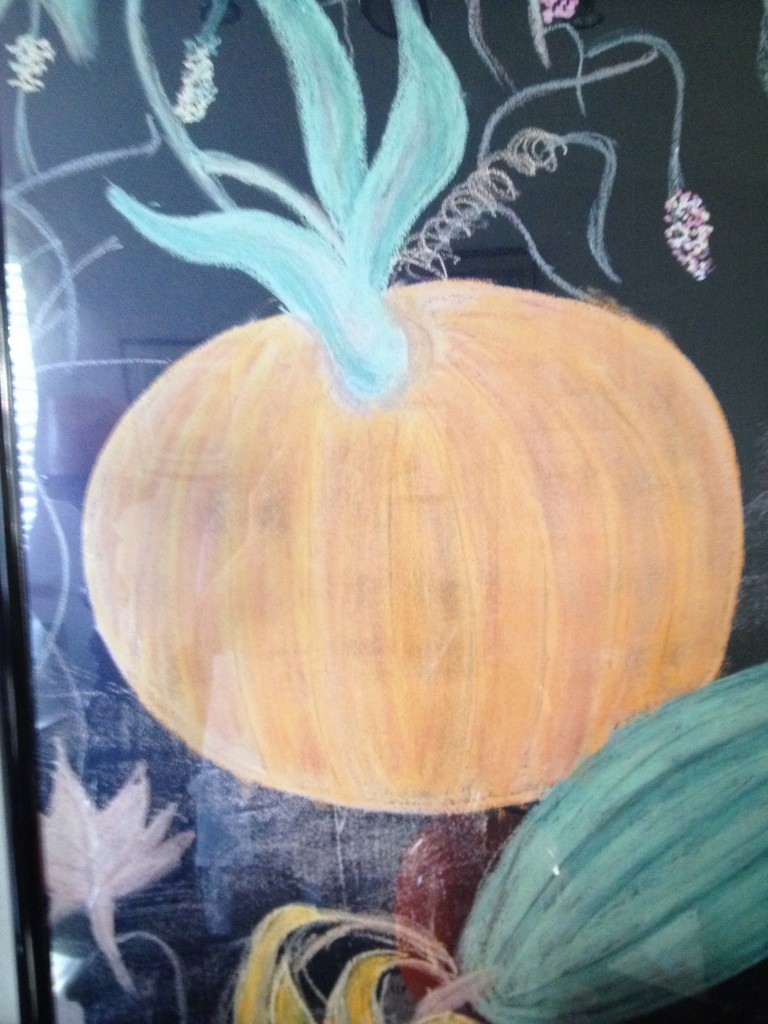
Traditional Pumpkin Pie Topped with Italian Meringue
Apple-Pear Pie
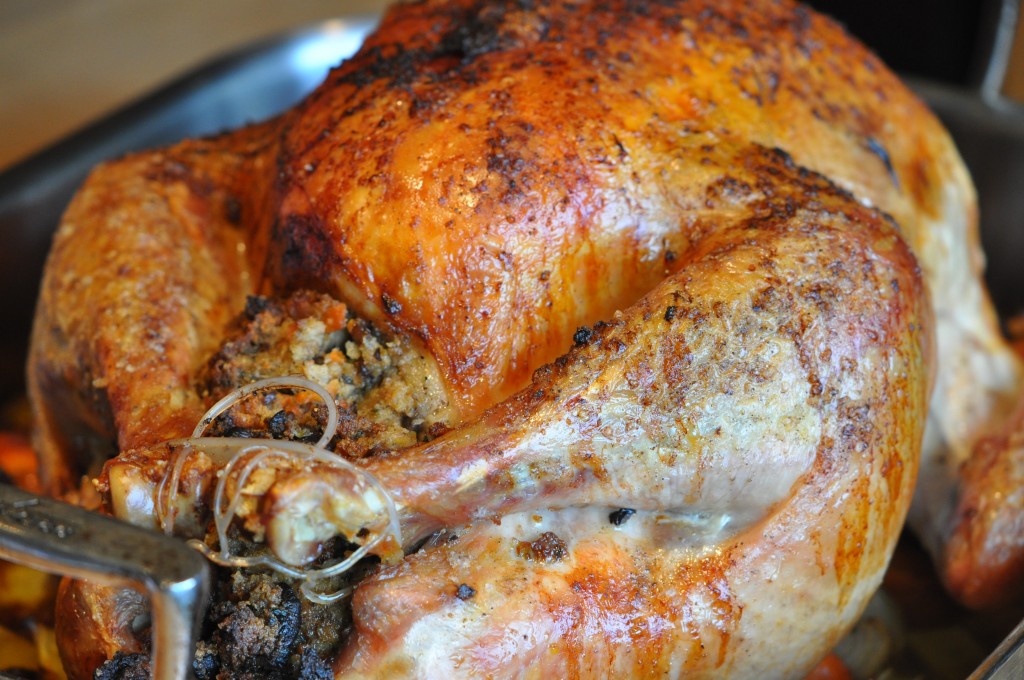
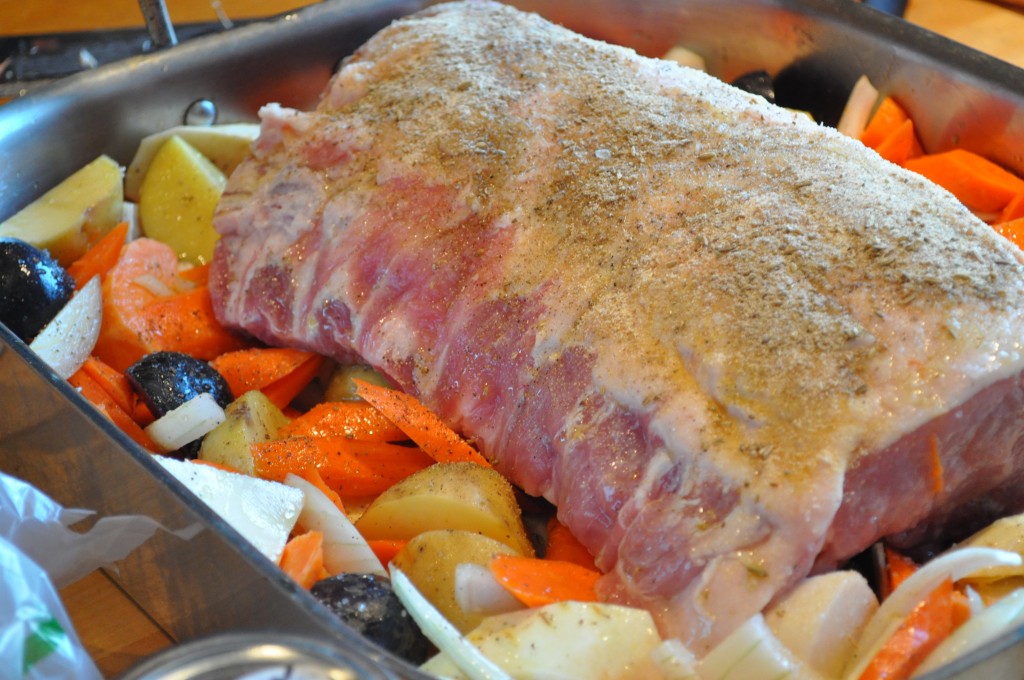
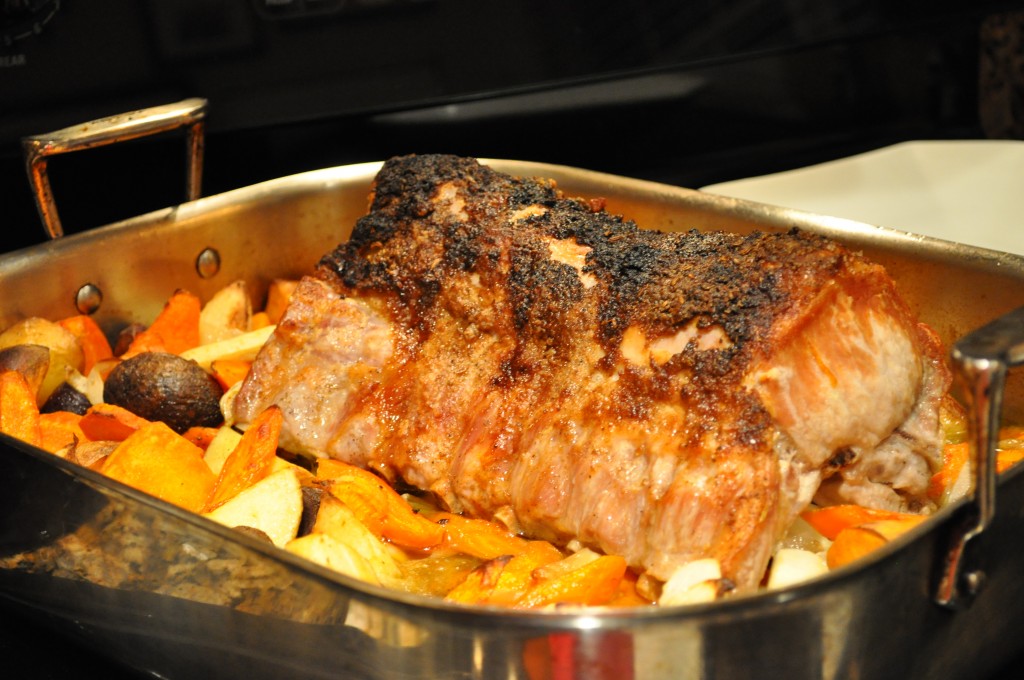
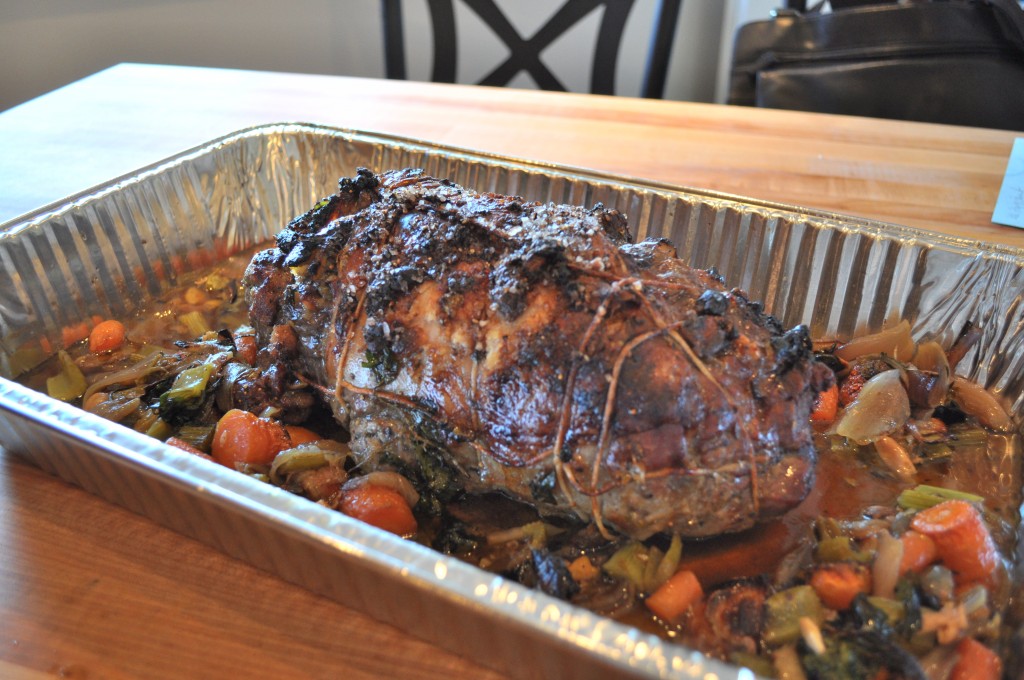
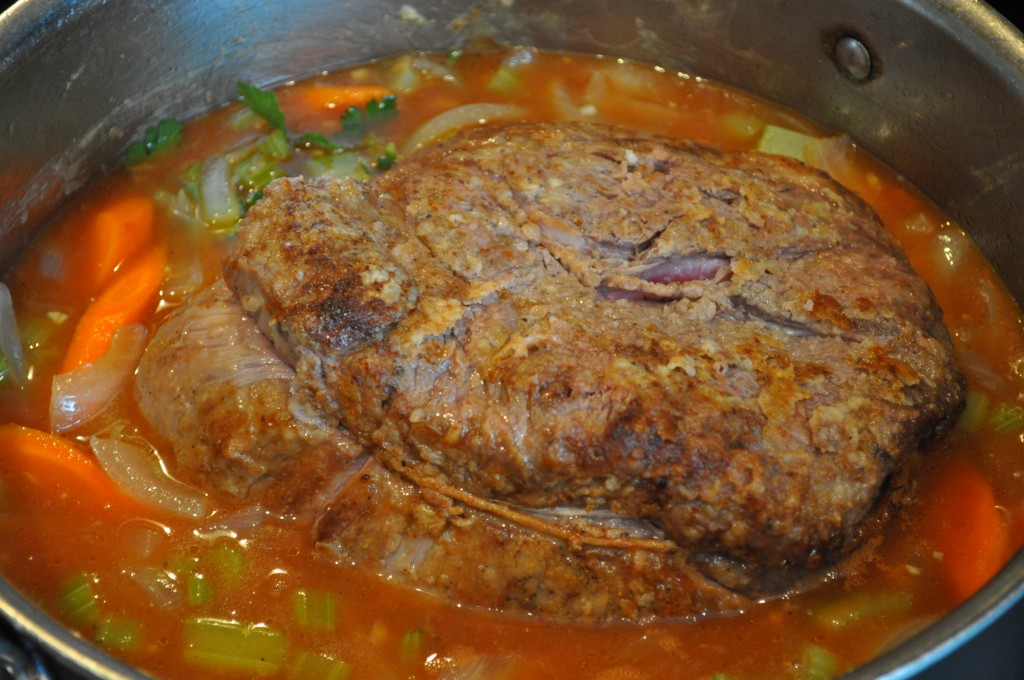
Roasted Turkey with Golden Cornbread and Andouille Sausage Stuffing
Roasted Turkey with Golden Cornbread and Andouille Sausage Stuffing
Every oven is different and things can get really scary when roasting a turkey. If the turkey doesn’t have the little pop up gage in the breast there is always the question of it being done or not. The best way to take a lot of the mystery out of cooking the big bird is to use a probe thermometer. You stick the probe end of the thermometer wire into the thickest part of the thigh and the other end of the wire into an instant read thermometer. If you don’t have a probe that came with your oven then this instant read probe thermometer is absolutely the best way to go. It’s worth the investment. You can get one of these wonderful gadgets at any kitchen store.
Serves 12
1 Cup (2 Sticks) Unsalted Butter, Melted
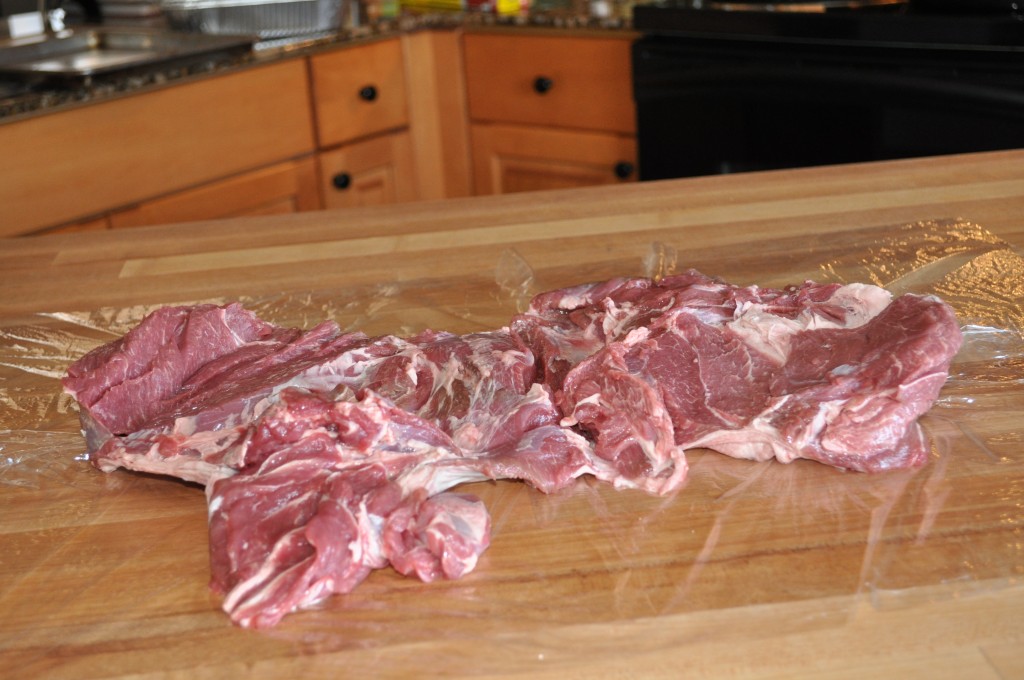
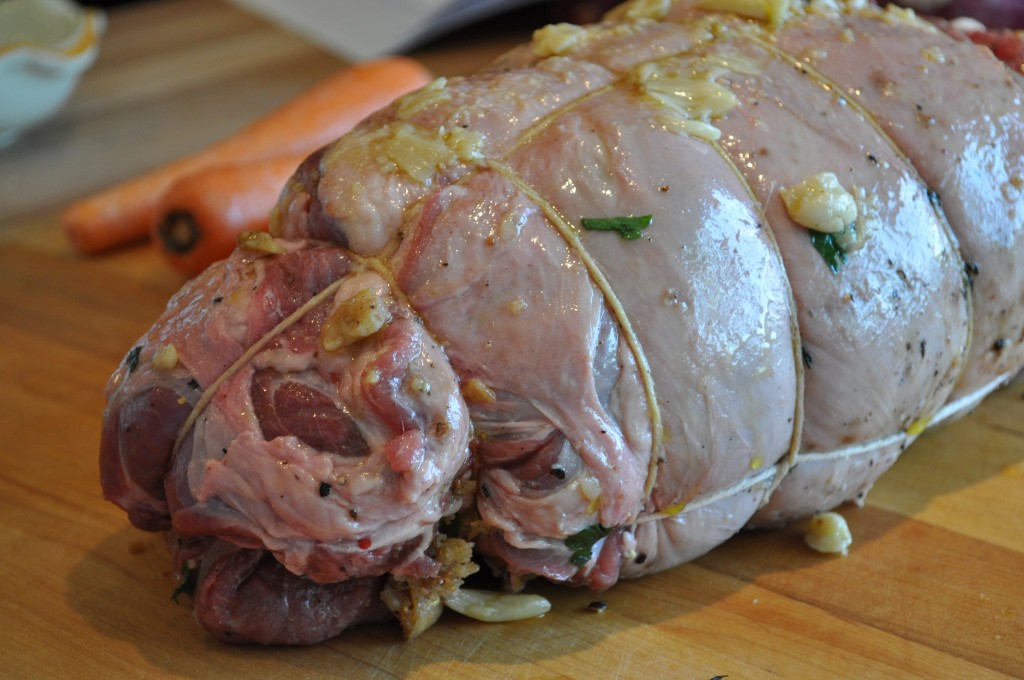
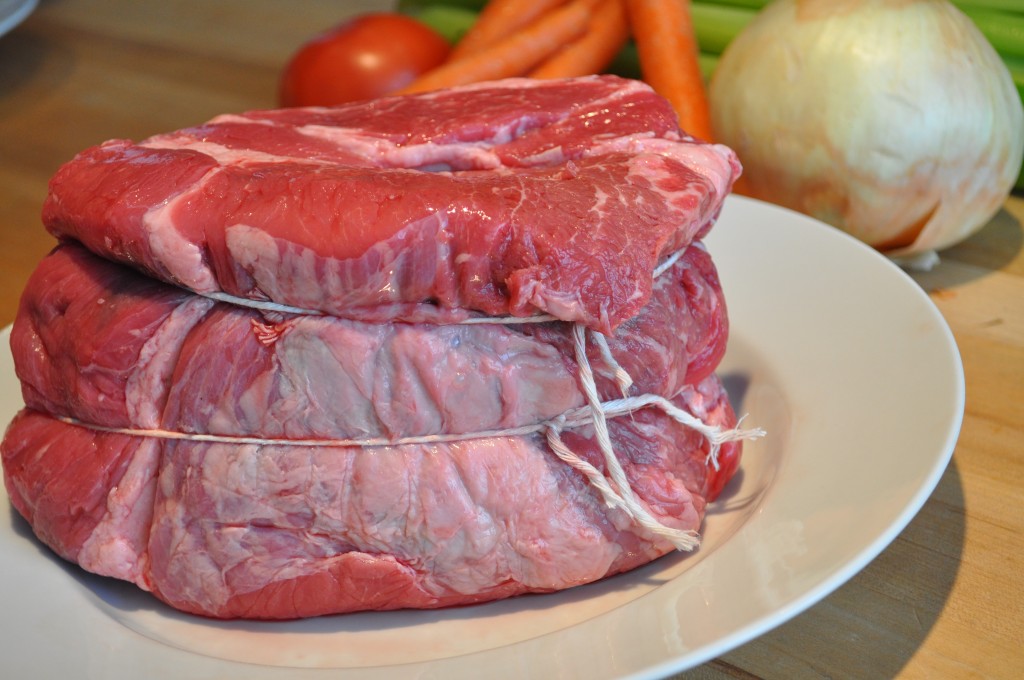
1 23-25 Pound Fresh Turkey, Rinsed Well and Patted Dry
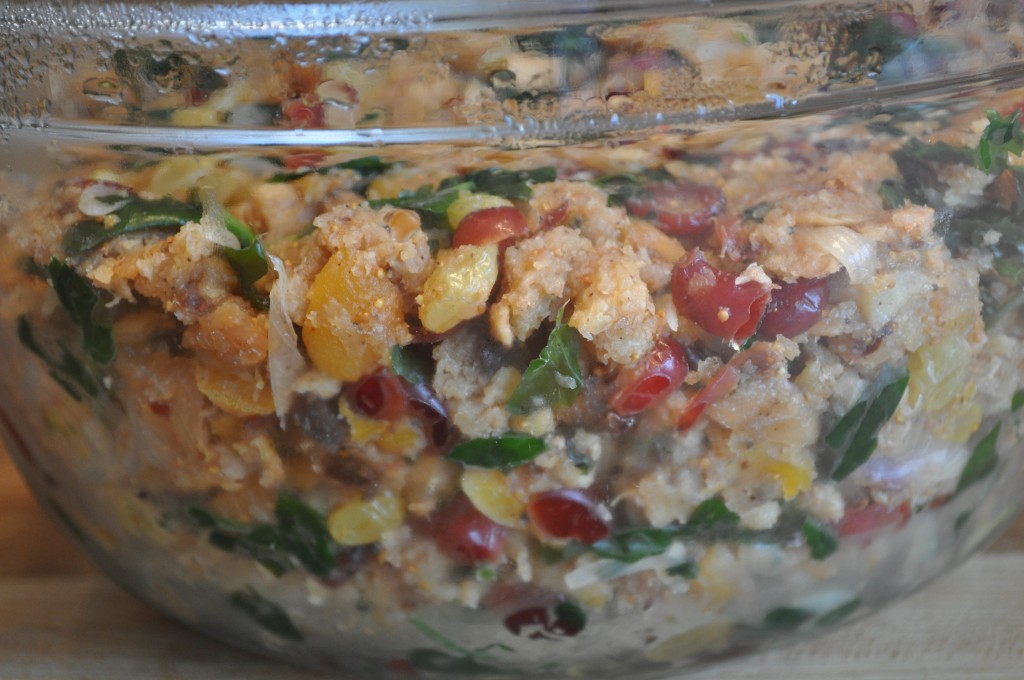
Golden Cornbread and Andouille Sausage Stuffing
Coarse Sea Salt
Freshly Ground Black Pepper
6 Large Carrots Coarsely Cut into Pieces
2 Large Spanish Onions Coarsely Cut into Pieces
6 Celery Stalks Coarsely Cut into Pieces
Reserved Turkey Neck
8 Cups Homemade Turkey Stock or Canned Low Sodium Chicken Broth
1 Cup All-Purpose Flour
Coarse Sea Salt and Freshly Ground Black Pepper
Preheat oven to 350 Degrees F with the rack in the lowest part of the oven.
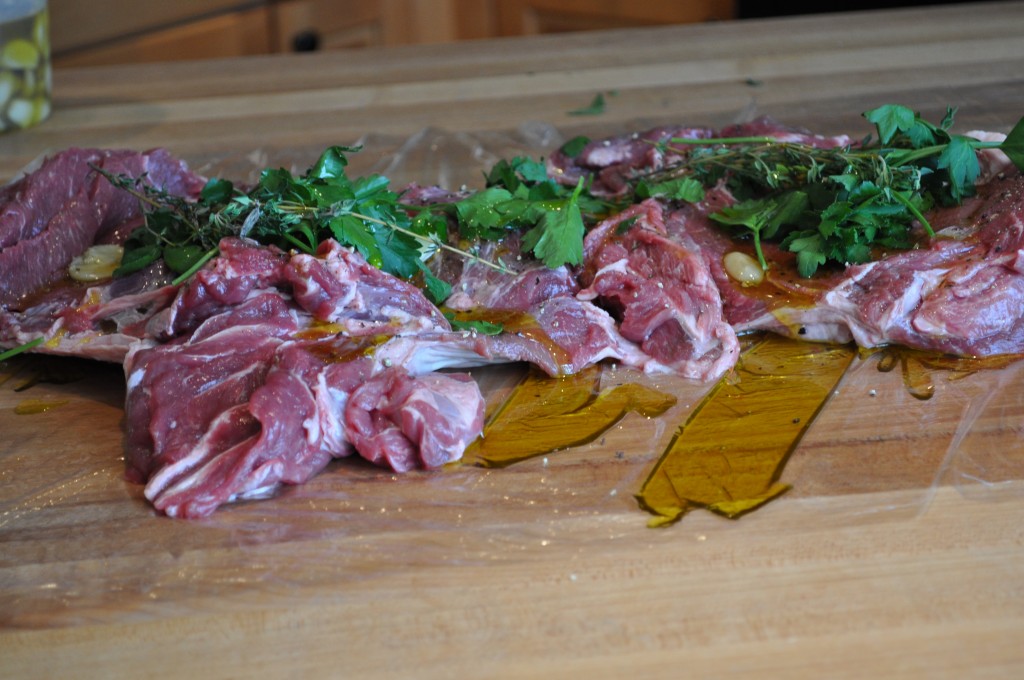
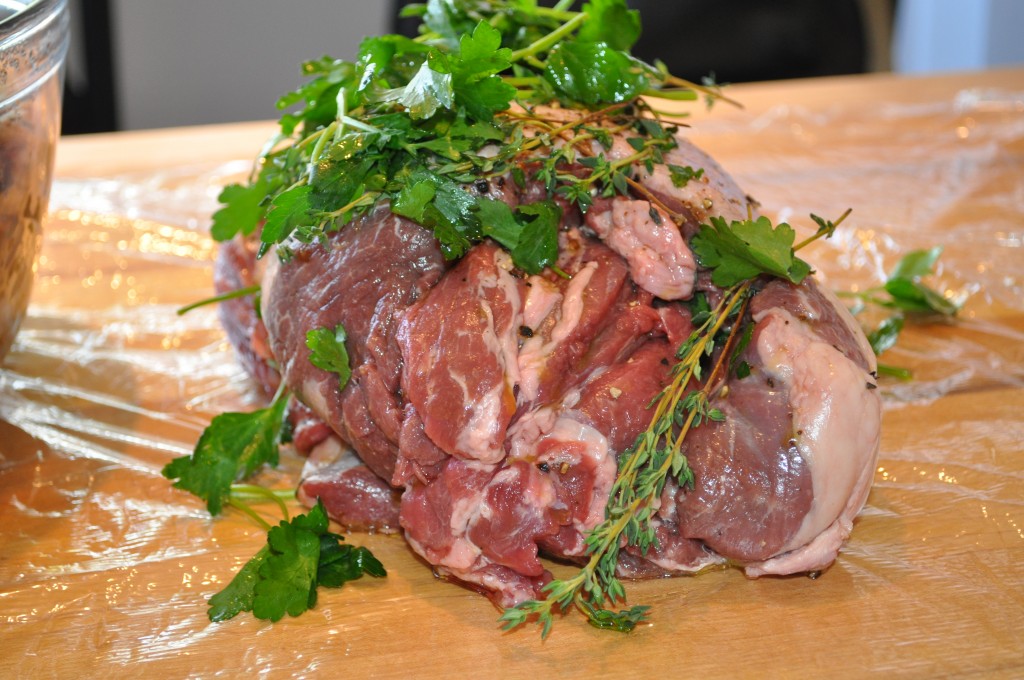
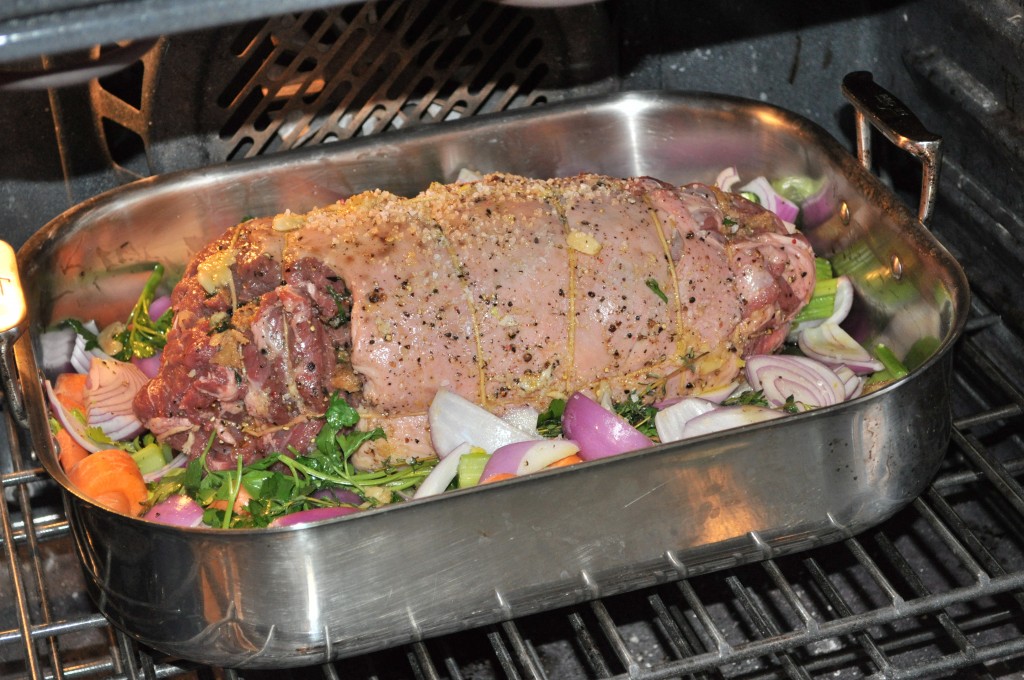
Place cut up carrots, onions and celery into a large roasting pan. (Laying flat on the bottom of the pan will act as a roasting rack. The veggies cooked with the turkey in this way will give your gravy more flavor.) Place the turkey, breast side up, in the pan on top of the veggies. Fold the wing tips under. Season the turkey body cavity and the neck cavity with salt and pepper. Loosely stuff the turkey body cavity and the neck cavity with the Cornbread and Andouille Sausage stuffing. (Put left over stuffing into a buttered heat proof dish and bake at 350 degrees F 40-50 minutes. Serve as a side dish besides the stuffing in the bird.) Tie the legs together with butcher’s twine. Fold the neck cavity skin under and secure with a skewer or long pick. Rub the turkey all over with the melted butter and pour some of the butter over the veggies. Sprinkle the turkey with salt and pepper.
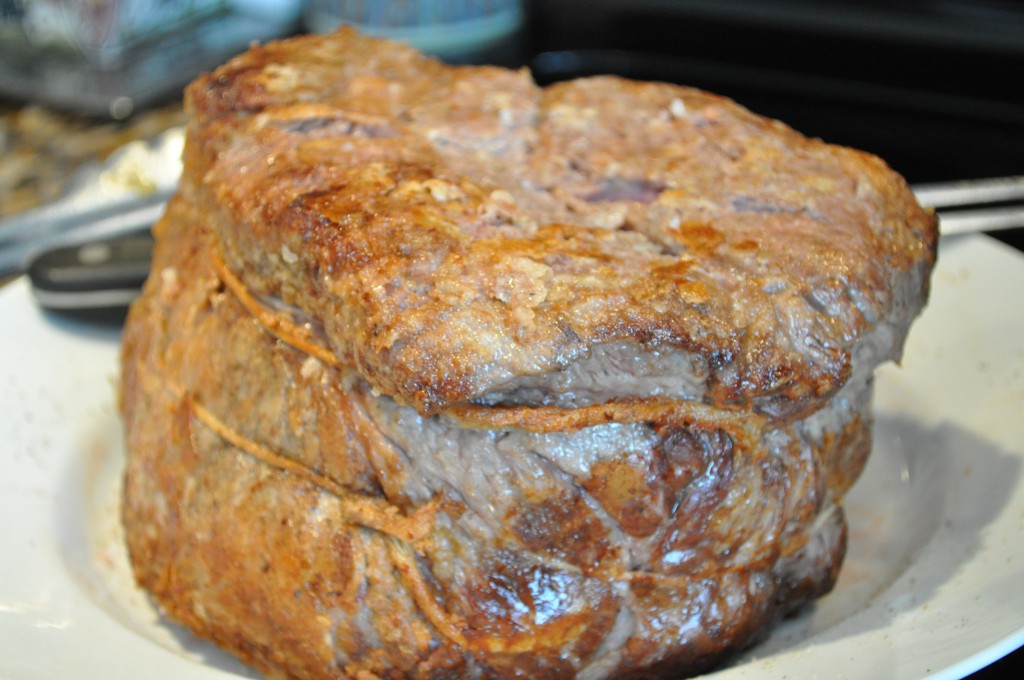
Place the turkey in the preheated oven and roast for 5 to 6 hours. Baste the turkey occasionally (about every 45 minutes). Do this quickly; keeping in mind that each time you open the oven door you loose about 25 to 40 degrees of heat and it takes time to recover the heat. The turkey is done when an instant read thermometer reads 175 degrees F when inserted into the thickest and meatiest part of the thigh.
Remove the turkey from the oven and transfer to a large platter. Cover with foil and let rest for at least 30 minutes or up to 1 hour before serving. Remember the turkey will continue to cook when covered with the foil.
Place the roasting pan over two burners. Over medium high heat bring the juices, fat and veggies to a boil. Sprinkle the veggies with 1 cup all-purpose flour. Stir this all together, scraping the bits off the bottom of the pan and let it cook for about 5 minutes to eliminate the raw flour taste, stirring and scraping the bottom of the pan continuously.
Meanwhile heat the turkey stock. Slowly add the hot stock to the pan stirring continuously. Let this cook until thickened, about 10 minutes. Strain the gravy into a large sauce pan and slowly bring back to a simmer. Season the gravy with salt and pepper to taste.
Gravy Hints and Tips: You can make the Turkey Stock by boiling together 10 cups water, two cut up carrots, a cut up onion and several cut up stalks of celery, the turkey neck, a bay leaf, ½ teaspoon whole black peppercorns, 1 bay leaf, a few sprigs of fresh thyme and fresh parsley. Lower heat to simmer and cook for two hours covered.
If the gravy is too thin for your liking, blend cornstarch and water together to a smooth thin paste and stir into boiling gravy a little at a time until the desired thickness is reached. If the gravy is too thick for your liking, add hot stock until the desired thickness is reached.

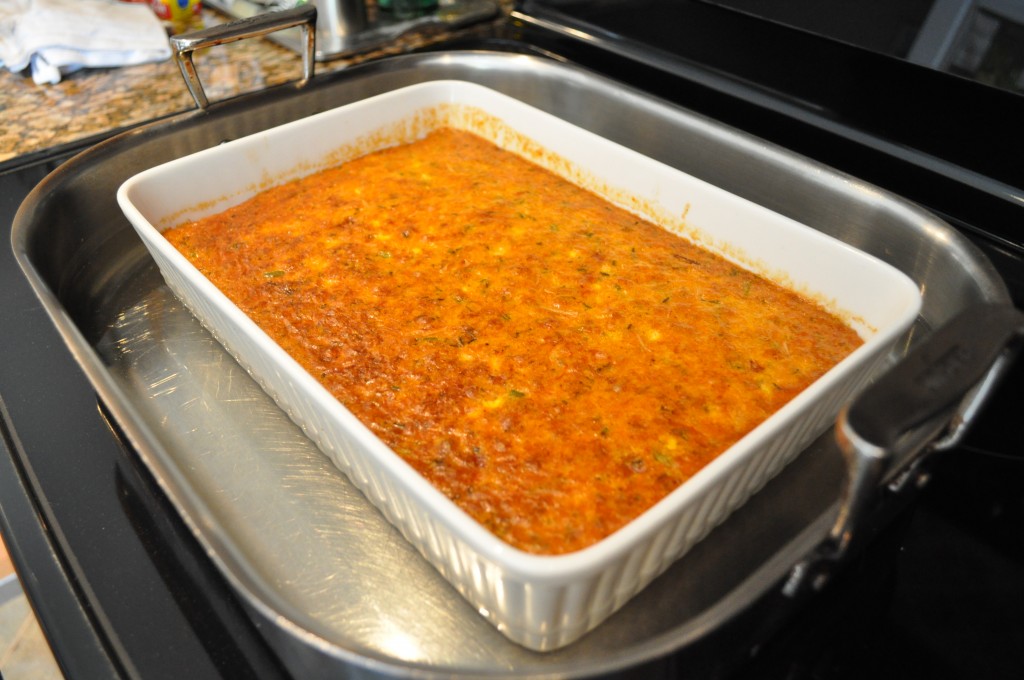
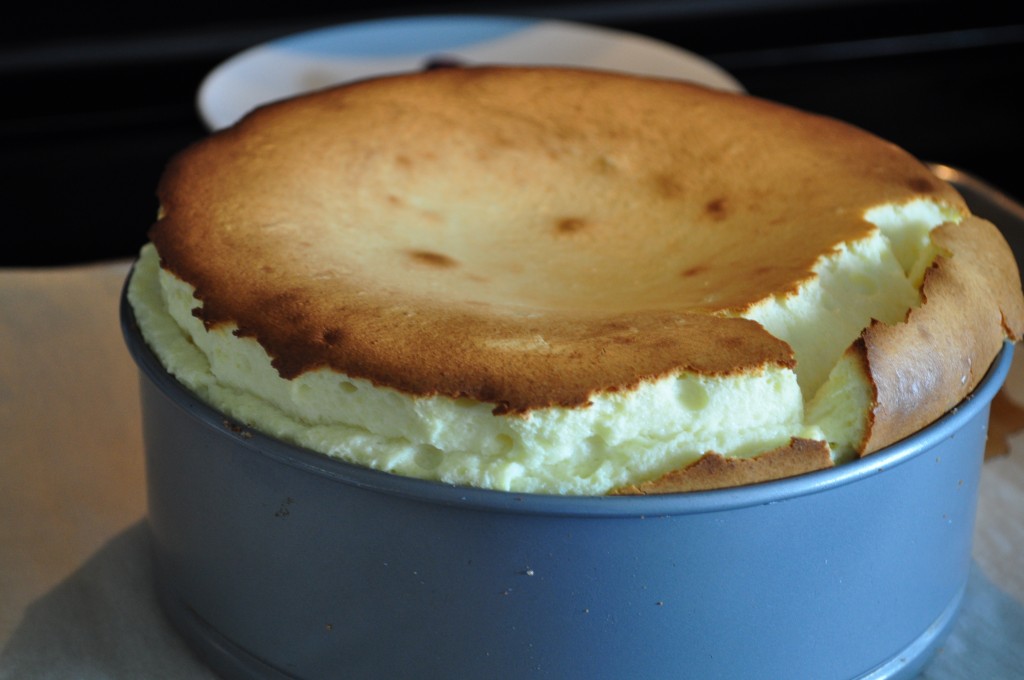
Roasted Corn Pudding
Roasted Corn and Sweet Pea Pudding
Makes One 9”x13” Casserole
6 Cups Roasted Corn Kernels, Instructions Below (Fresh Yellow or Bi-Color Kernels Cut off the Cobb or the Equivalent of Frozen Corn Kernels)
1 Cup Chopped Scallions
3 Cups Frozen Peas
6 Large Eggs
2 Large Egg Yolks
1½ Cups Heavy Cream
1½ Cups Half and Half
3 Cups Shredded Mozzarella (Pizza Cheese NOT Fresh Mozzarella)
2 Tablespoons Sunny Paris (From Penzy Spices)
1 Tablespoon Coarse Sea Salt
1 Teaspoon Freshly Ground Black Pepper
Pinch of Freshly Grated Nutmeg
Preheat the oven to 350°.
Spray the inside of Large Baking dish (13x9x3 high) with cooking spray. Set Aside. Have a large pot of boiling water at the ready when it’s time to bake the pudding.
Whisk together the whole eggs, egg yolks, heavy cream, and half-and-half in a large bowl. Add Sunny Paris, salt, pepper and nutmeg. Add the cooked corn, the scallions, peas and grated cheeses to the egg/cream mixture and combine well. Pour into the prepared baking dish.
Place the dish in a large roasting pan and fill the pan half way up the side of the dish with the boiling water. Bake the pudding for 1 hour and 15 minutes or until the top begins to brown and a knife inserted in the center comes out clean. Serve warm.
Roasted Corn – You will get about ? cup of kernels from each corn cobb. Use either yellow, white or bi-color corn. Remove the kernels from the cobb and place on a half sheet pan with sides. Sprinkle lightly with corn oil and toss to coat. Roast until kernels begin to take on a slight golden color, about 10 to 15 minutes at 375°. Alternately you can use frozen corn kernels but you will have to roast a bit longer for the kernels to become drier.

Brussels Sprouts with Pearl Onions and Pancetta
This is a wonderful dish to serve with Thanksgiving Dinner. It is equally good served any day of the week. I give you this large recipe for the holidays but it is easy enough to cut down for a smaller group of diners.
Serves 12
½ Pound Thinly Sliced Pancetta, Cut into Julienne Strips
3 Pounds Brussels Sprouts, Medium in Size, Core Trimmed and
Cut in Half Length-Wise
1 Pound White Pearl Onions, Skins Removed
2 Tablespoons Unsalted Butter
2 Tablespoons XVOO
1 Cup White Wine
½ Cup Homemade Chicken Stock or Canned Low Sodium Chicken Broth
1 Teaspoon Coarse Sea Salt
½ Teaspoon Freshly Ground Black Pepper
In a sauté pan large enough to hold all of the Brussels sprouts and pearl onions in a single layer, cook the pancetta until all the fat is rendered and the pancetta is crisp. Remove the pancetta from the pan and drain on paper towels. Set aside. Discard the pancetta fat. (If you don’t have a pan large enough to cook all of the sprouts and onions together then do it in smaller batches.)
In the same pan over medium high heat, heat the butter and XVOO. When the butter stops foaming add the Brussels sprouts and the pearl onions to the pan and sauté tossing around in the butter and XVOO. Add the salt and pepper. Toss to combine. Deglaze the pan with the white wine and reduce the wine by half. Add the chicken stock and reduce by half. This should take only a few minutes. Reduce the heat to medium and cover the pan with a lid. Cook until the sprouts are tender and the onions are cooked through, about 7-10 minutes.
Add the cooked pancetta bits to the pan and toss to combine. Transfer to a serving dish and serve immediately.
Hints and Tips: To peel the pearl onions, bring a pot of water to a boil. Add the onions and let simmer for two minutes. Drain and quickly transfer to a bowl of ice water to cool down. When cool, easily remove the skins from the onions.

Sweet Potato Casserole with Pecan Streusel Topping
Serves 12 – 15
For the Topping
1 Cup All Purpose Flour
3/4 Cup Firmly Packed Light Brown Sugar
1 Teaspoon Salt
1 Teaspoon Cinnamon
8 Tablespoons (1 Stick) Cold Unsalted Butter, Cut into 1/2 Inch Cubes
1½ Cups Chopped Pecans
For the Sweet Potatoes
7 Lbs. Sweet Potatoes
¼ Cup Heavy Cream
2 Teaspoons Pure Vanilla Extract
8 Tablespoons (1 Stick) Unsalted Butter Melted
3 Large Eggs
½ Cup Maple Syrup
½ Cup Orange Blossom Honey
¾ Cup Firmly Packed Light Brown Sugar
2 Teaspoons Fine Sea Salt
1 Teaspoon Freshly Ground Black Pepper
¼ Teaspoon Freshly Grated Nutmeg
Preheat oven to 450 Degrees
To prepare the topping, in a bowl, stir together the flour, brown sugar, salt and cinnamon. Using your fingers, a pastry blender or two knives cut in the butter until the flour mixture has been completely absorbed into the butter. The mixture should hold together when squeezed with your hand but still crumble apart easily. Stir in the pecans, Set aside.
To prepare the sweet potatoes, put them a large roasting pan and add a small amount of water. Cover the pan tightly with aluminum foil and roast until the potatoes are tender and easily pierced with a knife, 1 to 1 1/2 Hours. (Don’t forget to pierce the potatoes with a knife before roasting.) Cool the potatoes completely. Once cool, remove the skins from the potatoes. Refrigerate the potatoes for several hours. This will make them much easier to handle and cut.
Reduce the oven temperature to 350 Degrees.
Remove the potatoes from the refrigerator and cut the flesh into 1/2 cubes. Transfer one-fourth of the potatoes to a large bowl and mash with a potato masher. Set aside.
In a bowl, whisk together the cream, vanilla, butter, eggs, maple syrup, honey, brown sugar, salt, pepper and nutmeg. Add the cream mixture to the mashed sweet potatoes and stir until well combined. Combine this mixture with the cubed potatoes and GENTLY stir to combine. (Gently toss so as not to mash the cubes.)
Transfer the mixture to a 3-quart rectangular baking dish that has been sprayed with bakers spray such as PAM and sprinkle with the Streusel topping. Bake until the topping is golden and crispy and the potatoes are hot and cooked all the way through, 45 to 60 minutes. Let cool for 10 minutes before serving.
Hints and Tips: To test the potatoes to be sure they are hot all the way through, insert a thin bladed knife into the center of the dish and leave it there for 30 seconds. If the knife blade is hot then the potatoes are ready.
You can do some of this recipe in advance. The streusel topping can be made the day before and refrigerated until you are ready to use it.
The potatoes can be cooked the day before as well, but peel them while they are still warm.
Cranberry Citrus Compote
Makes 4 Cups
1 Large California Orange
1 Large Ruby Red Grapefruit
2 Cups Granulated Sugar
1 Cup Water
1/2 Cup Fresh Squeezed Orange Juice
1/2 Cup Fresh Squeezed Grapefruit Juice
2 12 Ounce Bags Fresh or Frozen Cranberries
1 Teaspoon Coarse Sea Salt
Wash the Orange and Grapefruit and peel the skin off with a vegetable peeler. Julienne the skins peels into very thin strips. Set aside. Squeeze the juice from both the orange and the grapefruit. You should get about 1/2 cup of juice from each.
In a large pot such as a Dutch oven combine the sugar, the orange and grapefruit juices and water. Bring the mixture to a boil. Boil until the sugar is dissolved and becomes a bit syrupy, about 5 minutes. Add the cranberries, julienned strips of orange and grapefruit and salt and bring to a rolling boil. Lower the heat to simmer and cook, uncovered, for 30 minutes, stirring often. Skim the foam that will float to the top as you go along.
Remove the pan from the heat and cool completely. Store in air-tight containers and refrigerate for up to one month.
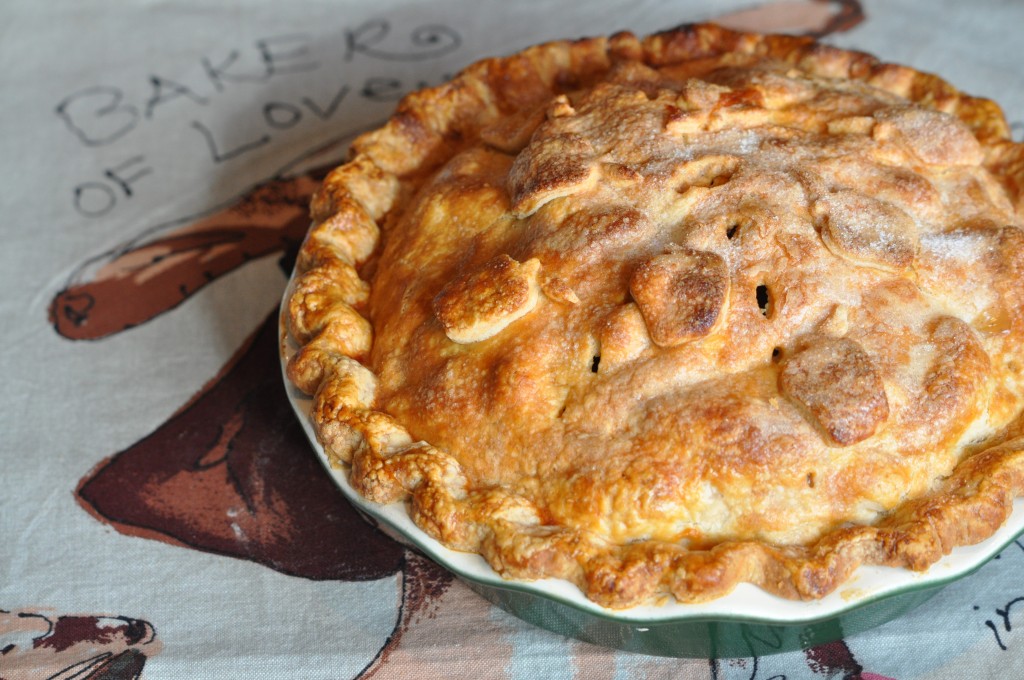
Apple Pie Made With Love
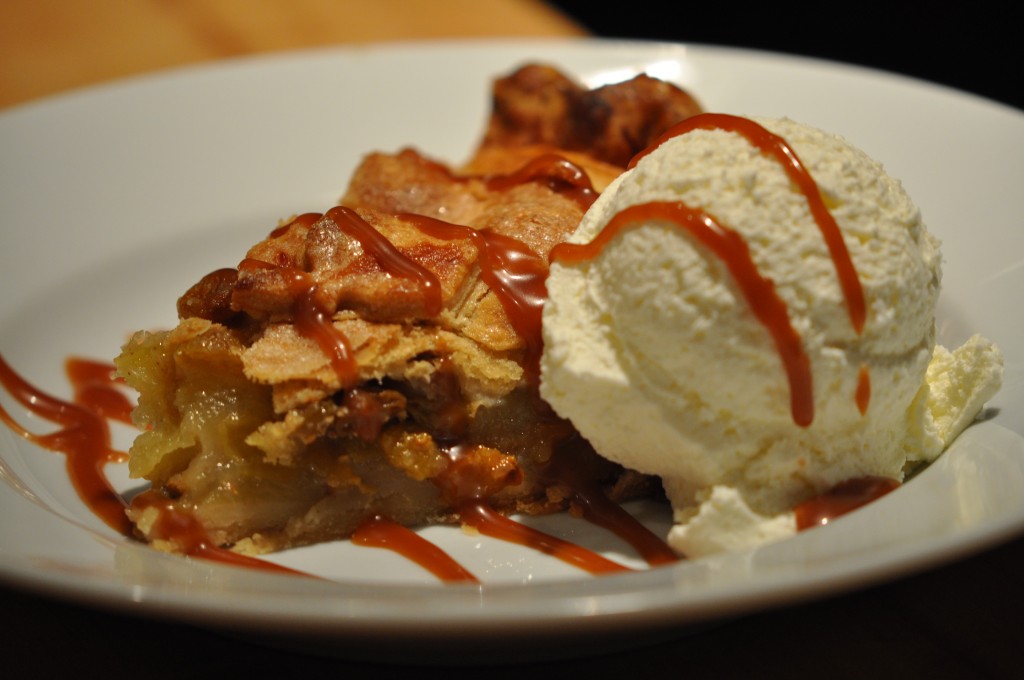
Apple Pie With Vanilla Gelato and Caramel Sauce
Apple-Pear Pie
Makes One 9” Deep Dish Pie
1 Recipe Pate Sucre (Recipe Below)
5 Large Granny Smith Apples, Peeled, Cored and Sliced ¼” Thick
3 Large Bartlett Pears, Ripe But Not Soft, Peeled, Cored and Sliced ¼” Thick
1 Cup Granulated Sugar
¼ Cup All-Purpose Flour
¼ Cup Corn Starch
1 Teaspoon Fine Sea Salt
1 Teaspoon Ground Cinnamon
½ Teaspoon Freshly Grated Nutmeg
1 Tablespoon Fresh Lemon Juice (DO NOT USE BOTTLED)
2 Tablespoons Cold Unsalted Butter Cut into Small Pieces
1 Large Egg Beaten with 1 Tablespoon Cold Water for Egg Wash
Coarse Sanding Sugar for Pie Top
Preheat oven to 425°. Place the oven rack in the lower third of the oven.
In a large bowl combine the apples, raisins, pecans, sugar, flour, cornstarch, sea salt, cinnamon, nutmeg and lemon juice. Toss until well combined. Set aside.
On a lightly floured surface, roll out one disk of pate sucre into a 11” to 12” circle approximately 1/8” thick. When rolling, add a little flour to the top of the pastry so the rolling pin won’t stick. To make an evenly round circle when rolling make a quarter turn with the pastry. In other words, give a few rolls over the pastry, lift the pastry off of the rolling surface and turn it to the right 90 degrees. Do that three times while rolling and you will have a perfect circle. Gently roll the pastry up onto the rolling pin and lift over the top of a 9” deep-dish pie dish and roll out. Gently press into the pie dish. You should have about a 1” overhang.
Place the apple-pear pie mixture into the pastry-lined dish, evenly distributing the apples and pears. This will allow for more even cooking. Pour any juices that may be in the bottom of the bowl over the top of the apple-pear mixture. Dot the apple-pear mixture with the 2 tablespoons of cold butter pieces. Brush the edges of the pastry with the egg wash.
Roll out the second disk of pastry in the same manner as the first. Place the rolled pastry over the apples. Seal the edges by trimming with a scissor. Press the edges decoratively with your thumb and forefinger.
With a sharp thin knife make a whole in the top of the pie to let out the steam while it cooks. You don’t want it to explode in the oven – and believe me, it will if you don’t vent the pie. Brush the top of the pie with the egg wash and sprinkle with the sanding sugar.
Place the pie on a sheet pan with holes (such as a pizza pan) lined with parchment paper. Bake the pie for 15 minutes and turn down the oven temperature to 375°. Bake the pie for 1 hour more or until the top is nicely browned and the juices are bubbling. You will see some of the juice leek out of the pie on the side. To be sure the apples are cooked, insert a skewer into the vent at the top of the pie. There should be no resistance when the skewer goes through the apples.
If the pie is not cooked through and the crust is beginning to get too brown, loosely cover the pie with aluminum foil by making a tent. You do not want to crush the pie or cover the vent tightly.
Remove from the oven to a wire cooling rack and let the pie cool completely before serving. I like to serve this pie with Caramel Sauce (Page) and Cinnamon Ice Cream or Gelato.

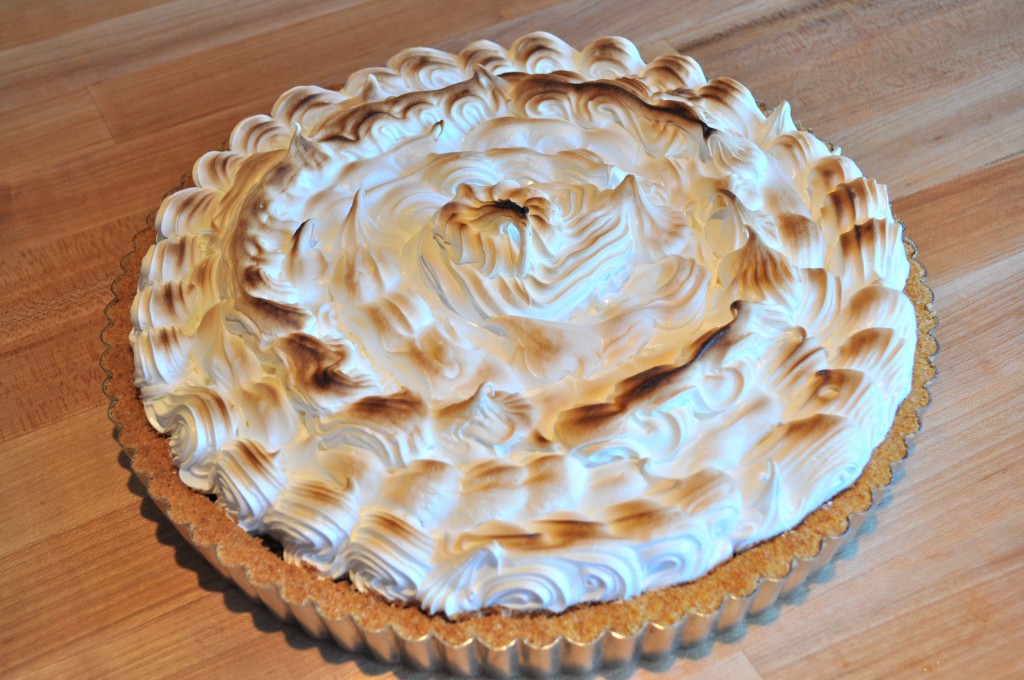
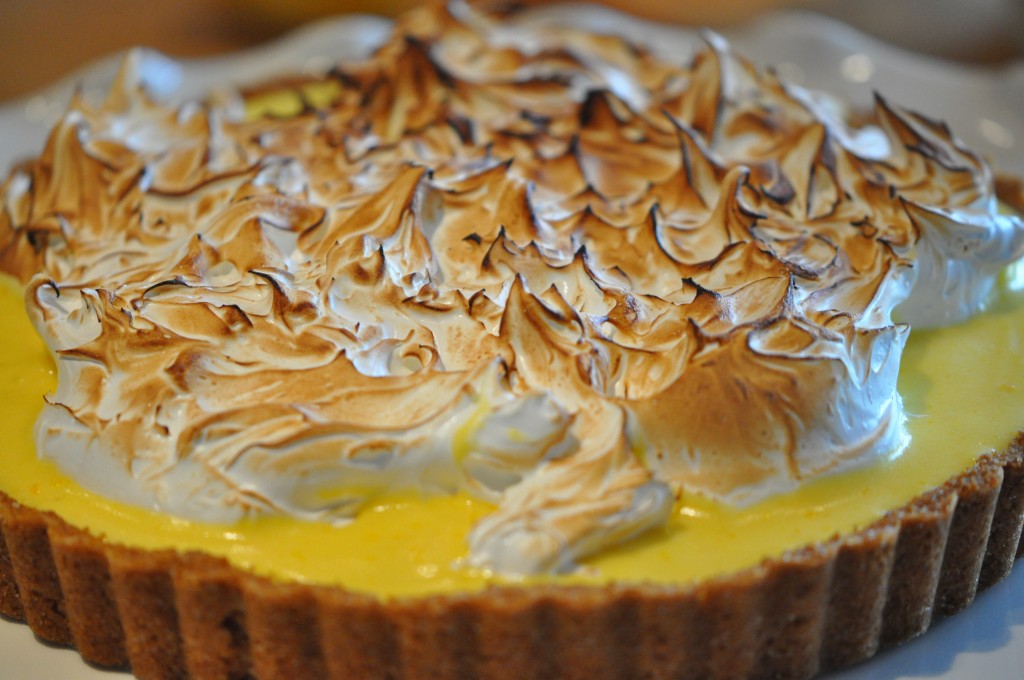
Traditional Pumpkin Pie Topped with Italian Meringue
Anyone who knows me knows I am a purist when it comes to food. Only organic and fresh for me: Nothing frozen, canned or precooked. BUT once in a while I have to make the exception to my rule and Pumpkin Pie filling comes under the exception category. I have made Pumpkin Pie with fresh pumpkin, pumpkin I have picked, white pumpkin, you name it. The only pumpkin I like for Pumpkin Pie is the good old standard – Libby pumpkin puree. My mother used it and I am continuing the tradition. The pumpkin puree by Libby is consistent. I never have to second guess the product. I guess you can say I am only 99¾% pure. DO NOT USE PUMPKIN PIE FILLING IN THE CAN. When you reach for the puree on the shelf don’t grab the wrong one.
To take it even further, I use the recipe on the can. The proportions are perfect. I am giving Libby complete credit for the Pumpkin Pie but the Meringue Topping is my idea. I thought it would be fun to do something different for the topping.
If the Italian Meringue is too daunting for you or you just don’t have the time with everything else that is going on, go ahead and use whipped cream to top the pie. But, please, do me a favor and don’t use cool whip!! Please!!!!
¾ Cup Granulated Sugar
½ Teaspoon Fine Sea Salt
1 Teaspoon Ground Cinnamon
½ Teaspoon Ground Ginger
¼ Teaspoon Ground Cloves
¼ Teaspoon Freshly Ground Nutmeg
2 Large Eggs
1 15 Ounce Can Libby’s Pumpkin Puree (NOT PUMPKIN PIE FILLING)
1 12 Ounce Can Evaporated Milk
1 Disk of Pate Sucre (Pastry Crust) Recipe Below, Rolled Out to Fit a 9″ Deep Dish Pie Pan, Flute the Edges
Preheat oven to 425 degrees F.
In a small bowl combine the sugar, salt, cinnamon, ginger, cloves and nutmeg.
In a larger bowl beat the eggs lightly, add the pumpkin puree and the spice mix. Blend well. Slowly add the evaporated milk. Mix well.
Pour into unbaked pie shell. Bake at 425 for 15 minutes. Turn the oven down to 350 Degrees F (325 if using a convection oven). Bake 40 – 50 minutes or until a thin bladed knife inserted into the center of the pie comes out clean.
Cool on a wire rack completely before topping with Italian Meringue.
Hints and Tips: I found that baking a pie in a glass dish is the best way to get a crispy cooked crust. If you don’t have a glass dish, ceramic works just as well. If you don’t have either I suggest you purchase one. You will be so glad you did. They are sold at the grocery store for as little as $6.00
You can make the pie the day before and refrigerate it overnight. When you are ready to top it with the meringue, bring the pie to room temperature before topping it. If the pie is cold and the meringue is warm condensation will develop between the pie and the meringue. You don’t want this. Also, when you take the pie out of the refrigerator to bring it to room temperature there may be a little moisture on top of it. Blot it lightly with a paper towel.
Italian Meringue
6 Large Egg Whites at Room Temperature
½ Teaspoon Cream of Tartar
Pinch of Fine Sea Salt
2 2/3 Cup Sugar
2/3 Cup Water
You have to do the two steps to this recipe simultaneously. Have a standing mixer ready to go along side your stove. You will also need a candy thermometer.
Begin by beating the egg whites on medium speed to break up the whites. Add the cream of tartar and the salt and beat at high speed until stiff peaks form, not dry peaks.
At the same time bring the water and sugar to a boil over high heat, swirling the pan in the beginning to help dissolve the sugar. Do not stir with a spoon. Once it begins to boil, cover it with a lid for a minute or two to help dissolve the sugar crystals that form on the side of the pan. Do this instead of washing the crystals down with a brush. Doesn’t work!!!! Remove the lid and boil the sugar/water mixture until it reaches 238 Degrees F on the candy thermometer. As soon as it reaches 238 Degrees F quickly pour the mixture into a 4 cup measuring cup (don’t burn yourself).
With the mixer on low, slowly add the syrup in a slow and steady stream to the egg whites. When all of the syrup is in, turn the mixer on high and beat until the meringue is cool. This will take about 10 minutes.
Place some of the meringue in a pastry bag fitted with a French tip or star tip and decoratively pipe the meringue onto the pie. Complete a full circle around the pie using either of the tips. Then do a second full circle on top of the first circle. You will most likely not use all of the meringue but go ahead and be generous with it. After the meringue is piped onto the pie, torch it with your blow torch to give it a little brown color. This also sets the meringue. If you don’t have a blow torch (mine is industrial size) put the pie under the broiler about five or six inched below the heat. Stand there and watch it turn a light brown color. Don’t take your eyes off of it for it will surely burn. It will take only a minute or two to brown under the broiler
Refrigerate the pie for several hours before serving.
Pate Sucre (Pastry Crust, Pie Crust)
Enough for a 13 Inch Tart or Two 9” Pie Crusts
For the Pastry
3½ Cups All Purpose Flour
1/2 Cup Granulated Sugar
1 Teaspoon Fine Sea Salt
8 Ounces Cold Unsalted Butter (2 Sticks) Cut Into 16 Pieces
½ Scant Cup Cold Vegetable Shortening Such as Crisco
5 – 6 Tablespoons Ice Water
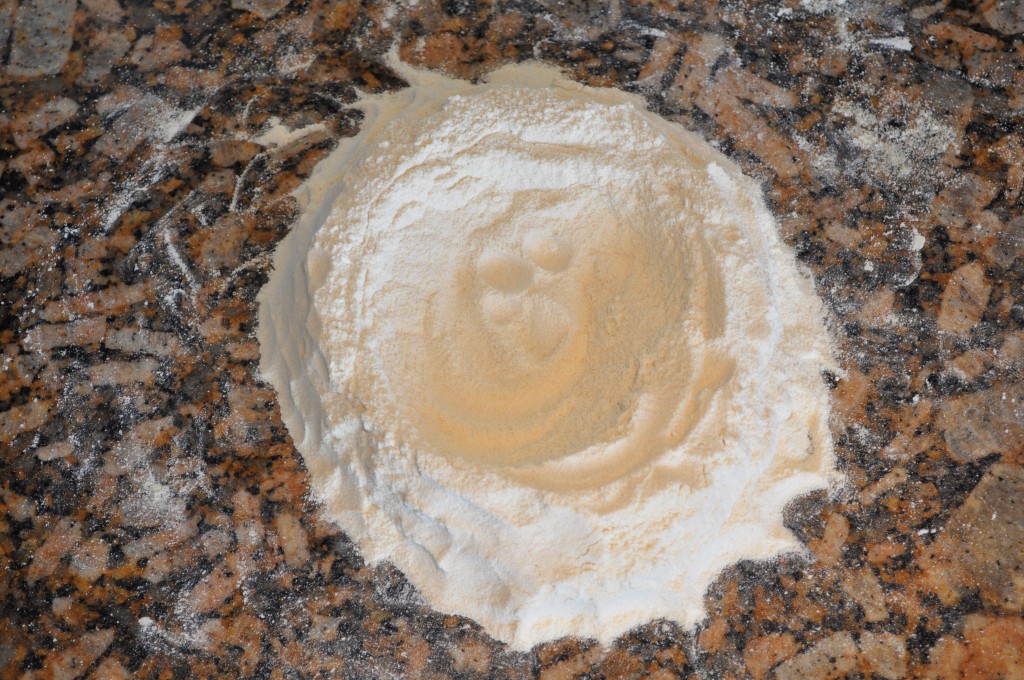
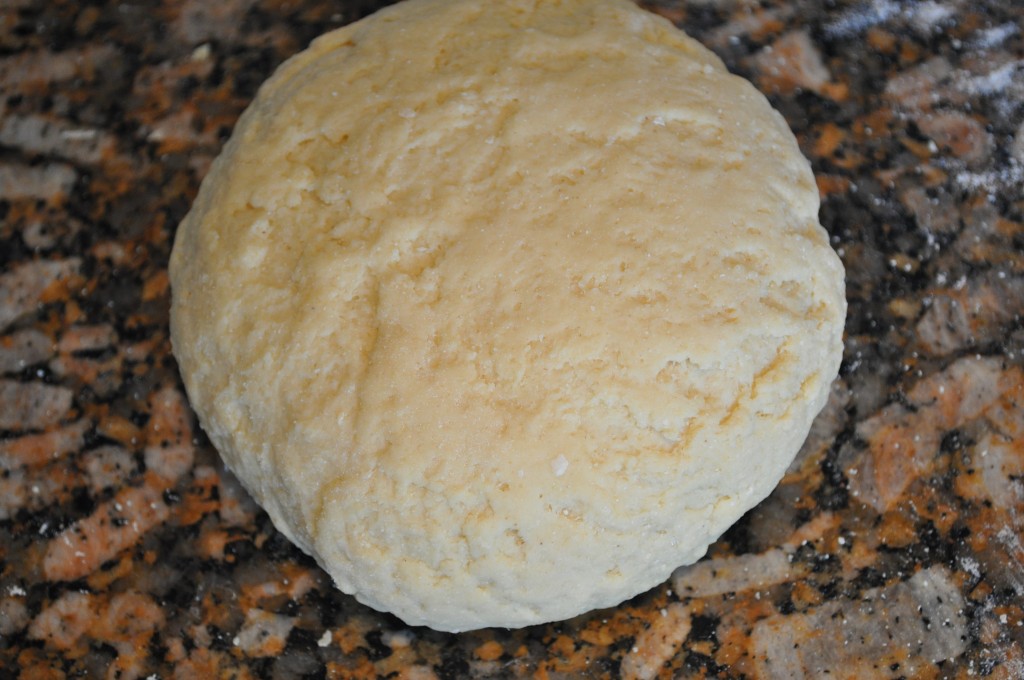
My personal preference for making this or any pastry crust is to use my fingertips. To make it my way, place the flour, sugar and salt in a large bowl and whisk to combine. Add the cut up butter and blend into the flour mixture using your fingertips. Work quickly so butter does not get too soft. Blend until the mixture resembles coarse meal or small peas. Add the vegetable shortening in the same manner. When all is mixed take a small amount and press it together in the palm of your hand. If it stays together it is time to add the water. Start with 5 tablespoons of the ice water and pour over the mixture. Gather the mixture together into a ball. If it is too crumbly and won’t stay together add a little more water. You want the mixture to come together nicely. Not dry or wet. Turn the dough out onto a lightly floured surface and form it into two balls. Flatten into disks and wrap the disks in plastic. Refrigerate for 1 hour.
If this all seems to daunting, use your food processor following this next set of directions: Place the flour, sugar, and salt in the bowl of a food processor fitted with the steel blade. Pulse a few times to combine. Add the butter and shortening to the flour. Pulse the mixture until the mixture forms crumbs the size of peas. With the motor running, add the ice water all at once through the feed tube. Keep hitting the pulse button to combine the mixture and the dough comes together. Turn the dough out onto a lightly floured surface and form it into two balls. Flatten into disks and wrap the disks in plastic. Refrigerate for 1 hr.
Whew, that was a long posting. I hope you read it all and maybe, just maybe, you will try at least one of my recipes. If you have any questions please contact me by posting directly on this blog or e-mailing me at:
camille@camillecooksforyou.com
HAPPY THANKSGIVING!!!! WE HAVE SO MUCH TO BE THANKFUL FOR.