Yellow Cake With Berry Filling And Old Fashioned Frosting


Yellow Cake

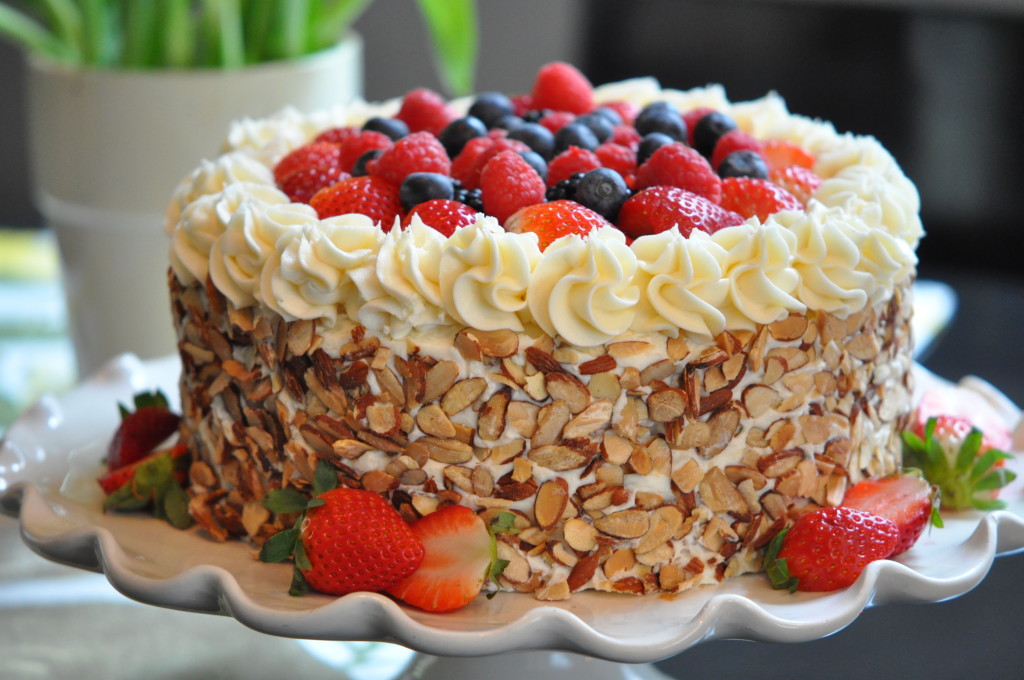
I made this beautiful cake for my sister’s birthday and it was a hit. I say that because my sister, Lucille, doesn’t usually eat dessert. She is not a fan of sweets. She absolutely loved it, she said, because it wasn’t overly sweet. Lu IS a fan of berries, so the filling and topping were perfect for her.

I have been making this cake for over 20 years and it turns out perfectly perfect each time. I call it a yellow cake because it is somewhere between white and yellow in color. The fresher and darker the egg yolks, the more yellow the cake.

This cake recipe is what I use as a base recipe other cakes. For example, I use this base recipe for Coconut Cake (on the blog) by changing just a few ingredients.

Yellow Cake

Makes Two 9” Layers

4          Large Eggs, Room Temperature

½         Cup Whole Milk, Room Temperature

2          Teaspoons Vanilla Extract

2¼      Plain Cake Flour

1½      Cups Granulated Sugar

2          Teaspoons Baking Powder

1          Teaspoon Fine Sea Salt

8          Ounces Unsalted Butter, Softened, Cut into 16 Pieces

1           Recipe Old Fashion Vanilla Frosting

2          Cups Toasted Sliced Almonds

Mixed Berries for Filling and Decoration (Strawberries, Blueberries, Raspberries, Blackberries)

Preheat oven to 350° with oven rack in lower middle of oven. Spray two 9” cakes pans with baking spray such as Pam. Cover pan bottoms with rounds of parchment paper and spray with baking spray.

Beat eggs, milk and vanilla with a fork in a small bowl. Measure out 1 cup of this mixture and set aside (you will have a total of 1½ cups to be used separately).

Combine flour, sugar, baking powder and salt in a bowl of a standing mixer fitted with the paddle attachment. Mix on lowest speed to blend to blend the dry ingredients for 30 seconds. With mixer still running at lowest speed, add butter one piece at a time, mix until butter and flour begin to clump together and look sandy and pebbly, with pieces about the size of peas Once all of the butter is incorporated beat on low for an additional minute.

Add reserved 1 cup of egg mixture and mix at lowest speed until incorporated, 5 to 10 seconds. Increase speed to medium high (#6 on the Kitchen Aid Mixer) and beat until light and fluffy, about 1 minute. Add remaining egg mixture (about ½ cup) in a slow steady stream. Stop mixture and thoroughly scrape sides and bottom of bowl. Beat on medium high until thoroughly combined and batter looks slightly curdled, about 15 seconds longer.

Divide batter between the prepared cake pans, spread batter to sides and smooth with a spatula. Bake 25 – 30 minutes, until top is light brown and an inserted skewer comes out clean. Cool on rack 10 minutes then remove from pan and cool completely before icing.

Make the Old Fashion Vanilla Frosting while the cake is cooling.

To Assemble the Cake

Place two cups of mixed berries (strawberries, blueberries, raspberries and blackberries) into a bowl and gently smash the berries lightly. You don’t want this to be very juicy. A little juice is OK. Set aside.

Reserve about a cup to 1 1/2 cups frosting to decorate the edge of the cake.

Place one layer on a cake plate and spread 1 cup of the frosting on top. Add the smashed berries and spread to 1 inch from the edge of the cake. Top with just a few small dollops of frosting to keep the top layer from sliding. Carefully spread the dollops over the berries.  It is not necessary to completely cover the berries with the frosting.

Place the second layer on top of the first layer and very gently push down on the top layer to set it in place. Frost the sides and top of the cake with the frosting,  With your hands, spread the toasted almonds on the side of the cake. Place the reserved frosting into a pastry bag that is fitted with a star tip and decorate the edge of the cake.

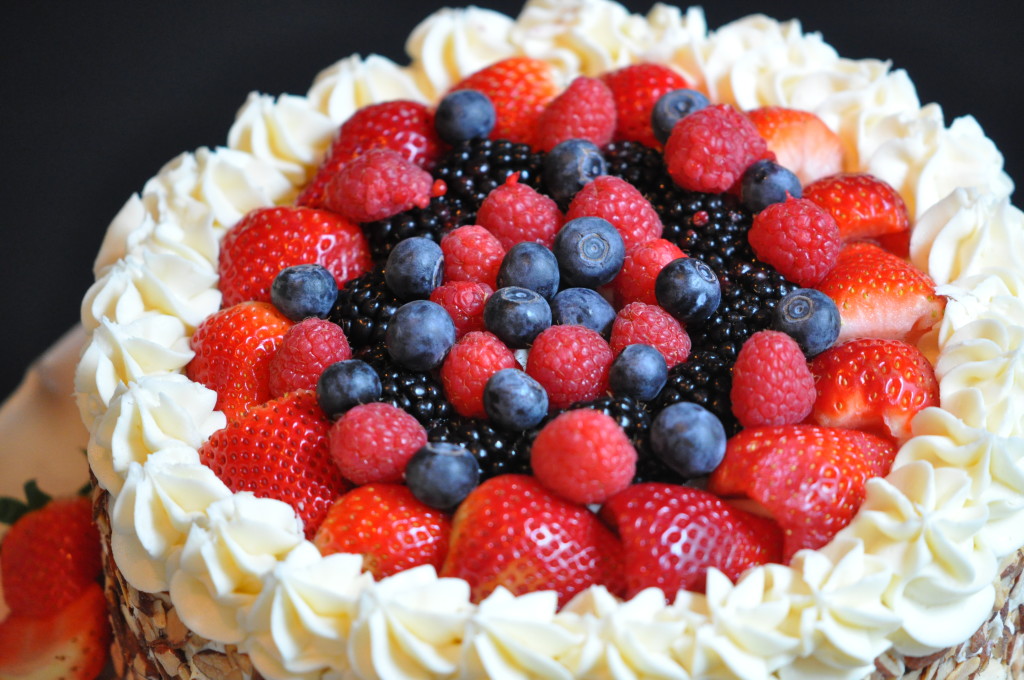
Place the UN-SMASHED berries decoratively on the top of the cake. (Cut the Strawberries and Blackberries in half lengthwise if they are large, That is what I did on this cake.)

Yellow Cake with Berries

Refrigerate cake until ready to serve. Remove from refrigerator 1 hour before serving to bring to room temperature.

camille@camillecooksforyou.com

Posted in Ahh Haa Moments, Dessert, Food For Thought, Fresh Fruit, Fruit, Mixed Berries, Nuts, Old Fashion Vanilla Frosting, Toasted Almonds, Yellow Cake | Tagged , , , | Comments Off on Yellow Cake With Berry Filling And Old Fashioned Frosting

Lobster Fest 2015

March is almost here and, for me, March is Lobster Fest Month. I’m not quite sure how this came about but I’m going to guess that it’s because my sister’s birthday is in March and she is the quintessential lobster lover. When we get together for her birthday lobster is always a part of the celebration.

This Lobster Blog is for my sister Lucille. Happy Birthday Little Sister. Let’s eat lobster this weekend!

Lobster Mac and Cheese
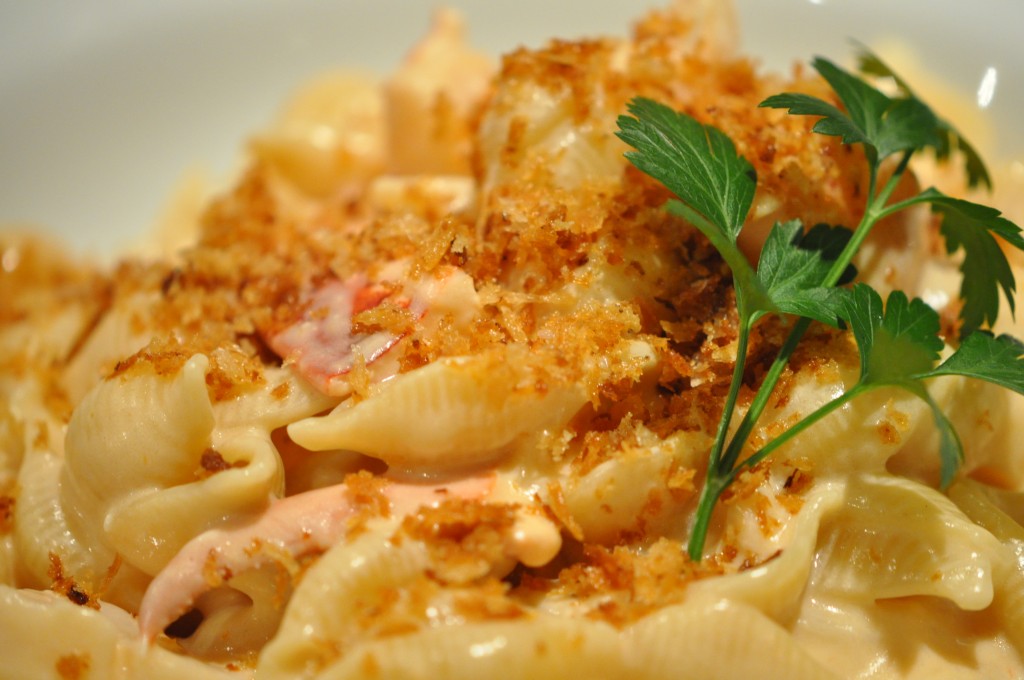
YUMMY!!!! Lobster Mac And Cheese

YUMMY!!!! Lobster Mac And Cheese

This recipe is not for the faint of heart. It’s rich and loaded with calories but if you’re going to splurge just once in a while then go for it. Also, the recipe is a little complicated to make and if you’re up for a challenge then this one is for you.

There is only one word for Lobster Mac and Cheese – Decadence!!!! I catered a party at which the Lobster Mac and Cheese was the headliner on the menu.  I made this outrageously deliciously creamy dish for 60 people.  I spent countless sleepless nights before the event putting the recipe together in my mind.  So many questions needed to be dealt with before I spent the gazillion dollars it cost to make this dish:  How much to make?  How can I infuse the lobster flavor into the sauce without making a traditional stock?  When do I add the cheese and mascarpone?  When do I add the lobster meat?  To bake or not to bake?  That was a really big question and I chose not to bake so as not to dry out the lobster meat.  Each question was answered and the recipe thought out perfectly before I made the dish.  My obsessiveness paid off as I got rave reviews and a lobster boat load of compliments on the dish.

I have taken my huge quantity recipe and cut it down to a reasonable size.  The new version will feed 8-10 generously or 16-18 as a side dish.

There are some things which are kind of up to you.  I put a good amount of lobster meat into the recipe but you might want more.  More won’t hurt and there need not be any recipe adjustments made.  Just add more lobster.

I chose a cheese of not too much intensity, Vermont White Cheddar, in combination with the rich and creamy mascarpone because I did not want to hide the flavor of the lobster infused milk.  You will notice I also did not add any herbs at the end of the dish.  I just want that lovely lobster taste to linger in my mouth.  No Herbus Interruptus.

Serves 8-10 (Can easily be cut is down in size)

1        1.5 to 2 LB Maine Lobster

4        Cups Whole Milk

4        Cups Half and Half

2        Cups Heavy Cream

3        Stalks Celery, Coarsely Chopped

3        Carrots, Unpeeled, Coarsely Chopped

1        Medium Spanish or Vidalia Onion, Skin On, Coarsely Chopped

1        Bay Leaf

1        Teaspoon Whole Black Peppercorns

1        Cup Flat Leaf Parsley Left Whole

1        Sprig Fresh Whole Sage Leaf

2        Tablespoons Tomato Paste

½       Cup Madeira Wine

8        Tablespoons Unsalted Butter

8        Tablespoons All-Purpose Flour

12      Ounces Grated Vermont White Cheddar Cheese

8        Ounces Mascarpone at Room Temperature

1        Teaspoon Coarse Sea Salt

½       Teaspoons Freshly Ground Black Pepper

¼       Teaspoon Freshly Grated Nutmeg

1        Lb. Cooked Maine Lobster Meat, Coarsely Chopped (In addition to lobster meat pulled from the whole lobster)

2        Lbs. Shell Pastas

Buttered Bread Crumbs

Bring a large pot of salted water to a boil.  Plunge the lobster, head first, into the boiling water.  Bring water back to a boil, turn heat down to simmer and cook the lobster, covered, for 8 minutes.  Remove the lobster from the simmering water and immediately immerse it into an ice bath.  Cool the lobster completely in the ice bath, about 10 minutes.  Remove from the ice bath and carefully remove all of the lobster meat from the tail, claws and knuckles and coarsely chop.  Reserve all of the shells.  Cut the body in half and remove all the insides of the lobster.  Set the body and the rest of the shells to the side.

In a large pot, bring the milk, half and half, cream, celery, carrots, onion, bay leaf, peppercorns, parsley sage, tomato paste and Madeira wine to a slow simmer.  Add the lobster shells and body to the simmering mixture and continue to simmer covered for 1 hour.  Be careful to not let it come to a full boil (intense boiling could make it curdle).  After an hour, strain the mixture through a fine sieve into a large bowl.  Discard the solids.

In a large heavy pan, melt the butter over medium heat until bubbly.  Add the flour and cook for a few minutes stirring continuously to cook out the raw taste of the flour.  Slowly add the warm milk, cream, half and half mixture whisking continuously.  Add salt, pepper and nutmeg.  Bring to a slow boil and cook until thickened, about 5 minutes, always whisking.  Remove from heat and stir in cheese and mascarpone, being sure to completely combine. Fold in the lobster meat.  Set aside.

Meanwhile, bring a large pot of salted water to a boil.  Add the shell pasta and cook until al dente following package instructions.  Drain the pasta, shaking the colander to get rid of excess water.

Place pasta in a large bowl and blend in the sauce, coating the pasta completely.  Spoon into pasta bowls and sprinkle with some of the buttered bread crumbs.  Serve immediately.

Grilled Maine Lobster with Corn and Potatoes
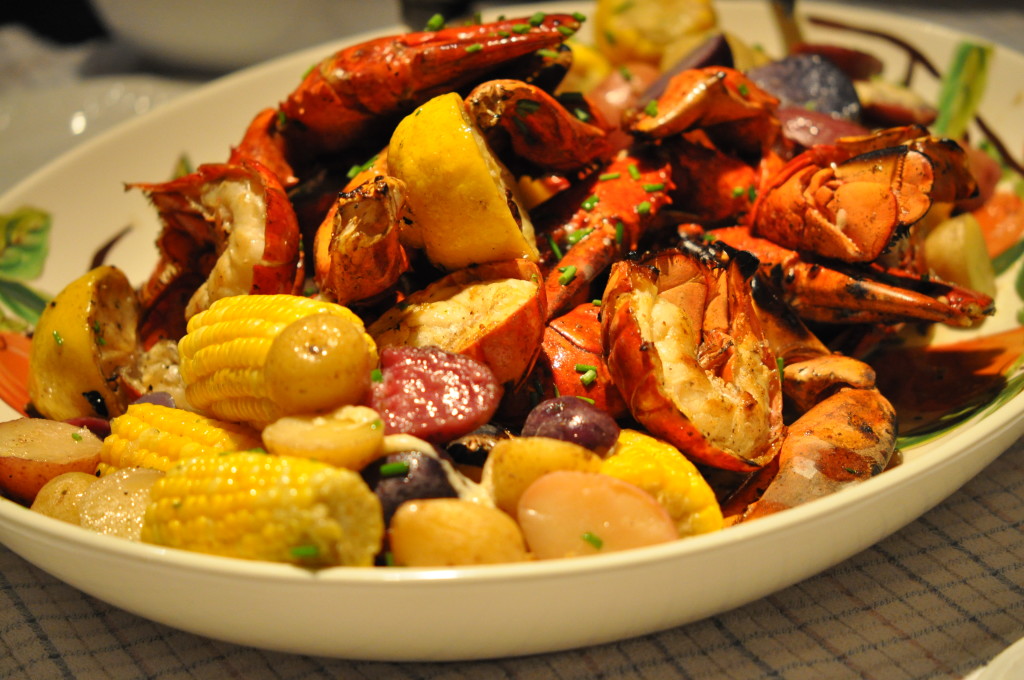
Grilled Maine Lobster with Potatoes and Corn

Grilled Maine Lobster with Potatoes and Corn

This is absolutely my most favorite way to have lobster. I love everything about cooking lobster on the grill especially the flavor and what the hot charcoal fire does to the meat. It’s hard to explain but when you cook the lobster on the grill you will know exactly what I am talking about.

Serves 4

4     Whole Live Maine Lobsters Each Weighing 1½ Pounds

½   Cup XVOO

1     Tablespoon Coarse Sea Salt

2     Teaspoons Freshly Ground Black Pepper

2     Lemons Cut in Half Crosswise

1     Pound Tiny Red and Yukon Gold Potatoes

4    Ears of Corn on the Cobb, Husk and Silk Remove and Each Cut in Half Crosswise

2    Sticks Unsalted Butter, Slowly Melted

1    Tablespoon Fresh Chives, Finely Chopped

1    Tablespoon Fresh Cilantro, Finely Chopped

1    Tablespoon Fresh Basil, Finely Chopped

1    Teaspoon Fresh Oregano, Finely Chopped

1    Teaspoon Fresh Thyme, Finely Chopped

Make a charcoal fire and when the coals are mostly white with ash, hold your hand 5 inches above the coals. You will know the coals are ready when you can no longer keep your hand over the coals after 3 seconds. This is a medium to medium high heat. This is perfect to cook everything without having to reload the fire. If using a gas grill, heat to medium high.

Meanwhile, as the coals are getting hot, place the corn on a double sheet of foil and the potatoes on their own double sheet of foil. Bring the foil up around the corn to make an open packet. Do the same with the potatoes. In each packet pour the rest of the XVOO over each, add ½ cup of water to each packet and sprinkle each packet with the rest of the salt and pepper. Bring the foil up each packet and crimp but leave it partially open.

Place the potato packet on the grill, cover grill and cook the potatoes for about 20 minutes. After 20 minutes place the corn packet on the grill and cook for 15 minutes. After 15 minutes test the potatoes to be sure they are done by inserting a thin bladed knife into a potato and if the blade goes in and out of a potato easily when pierced they are ready. Remove the potatoes and corn from the grill and tightly close the packets to keep warm.

While the potatoes and corn are cooking, bring a large pot of water to a boil and add lobsters to boiling water one at a time. You may be able to fit only 1 or 2 lobsters in the pot. Bring the water back to a boil and cook the lobsters for 3 minutes. Remove the lobsters from the water and pull off the claws and gently remove the tails. Cut the lobster tails in half lengthwise and, with a mallet, crack the claws slightly (this will make it easier to cook the claw meat and remove from the shell). Put the lobster pieces and the lemons into a large bowl and toss with ¼ cup of the XVOO and half of the sea salt and 1 teaspoon of pepper.

Place the lobster on the grill with the flesh side of the tails facing the grill and cook for about 2 minutes to lightly char. Add the lemons flesh side down. Turn the tails flesh side up, turn the claws over and cook for about 5 or 6 minutes.

Remove all from the grill and place lobster, lemons, corn and potatoes in to a very large bowl. Pour the melted butter over everything and add the fresh chopped herbs. Toss to combine and place decoratively onto a large platter.

Cedar Plank Grilled Seafood Featuring Maine Lobster Tails, Shrimp and Grouper

I am so lucky to be living in the land of year round grilling and what better to grill than seafood AND what better way to grill seafood than on cedar planks?  Every time I grill my first thought is “I will never cook in the house again!”. and now “I will never grill seafood again without cedar planks”.

The flavor is incredibly wonderful and the clean up is exceptionally easy.  NO POTS AND PANS!!!  When I grill, the whole meal is done on my Weber Grill.  I’ve been grilling on the Weber for a very long time and I actually feel as comfortable on the grill as I am on a stove.  It took a while to figure it out but once I did I feel as if I have it mastered.

You need not be a master to grill and using the cedar plank make grilling even easier.  You just have to be sure to soak the cedar planks for at least 4 hours and you most certainly must have  control of the fire.

Build a big charcoal fire and when the briquettes turn white spread them out in an even layer.  Place the cedar planks on the grill and let them char for about 5 minutes.  It’s always best to put the cover on the grill when you put the planks on the grill:  They won’t catch fire.  After 5 minutes of charring, flip them over and put your seafood on the planks.  (For the seafood, drizzle with a bit of olive oil and sprinkle with coarse sea salt and freshly ground black pepper.)  Cover the grill and cook the seafood pretty much the same as you would in an oven at a high roasting temperature.  I cooked the shrimp for about 4 minutes and them flipped them over and cooked 4 minutes more.  (I used large shrimp – 15 to a pound – cleaned and peeled with the tail left on.)
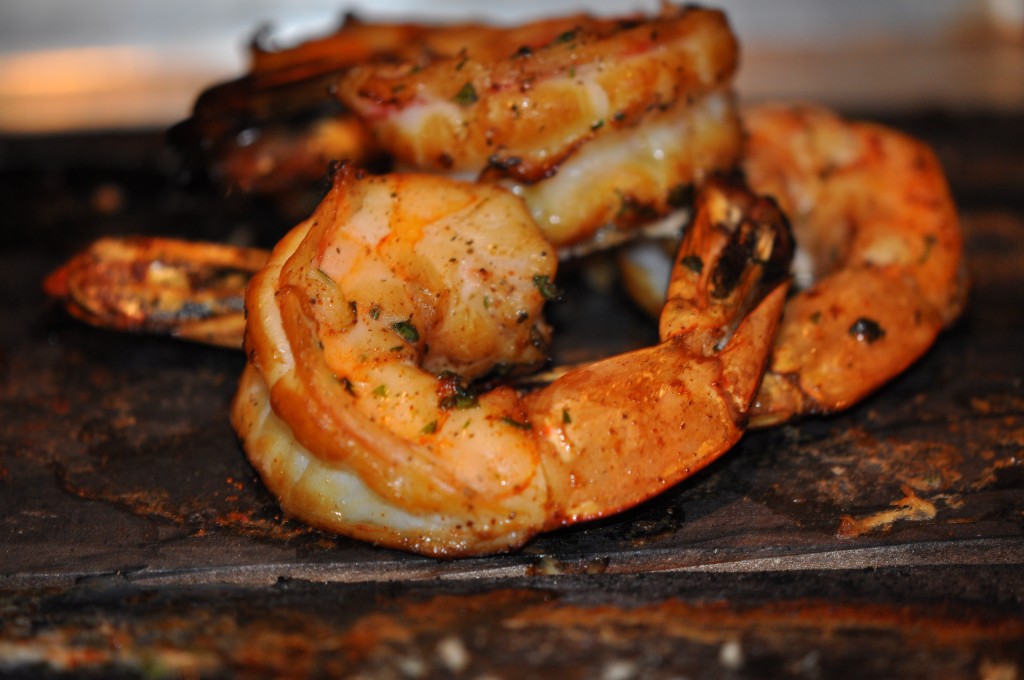
Cedar Plank Grilled Shrimp

The fish I grilled was a beautiful piece of grouper weighing about 12 ounces.  I cooked the grouper for approximately 12 minutes since it was a very think piece.  (Each piece of fish will vary so use your fish cooking knowledge and you won’t go wrong.)  Once I removed the seafood from the grill, I covered it loosely with foil and let it rest and “juice up” for about 10 minutes.Cedar Plank Grilling
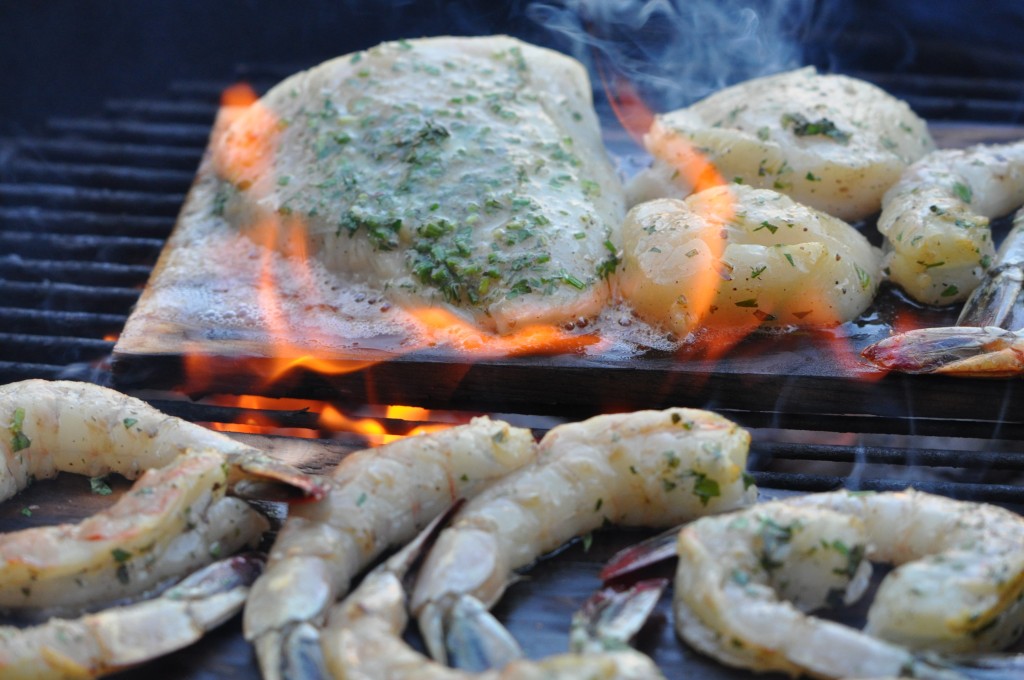
When cooking the lobster tails start by cooking them directly on the grill, meat side down, to char and grill mark the tails and then finish, meat side up, on the plank. Cook the tails covered with the grill lid. The amount of time on the grill and plank depends on the size of the lobster tails and how hot your grill is. You are the master of your grill and you control the timing. You will be able to tell when the tails are done once the meat turns opaque. Good size tails (1 LB. each, at least) will take about 12 minutes total cooking time.Cedar Plank Grilling
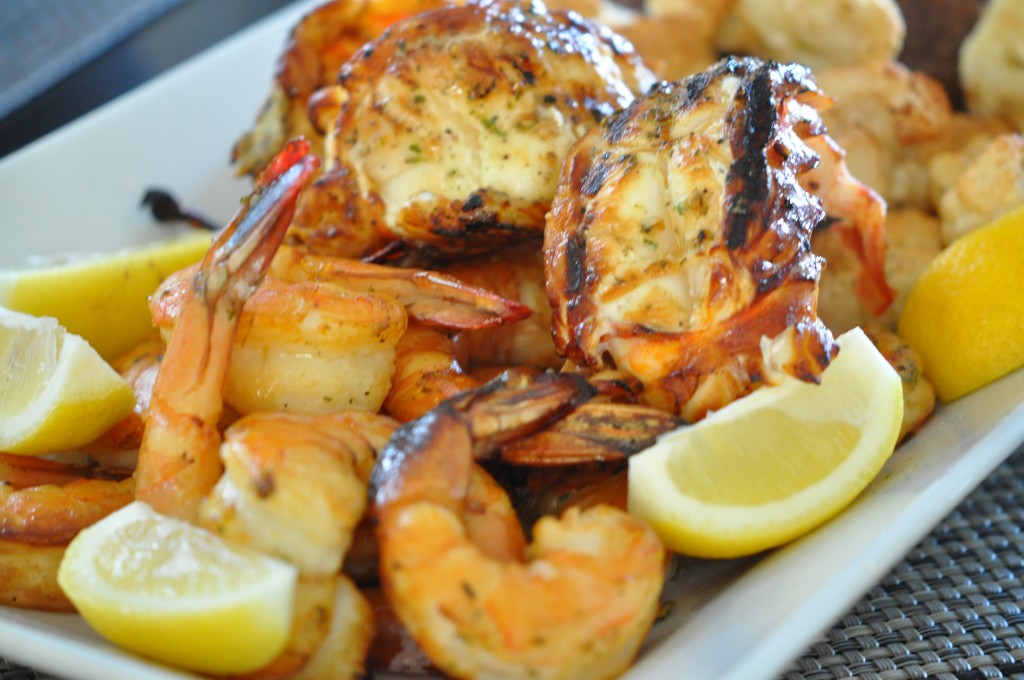
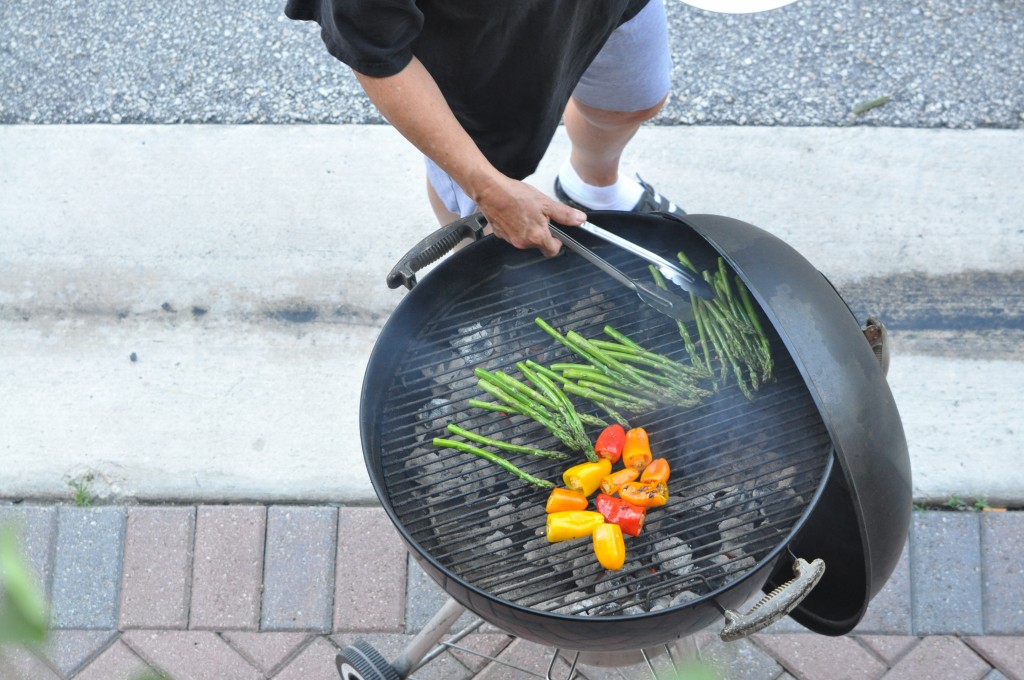
I also cooked a baked potato and vegetables on the grill. For the potato I rubbed it with XVOO and liberally sprinkled it with coarse sea salt.  I did not wrap it in foil but I did put it on a piece of foil to act as a sort of pan.  It took about 45 minutes to cook.  I did this before I grilled the seafood and kept the potato warm in my kitchen oven.  For the vegetables I drizzled them with XVOO and sprinkled with coarse sea salt and freshly ground black pepper.
Cedar Plank Grilling

camille@camillecooksforyou.com

Posted in Accompaniments, Ahh Haa Moments, Cedar Plank Grilling, Charcoal Grill, Cheese, Corn, Fish, Food For Thought, Lobster, Potato, Seafood, Shrimp, Vegetables | Tagged , , , | Comments Off on Lobster Fest 2015

Cookie Time Is Any Time

That’s what I say and most likely everyone I know will say the same.  What better way to wile away a cold afternoon?  It’s a great way to spend the day with the kids, grandkids, or even with yourself.

When I was catering, cookies seemed to be the most popular dessert; especially for large, casual events.  I’ve made so many cookies in my catering lifetime that I have learned a lot about the process and how to make cookie baking fun, easy and fast. I once made cookies as a parting gift after a wedding. 450 Boxes of cookies with 4 different cookies in each box. I did that again for my cousin’s wedding by doing enough cookies for 200 boxes again with 4 cookies in each box. So, yes, I have a lot of cookie experience.

Here are some of my favorite cookie recipes and the favorites of many of my customers.

Camille’s Very Chocolate-Chocolate Chip Cookies

Camille's Chocolate Chip Cookies

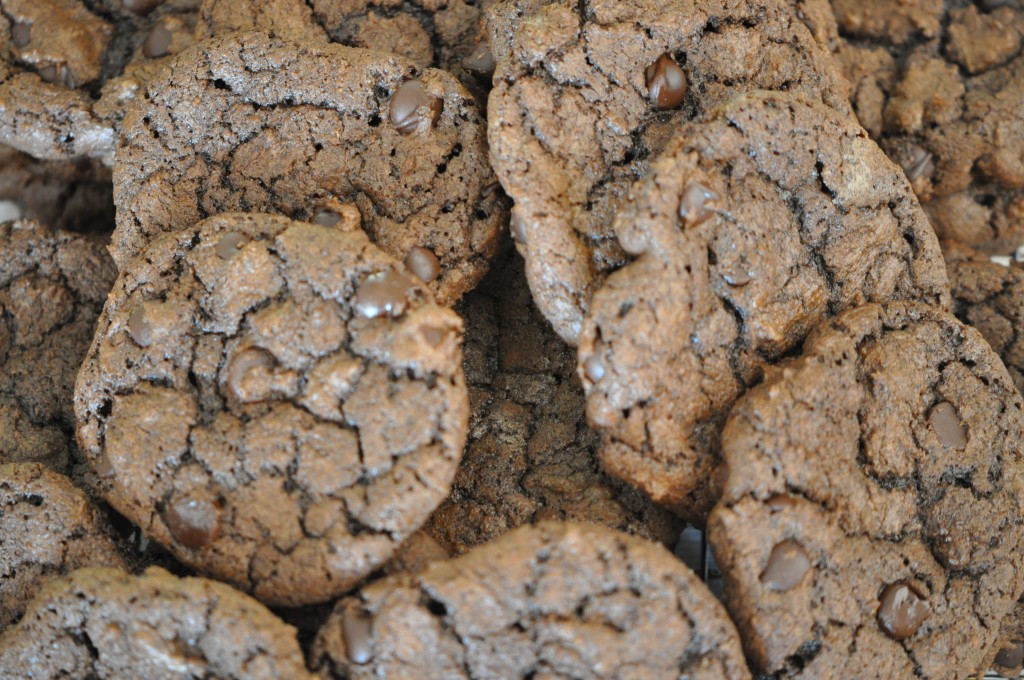
What I like about this recipe is the addition of finely chopped chocolate to the dough.  It  gives the cookies another dimension and layer of flavor.

Makes About 3 Dozen Medium Size Cookies

2¼      Cups All-Purpose Flour

1          Teaspoon Baking Soda

1          Teaspoon Fine Sea Salt

½         Cup Vegetable Shortening (Crisco), Room Temperature

½         Cup Unsalted Butter (1 Stick), Room Temperature

¾         Cup Granulated Sugar

¾         Cup Dark Brown Sugar, Firmly Packed

2          Teaspoons Pure Vanilla Extract

2          Large Eggs, Room Temperature

2          12 Ounce Packages Hershey’s Special Dark Chocolate Chips

Preheat oven to 375°.

In a small bowl, combine flour, baking soda, and salt.  Set aside.

In the bowl of a standing electric mixer fitted with the paddle attachment, cream together the vegetable shortening, butter, sugar, brown sugar and vanilla.  Beat until light and fluffy.  Beat in the eggs one at a time.  Gradually add flour mixture and mix well.

Put half of the chocolate (one 12 ounce bag) into a food processor fitted with the steel blade and pulse until most of it is chopped fine.  Add the chopped chocolate and the chocolate chips to the dough and mix on low until combined.

Drop the dough onto baking sheet lined with parchment paper, or silpat, using a small ice cream scoop to measure.  Slightly press down the top of each cookie and bake for 12 to 13 minutes rotating the pan half way through the cooking time.  Cool completely on baking sheet before storing.

Store cookies in an airtight container for up to 1 week.  Alternately, you can store the baked cookies in the freezer wrapped with plastic wrap and placed in a freezer plastic storage bag for up to 1 month.

Hints and Tips:  I use a 1½ inch ice cream scoop.  This makes a nice size cookie.  You can use a smaller scoop if you like but remember to adjust the baking time.

Triple Chocolate Chunk Cookies

Triple Chocolate Chunck Cookies

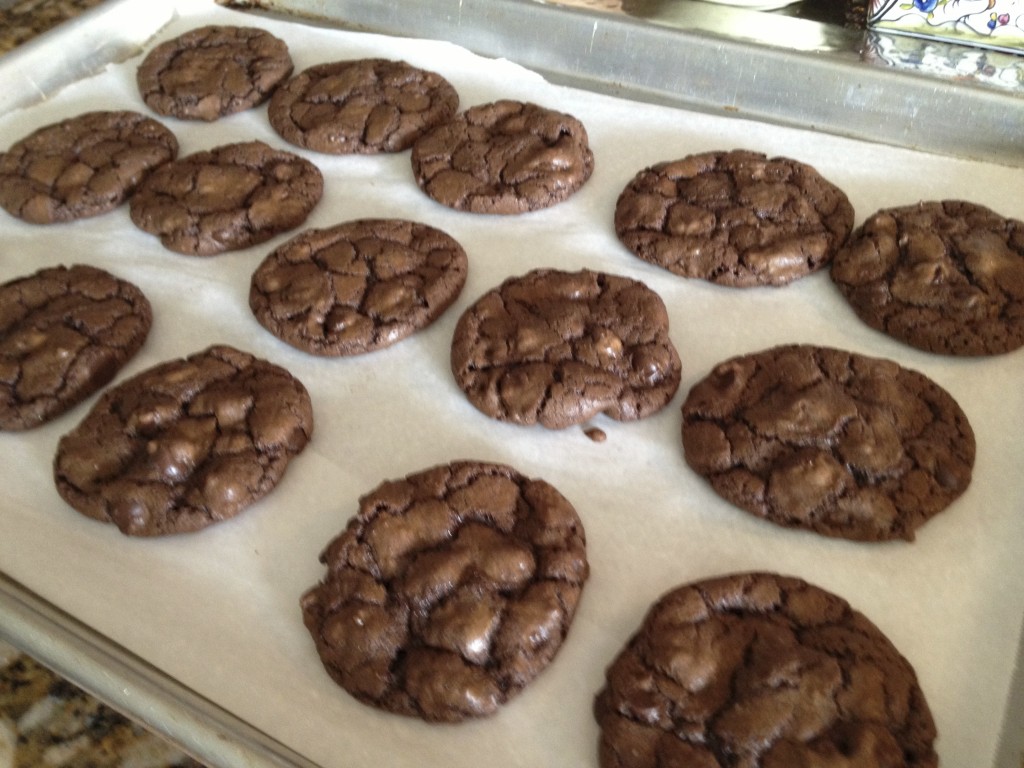
These rich cookies should be a bit soft when baked:  They firm up as they cool.  In this recipe it is important to use a sifter to combine the flour, cocoa powder, soda and salt.  Blending with a wire whisk is not good enough as the cocoa powder tends to have little lumps and sifting is the only way to break them up.

It is very important to use instant Espresso Powder.  Using espresso coffee grounds will not dissolve and will leave you with a grainy cookie.

Makes About 5 Dozen Cookies

2¼  Cups All-Purpose Flour

1      Cup Unsweetened Dutch Process Cocoa Powder

1      Teaspoon Baking Soda

1      Teaspoon Fine Sea Salt

8      Ounces Milk Chocolate Chips

2      Sticks (8 oz) Unsalted Butter

3      Cups Granulated Sugar

4      Large Eggs

2      Tablespoons Instant Espresso Powder

2      Teaspoons Pure Vanilla Extract

12    Ounces Semi Sweet Chocolate Chips or Chocolate Chunks

6      Ounces White Chocolate Chips

Preheat oven to 325°.

Melt the milk chocolate chips with the butter in a small heatproof bowl set over a pan of simmering water.  Set aside to cool to room temperature.

In a small bowl lightly beat the eggs with the vanilla.  Place the espresso powder on top of the beaten eggs to soften, about 5 minutes.

Whisk together flour, cocoa powder, baking soda and salt in a medium bowl, set aside.

Place the egg/espresso/vanilla mixture into the bowl of an electric mixer fitted with the paddle attachment.  With the mixer set on medium speed gradually add the sugar and beat until light and fluffy, about 2 minutes.

Add the chocolate mixture to the egg mixture and beat on medium to combine.

Reduce speed to low, gradually mix in flour mixture.  Fold in chocolate chunks (or chips) and white chocolate chips.

Scoop batter using a 1½ inch ice cream scoop and place two inches apart on parchment lined baking sheets.  Bake until cookies are flat and surfaces begin to crack, about 14 minutes, rotating the pan half way through the cooking time.    Cool completely on pan.

Store cookies in an air-tight container for up to 1 week.  Alternately, you can store the baked cookies in the freezer wrapped with plastic wrap and placed in a freezer plastic storage bag for up to 1 month.

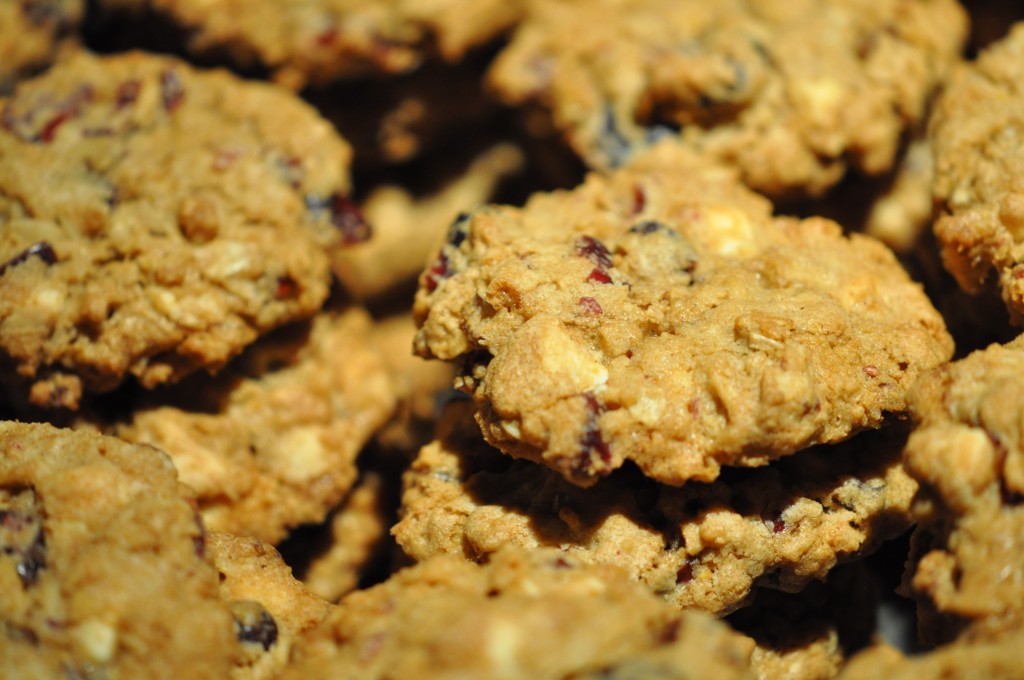
Oatmeal Cookies With Dried Fruit and White Chocolate

Oatmeal with Dried Fruit

Oatmeal Cookie, the healthy cookie – myth or fact?  MYTH!!!  of course.   I like this cookie with dried cherries, but raisins or cranberries will do just fine.   I used to soak the dried fruit for a minute in hot water, but all that did was to make the cookies soggy.  I think it makes sense to chop the fruit a bit before adding to the dough.  This makes for more even baking.

Makes 4 Dozen Small Cookies

½         Cup Vegetable Shortening (Crisco), Room Temperature

½         Cup Unsalted Butter, Room Temperature

¾         Cup Brown Sugar, Firmly Packed

¾         Cup Granulated Sugar

2          Large Eggs, Room Temperature

2          Teaspoons Pure Vanilla Extract

1½      Cups All-Purpose Flour

1          Teaspoon Cinnamon

1          Teaspoon Fine Sea Salt

1          Teaspoon Baking Soda

3          Cups Old Fashion Oats (Not Instant or Quick Cooking)

2          Cups Raisins, Dried Cherries or Dried Cranberries, Large Pieces Chopped

12       Ounces White Chocolate Chips

Preheat oven to 350°.

In the bowl of a standing electric mixer fitted with the paddle attachment, cream vegetable shortening, butter and sugars until light and fluffy.  Add eggs one at a time being sure each egg is completely incorporated before adding the next.  Add vanilla.

Mix dry ingredients together and mix into butter/egg mixture until just blended.  Fold in dried fruit and white chocolate chips.  Drop onto baking sheet lined with parchment paper, or silpat, using a small ice cream scoop to measure and bake 12 minutes rotating the pan half way through the cooking time.  Cool completely on baking sheet before storing.

Store cookies in an air-tight container for up to 1 week.  Alternately, you can store the baked cookies in the freezer wrapped with plastic wrap and placed in a freezer plastic storage bag for up to 1 month.

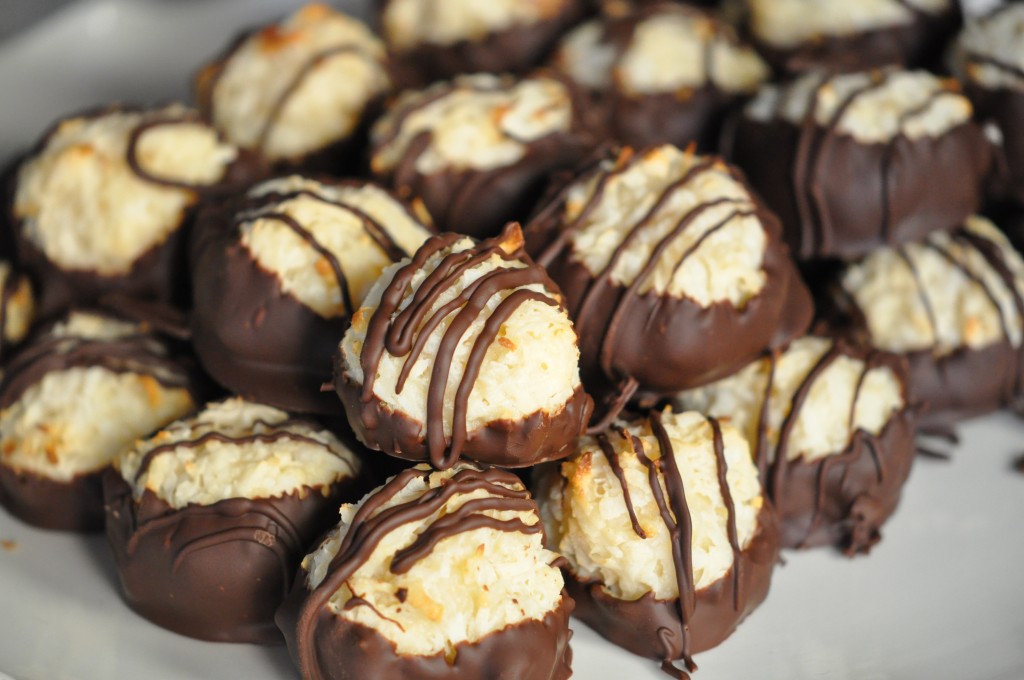
Chocolate Dipped Coconut Macaroons

Chocolate Dipped Coconut Macaroons

This is truly a coconut lovers delight.  Chocolaty and chewy can’t be beat especially when it comes to a simple treat such as these macaroons.  This is a no fuss, no mess recipe and can be done in a short amount of time.

Makes 4 Dozen Small Macaroons

5        Cups Shredded Sweetened Coconut, Firmly Packed

2/3    Cup All-Purpose Flour

¼       Teaspoon Fine Sea Salt

1 1/3  Cups Sweetened Condensed Milk

1          Teaspoon Pure Vanilla Extract

12       Ounces Dark Chocolate Chips Such As Hershey’s

Preheat oven to 350°.

Put the coconut in a large bowl and break up any clumps.  Add the flour and salt and blend until flour has coated the coconut.  Add the sweetened condensed milk and the vanilla.  Mix well.  (I use my hands wearing rubber gloves.  It is a sticky mixture and using your hands insures it will be completely blended.)

Use a small ice cream scoop and pack the mixture firmly and tightly into the scoop.  Place each scoop on a parchment or silpat lined baking sheet.  Roll into a uniformed ball and press down slightly.  Bake cookies for 15 to 17 minutes rotating the pan half way through cooking time.  The tops should have a lightly golden color.  Cool on the sheet pan.

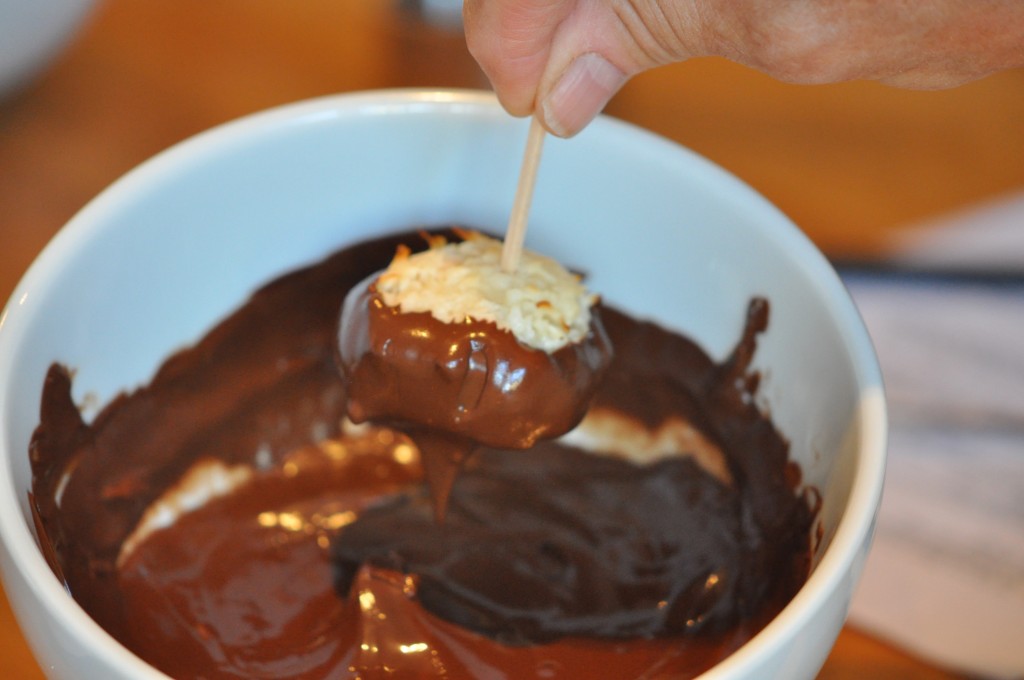
While the cookies are cooling melt the chocolate in a microwave on high in 1 minute intervals stirring at each interval until chocolate is melted and smooth.  Stick a toothpick into the top of the cookie and dip the cookie half way up the side.   Gently shake off excess chocolate.

Choc Dipped Macs

Place the dipped cookies on a parchment or silpat lined cookie sheet until chocolate is set.  Once set refrigerate until ready to serve.  Bring cookies to room temperature before serving.

If you have any questions you know the drill.

camille@camillecooksforyou.com

Posted in Ahh Haa Moments, Chocolate, Coconut, Cookies, Dried Fruit, Food For Thought, Oatmeal, White Chocolate | Tagged , , , | Comments Off on Cookie Time Is Any Time

Granola – Good And Good For You

Most mornings my day begins with a 4 or 5 mile walk along the New River in Fort Lauderdale followed by a hearty brunch of Low Fat Yogurt, Fresh Fruit and my Homemade Granola. My Granola is pure and simple; no preservatives or additives, no msg, little salt, little fat.

This recipe makes a lot, but if you don’t want a huge batch it can easily be cut in half. You can also use whatever nuts you like. The Macadamia Nuts are a bit extravagant and the only way I can get my husband to eat Granola since Macs are his favorite (mine too). Sometimes I will have it with dried fruit like raisins, cranberries, apricots, pineapple.

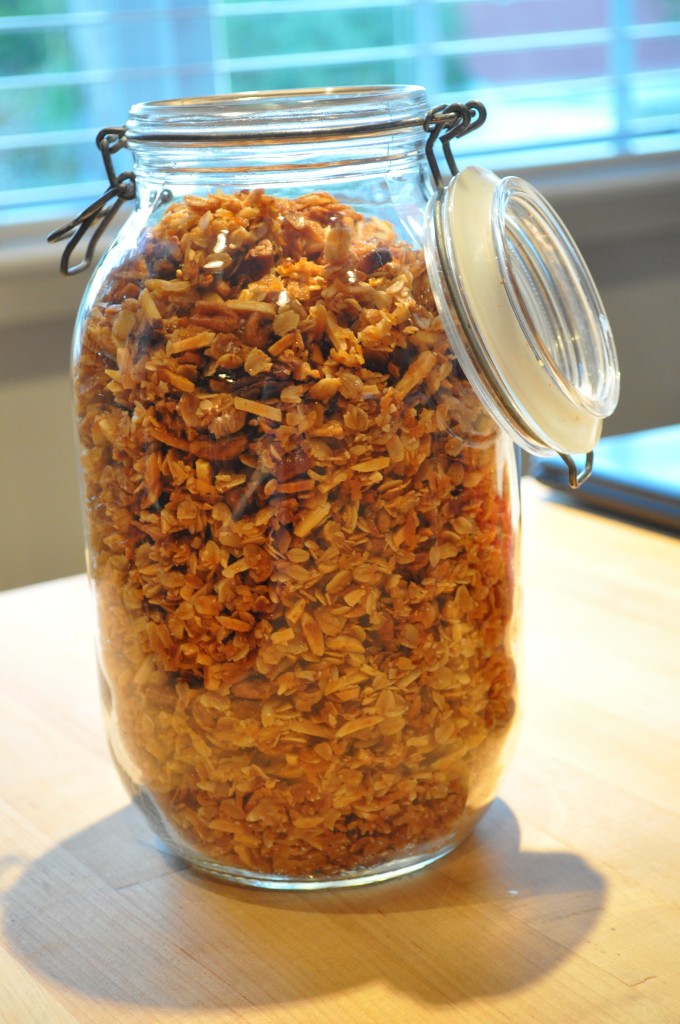
Granola

Granola Granola

6          Cups Rolls Oats (Not Instant or Quick Cooking)

3          Cups Sliced or Slivered Almonds

2          Cups Pecan Pieces

2          Cups Macadamia Nuts, Coarsely Chopped

3          Cups Shredded Sweetened Coconut

1          Cup Orange Blossom Honey

1          Cup Pure Maple Syrup

1          Cup Vegetable Oil

2          Teaspoons Fine Sea Salt

Preheat oven to 300°. Lightly spray two half-sheet pans with Pam Non-Stick Spray for Baking.

In a very large bowl combine the oats, almonds, pecans, macadamia nuts and coconut.

In a medium size bowl combine the honey, maple syrup, vegetable oil and sea salt. Pour over the oat mixture and mix thoroughly. Divide the granola between prepared sheet pans and smooth out into an even layer on each pan. Bake the granola for 1 hour and 15 minutes to 1 hour and 30 minutes stirring every 30 minutes to insure an even color.

Remove from the oven and transfer granola to a large shallow bowl to cool and dry. During the cooling time break up the granola as it will become one solid piece and will not cool or dry properly. Once completely cool and dry store the granola in an airtight container.

The granola will last at least a month when stored in an airtight container at room temperature.

Granola

Begin your day with Yogurt, Fresh Fruit and Granola and you will be good to go.

camille@camillecooksforyou.com

Posted in Accompaniments, Ahh Haa Moments, Food For Thought, Yogurt | Comments Off on Granola – Good And Good For You

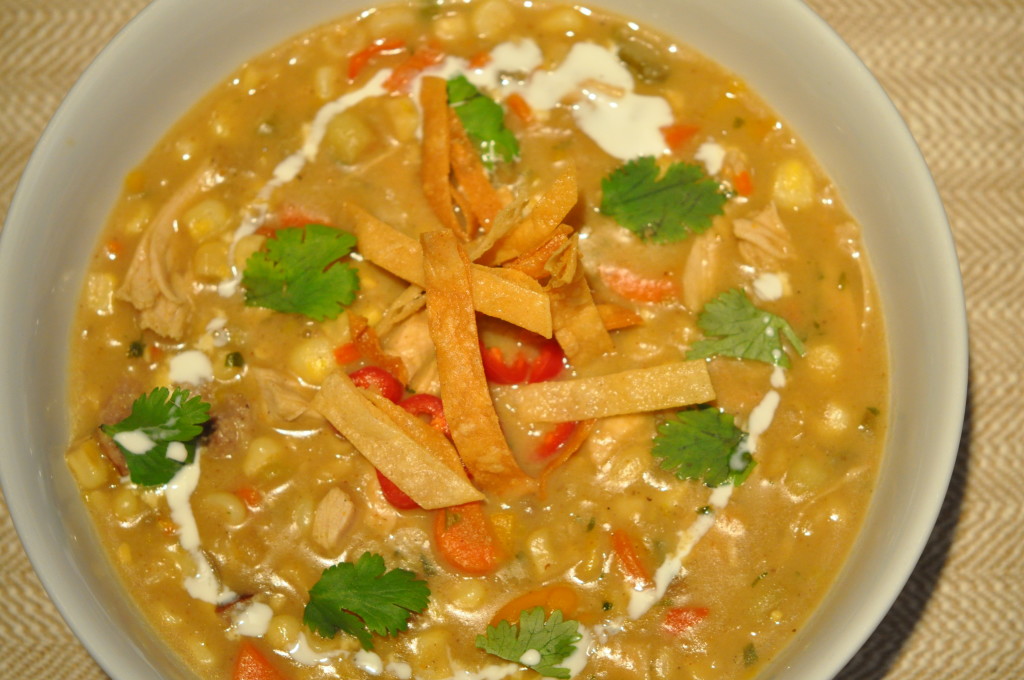
Tortilla Soup

I promised you this recipe and here it is. I’ve eaten plenty of Tortilla Soup and loved them all. I took what I liked about each and made my own original recipe. One thing for certain is that a soup like this can become your own recipe by using your imagination.

I know many vegetarians who will create this soup without the sausage and chicken (lobster would be good or crab). Some  of you may not want the added richness of the cream and Creme Fraiche; both can be left out without any negative consequences. Add other vegetables if you like. Sweet potatoes are good in this recipe besides, or instead of, Russets. Having both potatoes in the soup makes it interesting.

If you like Tortilla Soup spicy add more jalapeño. I like it on the hot and wild side but this recipe is very tame; especially if you leave the jalapeño out.

Be creative and have fun.

Tortilla Soup

Tortilla Soup

Using the corn cobbs and corn tortillas gives the soup a subtle yet distinctive corn flavor.

Makes About 1 Gallon, Enough for 10 Healthy Portions

2          Tablespoons XVOO

1          Pound Fresh Chorizo Sausage Links

1          Whole Boneless, Skinless Chicken Breast (At Least 1 Pound – Larger is OK)

2          Cups Diced Spanish Onions

2          Cups Diced Celery

2          Cups Diced Carrot

2          Cups Diced Sweet Red Bell Peppers (You Can Mix Red, Yellow, Orange)

1          Jalapeno, Seeded and Finely Minced (Optional)

4          Cups Diced Russet Potatoes, Unpeeled

6          Cups Fresh Corn off the Cobb (From About 8 Ears, Reserve the Ears) or Frozen Corn

1          Tablespoon Coarse Sea Salt

1          Teaspoon Freshly Ground Black Pepper

½        Teaspoon Chili Powder

½        Teaspoon Ancho Chili Powder

½        Teaspoon Chipotle Powder

2          Teaspoons Ground Cumin

8          Ounces Corn Tortillas, Diced

7          Cups Chicken Stock, Heated

½         Cup Heavy Cream

1          Cup Crème Fraiche

½         Cup Chopped Cilantro

Optional Garnishes: Chopped Scallions, Crème Fraiche, Shredded Cheddar Cheese, Sliced Jalapeno, Fresh Cilantro

In a large Dutch oven or stockpot, heat the XVOO over medium high heat. Add the Chorizo Sausage and brown thoroughly on all sides. Remove the sausage from the pan and in the same pan sauté the chicken until golden brown on both sides and cooked through, about 6 minutes per side. Remove from the pan and set aside to cool. Cut the sausage into bit size pieces and either cut or shred the chicken into pieces. Set aside.

Add the onion, celery, carrot, red peppers, jalapeno and potatoes. Reduce the heat to medium and sauté the vegetables for 8 to 10 minutes, until the onion begins to become translucent. Add the salt, pepper, chili, ancho and chipotle powders and the cumin. Add the corn and the diced tortillas. Toss to coat the vegetables and diced tortillas with the seasonings. Sauté for 2 or 3 minutes.

Add the heated chicken stock, stirring continuously, and bring to a rolling boil. Add the reserved corn cobbs and reduce the heat to simmer. Cook the soup, covered, for 45 minutes, stirring often to prevent sticking, until the soup begins to thicken and the vegetable are cooked through. Remove and discard the corn cobbs.

Add the cream and Crème Fraiche and simmer for 15 minutes, uncovered. Add the chicken, Chorizo sausage and the chopped cilantro. Simmer for 10 minutes.

To serve, ladle generous portions into warm bowls. Top each serving with the garnishes. Serve with Tortilla Chips.

Hints and Tips: I like to serve the soup topped with Julienned strips of fried tortillas. To do this cut several tortillas into thin strips and fry in a deep pan with two inches of vegetable oil. Heat the oil to 350° and fry the strips in batches until golden brown. Drain on a paper towel and sprinkle with fine sea salt. Or simply serve with a bowl of tortilla chips and let everyone help themselves.

Buen Apetito

camille@camillecooksforyou.com

Posted in Accompaniments, Ahh Haa Moments, Chicken, Chicken Stock, Entree, Food For Thought, Hints and Tips, Recipes To Share, Sausage, Soup, Vegetables | Tagged , , | Comments Off on Tortilla Soup

Not So Traditional Lasagne

Lasagne

Lasagne is one of my absolute favorite Italian dishes. My Mother would make this delicious layered dish for special occasions and for all of my years of cooking I made it exactly like her original recipe. Her layers consisted of Prince Lasagne Noodles, Ricotta Cheese mixed with eggs, parmesan cheese and chopped parsley, Tiny Meatballs and Marinara Sauce. There would be three layers of noodles, two layers of ricotta cheese with the meatballs and sauce and it would all be topped with Mozzarella cheese.

I have always made my lasagne that exact same way. That is until just recently. I decided I wanted to change it up. Since I am a lover of pasta, I wanted more pasta layers with less ricotta cheese and sauce in between each layer. I also have never been super crazy about the mozzarella on top as it just seemed to weigh everything down causing the lasagne to become heavy.

The first thing I changed was to use my delicious Bolognese Sauce instead of marinara and tiny meatballs. The next change was to add chopped basil to the ricotta mixture.  Another  big change to come along was to use 5 layers of pasta noodles (Barilla Oven Ready Lasagne Sheets) and 4 thin layers of ricotta and sauce. The super big change was to top it with a White Cheese Sauce instead of straight mozzarella. These changes produced a lighter, more delicate and tender lasagne.

I love using Barilla Oven Ready Lasagne Sheets. The sheets are thin and very much like homemade pasta and what is exceptionally nice about using Barilla is you do not have to pre-boil the pasta.

Lasagne Alla Camille

Lasagne Makes One 9″x13″x3″ Deep Ceramic Pan

2          Boxes Barilla OvenReady Lasagne Sheets (You may not need two full boxes)

1          Recipe of the Ricotta Mixture

1          Recipe Bolognese Sauce

½ to 3/4   Recipe White Cheese Sauce 

Constructing The Lasagne

Preheat Oven to 350º. Lightly spray a 9″x13″x3″ Deep Ceramic Pan with non-stick cooking spray (Pam is the best).

Spread a thin layer of Bolognese Sauce on the bottom of your prepared ceramic pan. Next place several lasagne noodles side by side to cover the bottom of the pan. Spread  ¼ of the ricotta mixture on top of the noodles and a thin layer of Bolognese Sauce on top of that. Repeat layering ending up with 5 layers of noodles and 4 layers of ricotta/sauce. Top the 5th layer of noodles with a thin layer of Bolognese. Top that with the White Cheese Sauce spreading it evenly from end to end and side to side.

Cover loosely with a piece of foil that has been sprayed with non-stick cooking spray (Pam). You do not want the foil to touch the top of the Lasagne. Place the Lasagne on a sheet pan and bake in the preheated oven for 1½ hours until the Lasagne is cooked through and the top is slightly and lightly golden (see photo).

To test for doneness, insert a thin bladed knife into the center of the lasagne. After 30 seconds remove the knife and if it is really hot it is ready. Remove from the oven.

Let stand at least 30 minutes before serving. Serve with some of the Bolognese Sauce spooned on to the bottom of the each individual plate.

Serve this with a salad and a bottle of Chianti Classico and you will be in heaven.

Manga!

camille@camillecooksforyou.com 

Posted in Accompaniments, Ahh Haa Moments, Bolognese Sauce, Food For Thought, Lasagne, Pasta, Ricotta Cheese, Ricotta Mixture for Lasagne and Ravioli, White Sauce | Comments Off on Not So Traditional Lasagne

New Year’s Eve Casual Dinner – Pulled Pork Soft Tacos

Here is a great menu for a casual New Year’s Eve Party. What’s so great about this menu is that I can make all of the accompaniments the day before and cook the roast on the day of the party.  It is especially helpful if you have an oven with a delayed start time and a timed cook control.  You can put it in the oven, set it and forget it.  Definitely my kind of cooking.  All you have to do on the day of the party is cook and pull the pork and set out the accompaniments at the time of serving. (You can even cook the rice the day before and reheat it in the oven before serving.)

New Year’s Eve Casual Dinner Menu

Golden Margaritas

Guacamole with Corn Tortilla Chips

Pulled Pork Soft Tacos

Tomato-Green Chili Salsa, Corn Relish, Sliced Avocado, Fresh Jalapenos, Creme Fraiche, Cheddar and Jack Cheeses, Flour Tortillas

Yellow Rice Pilaf

Individual Flan with Fresh Berries


Pulled Pork

Serves 8 Generously

1        7-8 Lb. Pork Butt with Blade Bone

½       Cup XVOO

½       Cup Southwest Spice Rub

2        Tablespoons Coarse Sea Salt

2        Cups Homemade Chicken Stock or Canned Low Sodium Chicken Broth

For Soft Tacos serve with Creme Fraiche, Black Bean and Roasted Corn Salsa, Tomato-Green Chili Salsa, Corn or Flour Tortillas, Cheddar and Jack Cheeses, Sliced Jalapeños, Fresh Cilantro, Pickled Corn Relish, Yellow Rice Pilaf

Preheat oven to 325º.

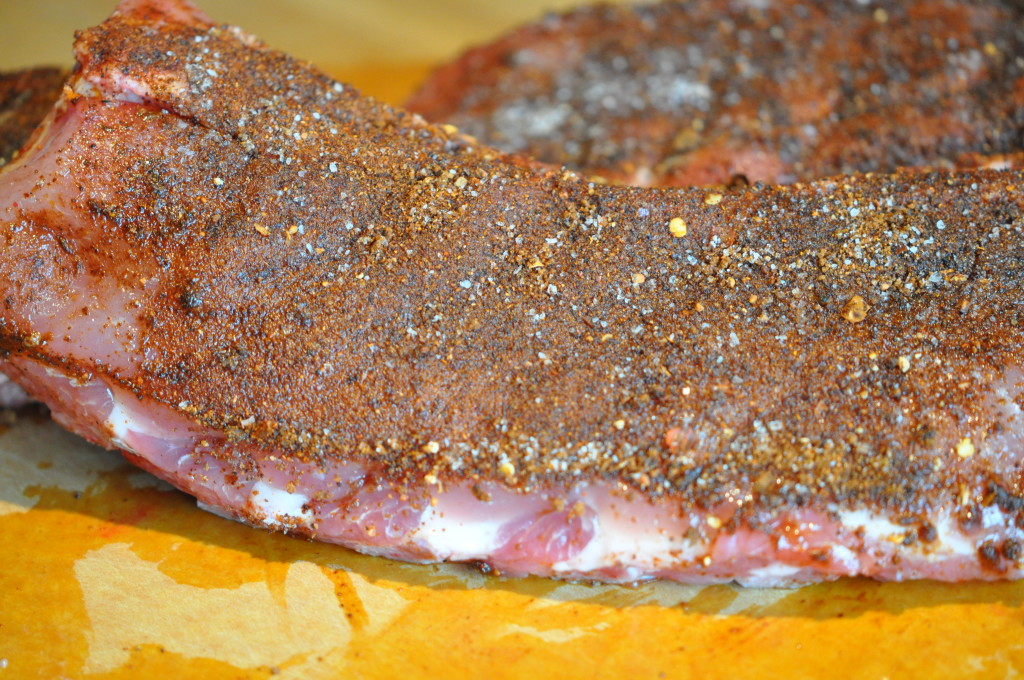
Mix the XVOO and the spice rub together to make a paste.  Rub this mixture all over the pork butt. (Use a good size pork butt. The bigger the piece of pork butt, the longer the cooking time and the more tender the meat.  A 7 to 8 pound Pork Butt with the blade bone is about the biggest you will find at the grocery. Cooking it for six hours, slow and low, resulted in a tender, moist, flavorful roast.) Sprinkle the meat with the salt.  Place meat, fat side up in a large roasting pan and pour in one cup of water and two cups of chicken stock in the bottom of the pan.  Cover the meat with a sheet of parchment paper and cover with heavy duty foil sealing the edges of the pan with the foil so no heat escapes. (The reason for the parchment paper is to keep the foil from touching the meat. A long slow cooking method with the foil directly touching the meat will transfer whatever part of the foil touching the meat onto the meat. This is not good.)

Place the pan on the oven rack in the lower third of the oven and roast for six hours without opening the oven.  After six hours, remove the foil and parchment paper, turn the heat up to 375 Degrees F and roast for 30 minutes.  This final roasting will crisp up the top of the pork butt.

Remove from oven and let rest for 30 minutes.  Using two forks shred the meat.  Pour some of the Au Jus from the pan over the meat.

Hints and Tips:  If you are not going to use the whole piece of meat immediately leave the rest of it in large chunks, cool completely, cover and refrigerate.  Leaving it in large chunks will keep the meat moist until you are ready to use.  These chunks of meat will last for several days in the refrigerator.  Or you can freeze for use later.  Freeze no longer than one month.

If you don’t want to spice it up with the spice rub, use salt and pepper only.  This is a good idea if you are not going to use the whole piece of meat for soft tacos.  Leaving off the rub will make the meat more versatile and can be used in other recipes.  For example I use the left over pork in my marinara sauce.  I certainly would not want southwest flavors in that.

Black Bean Salsa

Black Bean Salsa

Tomato-Green Chili Salsa

 Flan

Flan (Creme Caramel)

Flan

DSC_0695 DSC_0696

The most intense part of this recipe is making the “burnt sugar”. It’s not really burnt but that is how it has always been described. Keep a close eye on the boiling sugar as it goes from pale to burnt in a matter of seconds.

WARNING! Be careful to not touch the burnt sugar while still hot. It can do a lot of damage to your skin.

Serves 8

For The “Burnt Sugar”

2          Cups Granulated Sugar

¼         Cup Water

For The Flan

5          Large Eggs

3          Large Egg Yolks

1          Cup Granulated Sugar

4          Cups Heavy Cream

1          Teaspoon Pure Vanilla Extract

Pinch of Freshly Grated Nutmeg

Mixed Berries for Garnish

Preheat oven to 350°. Bring a pot of water to a simmer.

In a heavy saucepan combine 2 cups sugar and ¼ cup water. Swirl pan over high heat until sugar is dissolved and cook mixture until it turns a beautiful amber/brown color. Do not stir the sugar and water with a spoon and to keep the sugar from crystalizing on the side of the pan, place a cover over the pan while boiling for a minute. This will help melt any sugar that sticks to the side of the pan. As soon as the sugar turns that beautiful amber/brown color you are looking for, immediately remove from heat. Evenly distribute the sauce between 8 / 8 ounce ramekins or coffee cups. (I like to use coffee cups because it is easy to remove them from the water bath using the cup handle.) Swirl the sauce around the ramekin/cup to coat it a little. You want most of the sauce on the bottom of the ramekin/cup. Set aside to completely cool and set up hard.

In large mixing bowl, whisk the whole eggs and the egg yolks together until completely blended. Gradually whisk in the sugar. Add the heavy cream, vanilla and nutmeg and whisk together until all is incorporated.

Evenly divide the mixture between the prepared cups. You will have enough custard to fill the cups about 2/3 full. Place the cups in a roasting pan large enough so that the cups have at least two inches of space between them. Pour enough of the hot water into the pan to reach half way up the side of the cup.

Bake the custards for about 50 to 60 minutes, until the tops are slightly golden and the custard is set. Check to see if the custards are set by inserting a thin bladed knife into the center of one of the custards. If it comes out clean they are ready. If not, bake a little longer. Carefully remove the roasting pan from the oven and then carefully remove the cups from the water. Let cool completely to room temperature. Place in refrigerator for at least 4 hours or overnight.

To serve, run a thin bladed knife around the edge of the custard and invert onto a serving dish. Gently shake the custard out of the cup. The syrup will come out and run all over the custard. Garnish with fresh berries.

I wish you a Happy, Healthy and Safe New Year.

camille@camillecooksforyou.com
Posted in Accompaniments, Ahh Haa Moments, Appetizers, Chicken Stock, Custard, Dessert, Entree, Food For Thought, Hints and Tips, Meat, Pork, Pulled Pork, Recipes To Share, Rice, Sauces, Side Dishes | Tagged , , , , , , | Comments Off on New Year’s Eve Casual Dinner – Pulled Pork Soft Tacos

French Bistro Christmas Dinner


I have been dreaming of Paris lately and, even though we can’t be in our most favorite place on earth for the Holiday, I am going to bring Paris to our home for Christmas by serving a French Bistro Dinner.

French Bistro Christmas Dinner Menu

Charcuterie, Cheeses, Condiments

Austrian Vegetable Soup

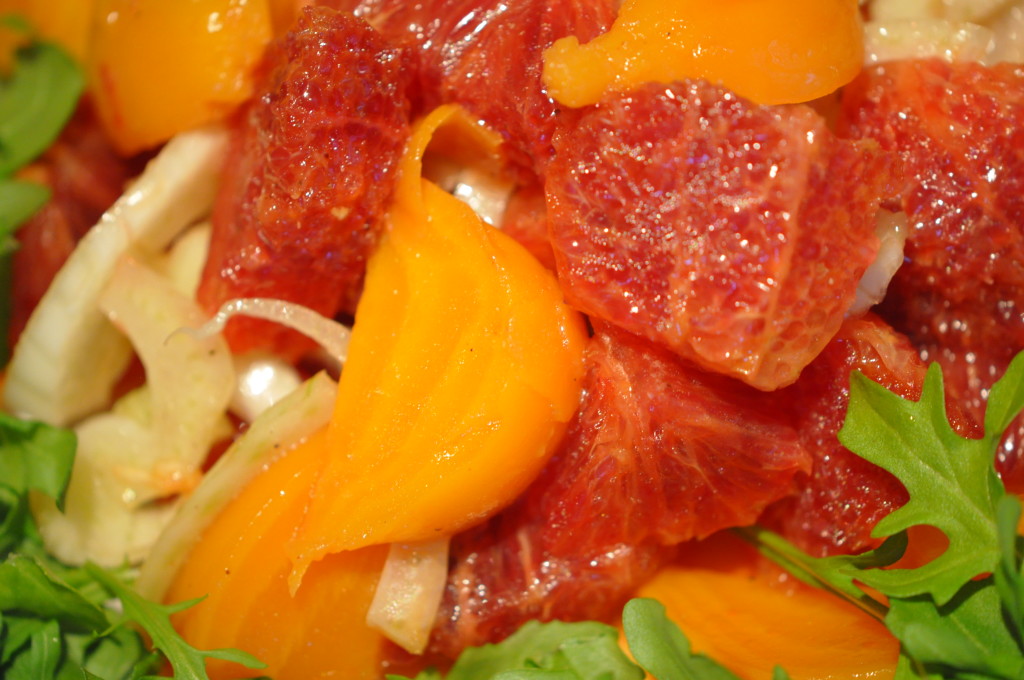
Bibb Lettuce, Hearts of Palm, Pickled Onion, Haas Avocado, Triple Cream Brie, Toasted Almonds, French Vinaigrette

Pan Sautéed Duck Breast with Currant Duck Sauce

Haricot Verts with Pecans

Smashed Yukon Gold Potatoes with Creme Fraiche and White Truffle Oil

Dessert

Blueberry-Peach Clafouti

~~~~~~~~~~~~

Charcuterie, Cheeses, Condiments

You can mix this up any way you want, use your imagination.

Antipasti

  Cheese

Austrian Vegetable Soup

Austrian Vegetable Soup

Makes 4 Quarts

2          Ounces Unsalted Butter (1/2 Stick)

½         Pound Thick Cut Bacon, Finely Chopped

4          Cups Finely Chopped Carrots

4          Cups Finely Chopped Celery

2          Cups Finely Chopped Spanish Onions

2          Cups Chopped Peeled Yukon Gold Potatoes (Medium Dice)

½         Cup All-Purpose Flour

6          Cups Homemade Chicken Stock or Canned Low Sodium Chicken Broth, Heated

2          Teaspoons Coarse Sea Salt

1          Teaspoon Freshly Ground Black Pepper

2          Cups Crème Fraiche

Crème Fraiche and Chopped Fresh Chives for Garnish

In a large pot such as a Dutch oven over medium heat, melt the butter. When butter has stopped foaming add the bacon and cook until bacon is crisp and all the fat has been rendered. Remove the bacon to a plate lined with a paper towel and set aside. Leave the rendered fat in the pan. In the same pot with the rendered bacon fat add the carrots, celery, onions and potatoes. Sauté the vegetables until they become softened, about 10 minutes. Stir frequently. Add the bacon and stir to combine.

Add the flour and stir the mixture until every bit of vegetable is coated with the flour. Cook for 5 minutes stirring frequently. You don’t want the flour to burn. Add the hot chicken stock, salt and pepper and bring to a boil. Reduce heat to low and cook the soup for 30 minutes, until the carrots and potatoes are cooked through and soft. Add the Crème Fraiche. Stir to incorporate the crème into the soup. Gently simmer for 10 minutes.

Serve the soup in warm bowls, topped with a dollop of Crème Fraiche and a sprinkle of chopped fresh chives.

Bibb Lettuce, Hearts of Palm, Pickled Onion, Haas Avocado, Triple Cream Brie, Toasted Almonds, French VinaigretteBibb Lettuce with Hearts of Palm

Bibb Lettuce with Hearts of Palm Delicate and pallet pleasing this salad is refreshing and light.

Traditional French Vinaigrette

Makes 2 Cups

2          Tablespoons Chopped Shallot

2          Tablespoons Dijon Mustard

½         Cup Red Wine Vinegar or Spanish Sherry Vinegar

¾         Cup XVOO

¾         Cup Vegetable Oil

½         Teaspoon Coarse Sea Salt

¼         Teaspoon Freshly Ground Black Pepper

In a blender jar add the shallots, mustard, vinegar, salt and pepper and blend until smooth. With the motor running, add the two oils in a slow, steady stream through the top of the jar’s lid. Blend until completely emulsified. Store in the refrigerator in an air-tight container for up to a week.

Sautéed Duck Breast, Currant Duck Sauce, Haricot Vert with Pecans and Smashed Yukon Gold Potatoes with Creme Fraiche and White Truffle Oil

Sautéed Duck Breast with Haricot Vert and Smashed Potatoes Sautéed Duck Breast with Haricot Vert and Smashed Potatoes Sautéed Duck Breast   Yummidy Yum Yum

Sautéed Duck Breast with Currant Duck Sauce

Serves 6

3          Whole, Boneless Duck Breasts, Skin On, Each Split in Half (6 Pieces)

1          Teaspoon Coarse Sea Salt

½         Teaspoon Freshly Ground Black Pepper

1          Tablespoon Chopped Shallot

½         Cup Madeira Wine

2          Cups Homemade Chicken Stock

1          Cup Currant Jelly

Heat a large heavy skillet on medium high heat. Score the duck breasts (see photo) and season with the salt and pepper. Place the duck skin-side down into the hot pan and render the fat from the duck. Do not attempt to turn the breasts for at least 5 minutes to prevent sticking. After 5 minutes check to see if the skin is very brown and crisp.

Turn the breast over and continue to cook for 7 to 8 minutes for medium rare. Cook a bit longer for medium. Remove the duck from the pan and keep warm.

Drain all but 1 tablespoon of the duck fat from the pan and add the shallots. (Save the drained duck fat. It’s great to sauté potatoes in.) Sauté the shallots in the fat for 2 minutes. Deglaze the pan with the Madeira wine and reduce by half. Add the chicken stock and reduce by half again. Add the currant Jelly and bring the sauce to a simmer whisking until all of the jelly is incorporated. Check for seasoning and add salt and pepper if needed.

Slice the duck breast on an angle into ½ inch slices. Spoon some of the sauce onto each dinner plate and top with sliced duck breast. Spoon a bit more sauce over the top of the duck. Don’t get carried away. You do not want to lose the flavor of the duck by adding too much sauce. Serve immediately.

Haricot Verts With Pecans

Haricot Vert with Pecans

Serves 6

2          Lbs. Haricot Verts (French Green Beans), Trimmed

6          Tablespoons Unsalted Butter

¾         Cup Pecan Halves

1          Teaspoon Coarse Sea Salt

½         Teaspoon Freshly Ground Black Pepper

Bring a large pot of water to a boil. Add 1 tablespoon coarse sea salt to the water. Add the Haricot Verts and bring water back to a boil. Cook the Haricot for about 3 or 4 minutes. Immediately transfer the Haricot to a bowl of ice water to cool down completely, about 2 minutes. Drain and pat the Haricot Verts dry.

In a large sauté pan add the butter and melt over medium high heat. When the butter is completely melted and stops sizzling add the pecans and cook for a minute or two tossing to cook evenly. Add the drained Haricot and toss with the pecans and butter. Sprinkle with the salt and pepper. Cook until the Haricot are warm all the way through. Serve immediately.

Smashed Yukon Gold Potatoes with Crème Fraiche

Serves 6

3          Lbs. Yukon Gold Potatoes, Washed, Skin On, Cut into 2” Chunks

8          Tablespoons (1Stick) Unsalted Butter, Softened at Room Temperature

¾         Cup Crème Fraiche, Room Temperature

1          Teaspoon Coarse Sea Salt

½         Teaspoon Freshly Ground Black Pepper

White Truffle Oil to Drizzle (Optional)

Place the potatoes in a pot of cold water to cover by at least an inch, along with 2 teaspoons coarse sea salt. Bring the potatoes to a boil and cook until tender, about 20 to 25 minutes. Drain the potatoes and return them to the pot. Over medium high heat shake the potatoes in the pan to evaporate any remaining water. Remove the pan from the heat.

Add the butter, crème fraiche, salt and pepper and, with a potato masher, smash the potatoes to the consistency you like. (I always leave a little bit of lumpy potato. I just like it that way.) Place the potatoes in a large bowl or plate individually. Drizzle a bit of white truffle oil just before serving. Serve immediately.

Hints and Tips: You can make the mashed potatoes an hour in advance of serving. To keep them hot place the bowl of smashed potatoes on a double boiler with simmering water. Put a couple of tablespoons of butter on top of the potatoes. Cover the potatoes with plastic wrap and foil. When ready to serve, gently fold in the butter.

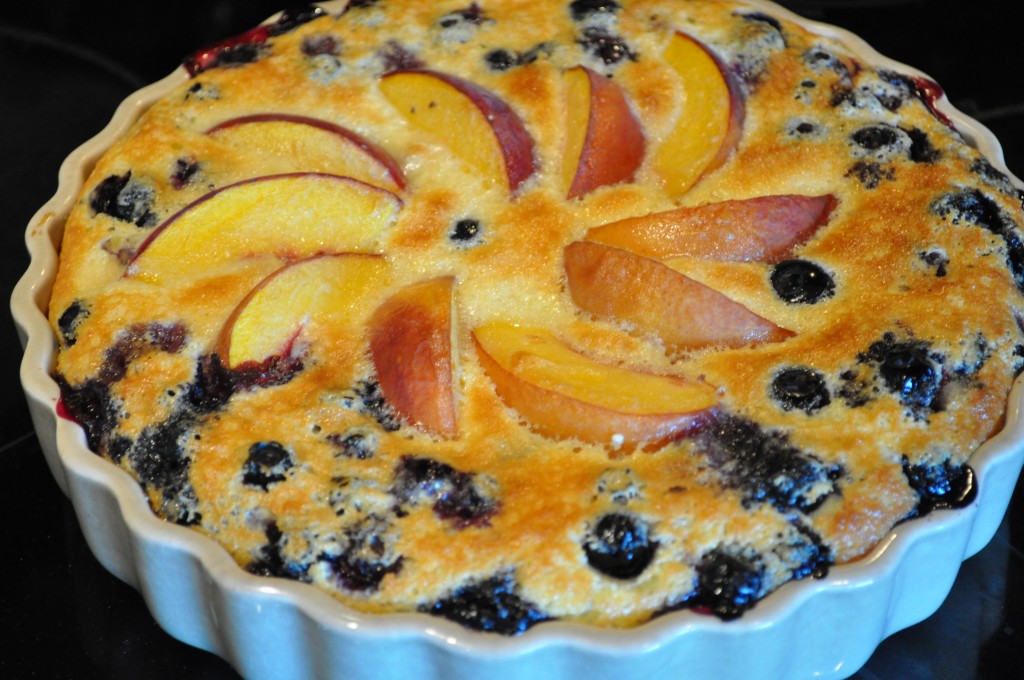
Blueberry-Peach Clafouti

Peach and Blueberry Clafouti

A Clafouti is a simple custard and fruit dessert. Super easy since there is no crust to deal with and it is delicate and delicious. I like to keep the skin on the peaches because it adds a bit more flavor and, besides, most of the skin will melt away. This is a dessert that can be made at the last minute without any fuss.

If you can’t find peaches at this time of year (we have them in Florida) don’t fret. Use more blueberries.

Makes One 10″ Tart

1          Tablespoon Melted Unsalted Butter

1          Tablespoon Granulated Sugar

3          Medium Size Peaches, Sliced Into Wedges

1          Cup Fresh Blueberries

½        Cup Granulated Sugar

1          Tablespoon Lavender Sugar (Optional)

6         Tablespoons All-Purpose Flour

½         Teaspoon Fine Sea Salt

1/4       Teaspoon Freshly Grated Nutmeg

3          Large Eggs

1½      Cups Heavy Cream

1          Teaspoon Pure Vanilla Extract

White Chocolate Whipped Cream for Garnish

Preheat oven to 375°. Brush a 10 inch ceramic or glass baking dish with the melted butter and sprinkle the 1 tablespoon granulated sugar evenly in the dish.

Arrange the peaches in a concentric circle on the bottom of the dish and distribute the blueberries evenly over the peaches.

In a small bowl combine the ½ cup granulated sugar, lavender sugar, flour, sea salt and nutmeg.

In the bowl of a standing mixer beat the eggs until light and fluffy. With the mixer speed on low, gradually add sugar/flour mixture and heavy cream in thirds, beginning and ending with the sugar/flour mixture and mix until completely incorporated. Gently blend in the vanilla.

Pour the mixture over the peaches and blueberries and bake for 40 minutes, until the custard is firm and has taken on a light golden color.

Serve warm or at room temperature with a dollop of White Chocolate Whipped Cream.

Joyeux Noel

camille@camillecooksforyou.com
Posted in Accompaniments, Ahh Haa Moments, Antipasti, Appetizers, Cheese, Dessert, Duck, Food For Thought, Fruit Desserts, Hints and Tips, Nuts, Potato, Recipes To Share, Salad, Sauces, Vegetables | Tagged , , , , , | Comments Off on French Bistro Christmas Dinner

The Best Stuffing Ever

Cornbread and Andouille Sausage Stuffing

Cornbread and Andouille Sausage Stuffing

I just make this stuffing for our early Thanksgiving dinner last week. I followed the recipe exactly how it is written and the stuffing turned our perfectly perfect. Stuffing the bird gives you a very moist finished product. Baking it separately gives you a less moist “dressing”.

Cornbread and Andouille Sausage Stuffing

Makes Enough Stuffing for a 25 lb. Turkey with Extra to Bake as a Side-Dish

You can make the cornbread several days in advance.  Wrap it in plastic wrap and store in the refrigerator for up to a week or in the freezer for a month.

If you don’t want to use spicy Andouille, you can use whatever sausage is to your liking.  A mild polish sausage is great in the recipe as well.  You can get a good quality Andouille locally at your grocer. I used Adele’s Smoked Andouille Sausage.

Don’t bother to dice the veggies by hand.  Do it in the food processor.  Just be sure you don’t puree them.  DO cut the chestnuts by hand.  If you put them in the processor they turn to mush.

If you don’t want to go through the whole roasting and peeling of the chestnuts (I don’t) you can purchase cooked and peeled chestnuts in the jar or foil packet.  I found them at my grocery store and Williams-Sonoma has them for sure.

Cornbread and Andouille Sausage Stuffing

1        Loaf Golden Cornbread

1        Pound Loaf Pepperidge Farm White Bread, Crust Removed

1        Lb. Smoked Andouille Sausage

12      Ounces Unsalted Butter

1        Lb. Celery, Finely Diced

1        Lb. Carrots, Finely Diced

2        Medium Onions, Finely Diced

3        Cups Cooked and Peeled Chestnuts, Medium Dice

6        Large Eggs, Lightly Beaten

1        Tablespoon Rubbed Sage

3        Teaspoons Coarse Seat Salt

1½    Teaspoons Freshly Ground Black Pepper

2        Cups Chicken Stock

Cube the Cornbread and White Bread into 1” pieces and let dry over night in a cooled oven with the door closed.

In a large sauté pan melt the butter over medium heat and add the celery, carrot and onion and cook until the vegetables are soft, not browned, about 15 minutes (this is called “sweating the vegetables”).  Cool slightly.  Add all ingredients, except the chicken stock, and gently mix so as not to make bread mushy.  Add the stock gradually and continue to mix gently.

Cool completely before stuffing bird.

Hints and Tips:  Never stuff a cold bird with warm stuffing.  This is how bacteria can form.  It’s best to make the stuffing the day before and refrigerate it over-night.  Bring the turkey and stuffing out of the refrigerator no more than an hour before stuffing and roasting.

To Bake as Dressing: Butter a casserole dish and bake at 350º covered for 45 minutes. Remove the cover and bake until top is crisp, about 15 minutes.

Brined Turkey

Don’t forget to brine your turkey. You will be amazed at the results. I used a brine I purchased at the grocery store. The brown bits you see on the turkey are from the rub that came along with the brine.
Happy Thanksgiving. We have so much to be thankful for.

Any questions can be answered by emailing me at

camille@camillecooksforyou.com   OR  camillecooksforyou@earthlink.net

Posted in Accompaniments, Ahh Haa Moments, Stuffing, Thanksgiving | Comments Off on The Best Stuffing Ever

Thanksgiving Pies

Thanksgiving Pies

This year I will not be preparing our usual Thanksgiving Feast. Instead we are invited to friends and we are so looking forward to having someone else cook for us. My contribution to this very looked forward to feast is dessert. I am making the traditional Thanksgiving desserts: Apple Pie, Pumpkin Pie and Sweet Potato Pecan Pie. The recipes are tried and true and pretty simple. I plan on having a day of pie making on Thanksgiving Eve. If you have nothing else to prepare then wait until Wednesday to make your desserts. If you are preparing the whole dinner including dessert you can make your pies a couple of days in advance, You can even make your pie crust several days in advance with no adverse results.

Old-Fashioned Apple Pie

Apple Pie Made With Love

Apple Pie Made With Love

I like to add golden raisins and pecans to my Apple Pie but if you don’t want to just leave them out. The best type of dish to use to insure a cooked bottom crust is a glass or ceramic pie dish. Tin pie pans just don’t give you that cooked and crispy bottom crust that is so very appealing. Also, placing the pie dish on a pizza pan with holes helps cook the bottom of the pie to achieve the crispiness we love. Why place the pie on a pan when cooking is what you might ask? The reason is to catch any juices that will escape from the pie and to keep the juices off the bottom of your oven. Lining the pan with parchment won’t allow the juices to go through the pan if it has holes and the pie dish won’t stick to the pan. All of these suggestions come from the thousands of pies I have made over my many years of cooking and will help to make the pie an easy and enjoyable experience.

1          Recipe Pate Sucre

7-8      Large Granny Smith Apples (About 5 Pounds) Peeled, Cored and Sliced  ¼” Thick

1          Cup Golden Raisins (Optional)

1          Cup Toasted Pecans (Optional)

1          Cup Granulated Sugar

¼         Cup All-Purpose Flour

¼         Cup Corn Starch

1          Teaspoon Fine Sea Salt

1          Teaspoon Ground Cinnamon

½         Teaspoon Ground Nutmeg

2          Tablespoons Fresh Lemon Juice (DO NOT USE BOTTLED)

2          Tablespoons Cold Unsalted Butter Cut into Small Pieces

1          Large Egg Beaten with 1 Tablespoon Cold Water

            Coarse Sanding Sugar for Pie Top (Available at Williams-Sonoma)

            Caramel Sauce

           Vanilla Ice Cream or Gelato

Preheat oven to 425°. Place the oven rack in the lower third of the oven.

In a large bowl combine the apples, raisins, pecans, sugar, flour, cornstarch, sea salt, cinnamon, nutmeg and lemon juice. Toss until well combined. Set aside.

On a lightly floured surface, roll out one disk of pastry into a 11 or 12 inch circle approximately 1/8” thick. When rolling, add a little flour to the top of the pastry so the rolling pin won’t stick. To make an evenly round circle when rolling make a quarter turn with the pastry. In other words, give a few rolls over the pastry, lift the pastry off of the rolling surface and turn it to the right 90 degrees. Do that three times while rolling and you will have a perfect circle. Gently roll the pastry up on the rolling pin and lift over the top of a 9” deep-dish pie dish and roll out. Gently press into the pie dish. You should have about a 1” overhang.

Place the apple pie mixture into the pastry-lined dish evenly distributing the apples. This will allow more even cooking. Pour any juices that may be in the bottom of the bowl over the top of the apple mixture. Dot the apple mixture with the 2 tablespoons of cold butter pieces. Brush the edges of the pastry with the egg wash.

Roll out the second disk of pastry in the same manner as the first. Place the rolled pastry over the apples. Seal the edges by trimming with a scissor. Press the edges decoratively with your thumb and forefinger.

With a sharp thin knife make a whole in the top of the pie to let out the steam while it cooks. You don’t want it to explode in the oven – and believe me, it will if you don’t vent the pie. Brush the top of the pie with the egg wash and sprinkle with the sanding sugar.

Place the pie on a sheet pan with holes (such as a pizza pan) lined with parchment paper. Bake the pie for 15 minutes and turn down the oven temperature to 375°. Bake the pie for 1 hour more or until the top is nicely browned and the juices are bubbling. You will see some of the juice leek out of the pie on the side. To be sure the apples are cooked, insert a skewer into the vent at the top of the pie. There should be no resistance when the skewer goes through the apples.

If the pie is not cooked through and the crust is beginning to get too brown, loosely cover the pie with aluminum foil by making a tent. You do not want to crush the pie or cover the vent tightly.

Remove from the oven to a wire cooling rack and let the pie cool completely before serving. I like to serve this pie with Caramel Sauce and Vanilla Ice Cream or Gelato.

Before The Top Crust Is Put In Place

Before The Top Crust Is Put In Place

Apple Pie With Vanilla Gelato and Caramel Sauce

Apple Pie With Vanilla Gelato and Caramel Sauce

Pumpkin Pie

Pumpkin Pie

Anyone who knows me knows I am a purist when it comes to food. Only organic and fresh for me: Nothing frozen, canned or precooked. BUT once in a while I have to make the exception to my rule and Pumpkin Pie filling comes under the exception category. I’ve made Pumpkin Pie with fresh pumpkin, pumpkin I’ve hand picked, white pumpkin, you name it I’ve done it. The only pumpkin I like for Pumpkin Pie is the good old standard – Libby pumpkin puree. My mother used it and I am continuing the tradition. The pumpkin puree by Libby is consistent. I never have to second-guess the product. I guess you can say I am only 99¾% pure. DO NOT USE PUMPKIN PIE FILLING IN THE CAN. When you reach for the puree on the shelf don’t grab the wrong one.

Makes One 9” Deep Dish Pie

½         Recipe Paté Sucre, Enough to Line Bottom of Pie Dish

1          Teaspoon Fine Sea Salt

1½      Teaspoons Ground Cinnamon

¾         Teaspoon Ground Ginger

¼         Teaspoon Ground Cloves

¼         Teaspoon Freshly Grated Nutmeg

4          Large Eggs

1          29 Ounce Can Libby Pumpkin Puree

1½      Cups Evaporated Milk

½         Cup Half and Half

White Chocolate Whipped Cream To Garnish

Preheat oven to 350°.

On a lightly flour surface roll out the paté sucre to 1/8” thick. Transfer to a 9” Deep dish pie dish. Crimp the edges and refrigerate for 30 minutes. After 30 minutes, remove from the refrigerator and partially blind bake the crust.   Cool completely and set aside.

In a small bowl, whisk together the salt, cinnamon, ginger, cloves and nutmeg. Set aside.

In a large bowl, lightly beat the eggs, add the spice mixture and blend well. Add the pumpkin puree and mix until completely incorporated. In a slow and steady stream add the evaporated milk and the half and half. Mix until completely incorporated.

Pour the pumpkin mixture into the prepared pie shell. Bake for one hour. To check for doneness pierce the center of the pie with a very thin bladed knife. When the knife comes out clean the pie is done. Transfer to a wire cooling rack to cool completely before refrigerating. Before covering the pie with plastic wrap, be sure to cool the pie in the refrigerator for at least 3 hours. Place a piece of plastic wrap directly on the pie’s surface. The pie should be made at least the day before serving.

Serve with White Chocolate Whipped Cream or top with Italian Meringue for a very dramatic presentation. Tastes good, too.

Pumpkin Pie Topped With Italian Meringue

Sweet Potato Pecan Tart

Sweet Potato Pecan Pie

I like to use a tart pan to make this scrumptious delight but if you don’t have one you can use a 9″ glass pie dish instead. You may need to adjust the baking time but not by much. Just keep your eye on it.

Makes One 10” Tart

½         Recipe Pate Sucre

For The Sweet Potato Filling

1   1/2  Cups Baked Sweet Potato Pulp,  About 3 Sweet Potatoes

¼         Cup Brown Sugar, Firmly Packed

2          Tablespoons Granulated Sugar

1          Large Egg, Vigorously Beaten with a Fork

1          Tablespoon Heavy Cream

1          Tablespoon Unsalted Butter, Room Temperature

1          Tablespoon Pure Vanilla Extract

½         Teaspoon Fine Sea Salt

¼         Teaspoon Ground Cinnamon

1/8         Teaspoon Freshly Grated Nutmeg

1/8         Teaspoon All-Spice

For The Pecan Topping

¾         Cup Granulated Sugar

¾         Cup Dark Corn Syrup

1          Large Egg

1½      Tablespoons Unsalted Butter, Melted and Cooled

2          Teaspoons Pure Vanilla Extract

¼         Teaspoon Fine Sea Salt

¼         Teaspoon Ground Cinnamon

1           Cup Pecan Pieces

3          Cups Pecan Halves

Preheat Oven to 325°.

On a lightly flour surface roll out the paté sucre to 1/8” thick. Transfer to a 10” tart pan with removable bottom. Crimp the edges at least 1/2″ above the rim of the tart pan. Refrigerate until ready to fill.

For The Sweet Potato Filling: Place all of the sweet potato filling ingredients into the bowl of a standing mixer fitted with the paddle attachment and beat on medium speed until smooth, about 3 or 5 minutes. Set aside.

For The Pecan Topping: In a clean bowl of a standing mixer fitted with the paddle attachment combine all of the topping ingredients except the pecans. Mix thoroughly on low speed until the syrup is opaque, about 1 minute. Remove 1/4 cup of the mixture and set aside. Stir in the 1 cup pecan pieces into the rest of the topping.

To Assemble: Remove the tart pan from the refrigerator and spoon the sweet potato filling evenly into the pastry lined tart pan. Pour the pecan topping over the sweet potato filling. (Do not pour the syrupy topping all the way to the top of the crust. Leave a little room for expansion.) Toss the half pecans with the reserved 1/4 cup topping and gently place pecans in a concentric circle starting on the outer edge and working towards the center (see photo).

Place tart on a sheet pan lined with parchment paper (preferably a pizza pan with holes) and bake for 1 1/4 hours or until filling is set and crust is golden brown. Remove the tart from the oven to a cooling rack. Cool completely before removing the pan rim.

Serve plain or with white chocolate whipped cream.

Happy Thanksgiving. We have so much to be thankful for. Eat lots of PIE.

Any questions email me at

camille@camillecooksforyou.com

Or you can ask any questions by leaving a comment on the blog.


Posted in Apple Pie, Caramel Sauce, Dessert, Food For Thought, Hints and Tips, Italian Meringue, Pastry Crust, Pate Sucre, Pumpkin Pie, Sweet Potato Pecan Pie, Thanksgiving Pies | Tagged , , , , , , | Comments Off on Thanksgiving Pies