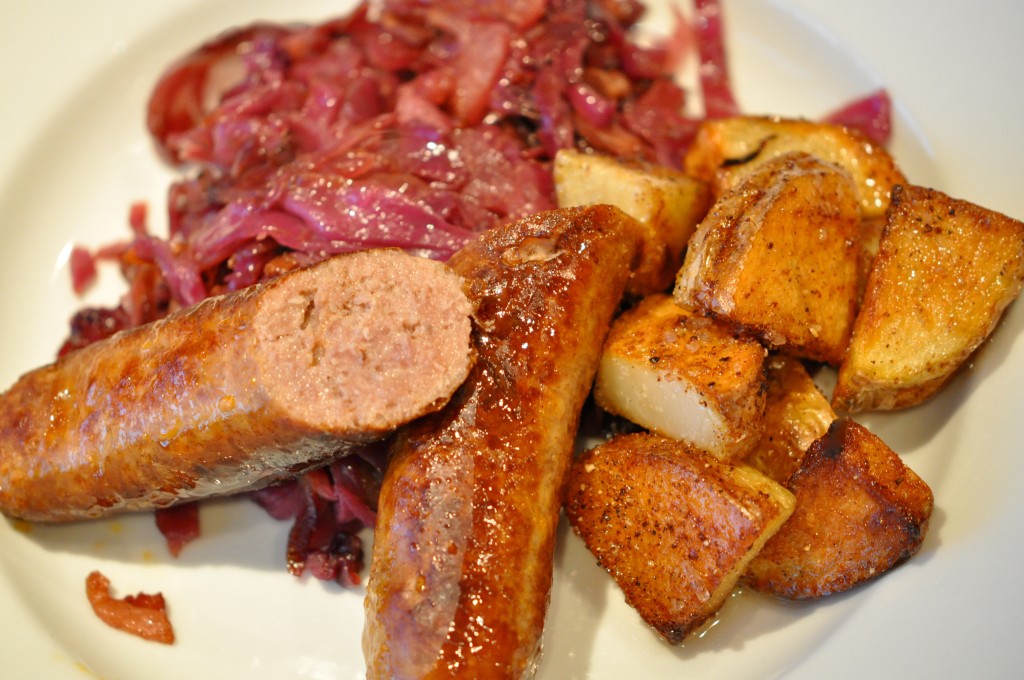
October Fest – Bratwurst Steamed in Beer, Braised Red Cabbage

I can honestly say that I never ate a Bratwurst until I met my Husband and his family oh so long ago. Although his family is not of German decent his Mother cooked as if she were. As Jim never had Italian food growing up I never had German. Actually the closest I got to German food when growing up was when I went to my lifelong friend Valorie’s home and her Mom, Gert, would make fruit dumplings. Gert’s parents were from Germany and this is the closest I ever got to Bavarian food.

Jim’s Mother, Kathryn, being from Wisconsin, (America’s Land of many German Descendants) would drive to Sheboygan, Wisconsin, from the Chicagoland area specifically to buy Bratwurst and all things German. Katty would make cooking Bratwurst an event and invite family over for a Bratwurst Festival. Along with the Bratwurst, Katty would make the best German Potato Salad (another first for me). The guys would have a Bratwurst eating contest and Jim was almost always the winner. He was very slight in those days and I couldn’t figure out where he put all those Bratwurst. I think his secret was not drinking beer while eating. All the others would fill up on the beer drinking. Kind of a secondary contest. 

Bratwurst Steamed in Beer

DSC_0699

My favorite way to cook Bratwurst is to grill them and then steam the sausages in the beer. Tonight I am cooking the brats on the stove top until brown all around and then steaming. Either way they are delicious.

6          Fresh Bratwurst

1          Tablespoon Unsalted Butter

1          Tablespoon Vegetable Oil

2          Bottles German Beer

1          Teaspoon Caraway Seed

1          Teaspoon Yellow Mustard Seed

½         Teaspoon Paprika

1          Bay Leaf

In a sauté pan heat the butter and oil. Add the Bratwurst and brown on all sided. Add the beer, caraway seeds, mustard seeds paprika and bay leaf. Turn the heat down to a simmer and steam the brats for 45 minutes.

Remove the Brats from the beer before serving.

Hints and Tips: Try grilling the Brats instead of cooking on the stovetop.

You might want to have more than one per person for the big eaters.

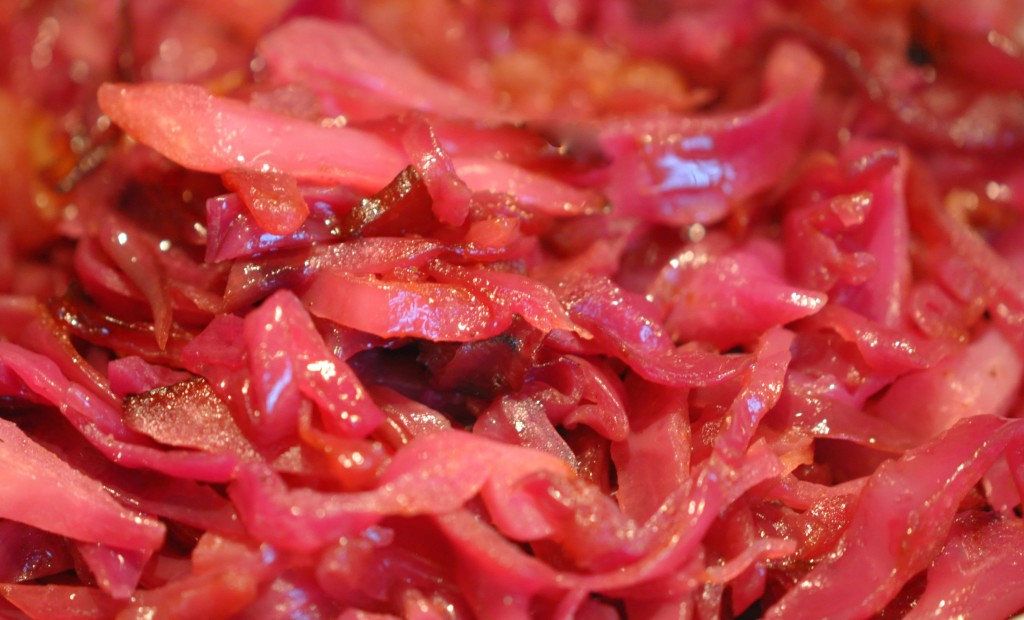
Braised Red Cabbage

Braised Red Cabbage

I love serving this side dish on a cold winter’s night with roast duck, rack of pork or, in this case, Bratwurst Steamed in Beer. It never gets very cold where I live but if the temperature plummets down to 50 that’s cold enough for me to make this delicious, sweet, pungent and oh so tender braised cabbage. You will be surprised to see how much volume you will lose when the cabbage cooks down.

Serves 6 to 8

8          Ounces Thick Cut Smoked Bacon, Cut Crosswise into Julienne Strips

1          Medium Red Onion, Thinly Sliced

2          Garlic Cloves, Minced

2          Granny Smith Apples, Peeled, Cored and Diced into ½” Pieces

2/3      Cup Dark Brown Sugar, Firmly Packed

1          Cup Red Wine Vinegar

1          Large Head Red Cabbage (About 3 Pounds) Halved, Cored and Shredded

1½      Teaspoons Coarse Sea Salt

¾         Teaspoon Freshly Ground Black Pepper

Preheat oven to 350°.

Heat a large braising pan such as a Dutch oven over medium heat. Add the bacon and cook until brown and crisp, about 5 minutes, stirring often. Add the red onion and garlic and sauté until onion is wilted and slightly golden, 2 to 3 minutes. Add the apples and sauté for 1 to 2 minutes. Stir in the brown sugar; when the sugar is completely incorporated and begins to caramelize, add the vinegar and stir to combine. Add the cabbage and toss to completely coat with the mixture. Add the salt and pepper and toss to combine.

Cover the pan and place into the oven. Braise for 1½ hours stirring every 30 minutes. Remove from oven and let rest, covered, for up to 30 minutes.

Hints and Tips: The cabbage can be made several hours in advance. When ready to serve heat the cabbage over medium heat until hot once again.

You can also make the cabbage the day before you serve it. Cool completely and store in a non-reactive container in the refrigerator. When ready to serve, remove from the refrigerator and bring to room temperature, about 1 hour. Reheat over medium heat until hot all the way through.

Prost – GenieBen Oktoberfest

camille@camillecooksforyou.com

Posted in Accompaniments, Ahh Haa Moments, Apples, Bacon, Beer, Bratwurst, Brown Sugar, Food For Thought, Recipes To Share, Red Cabbage, Red Onion, Red Wine Vinegar | Comments Off on October Fest – Bratwurst Steamed in Beer, Braised Red Cabbage

A Light Luncheon

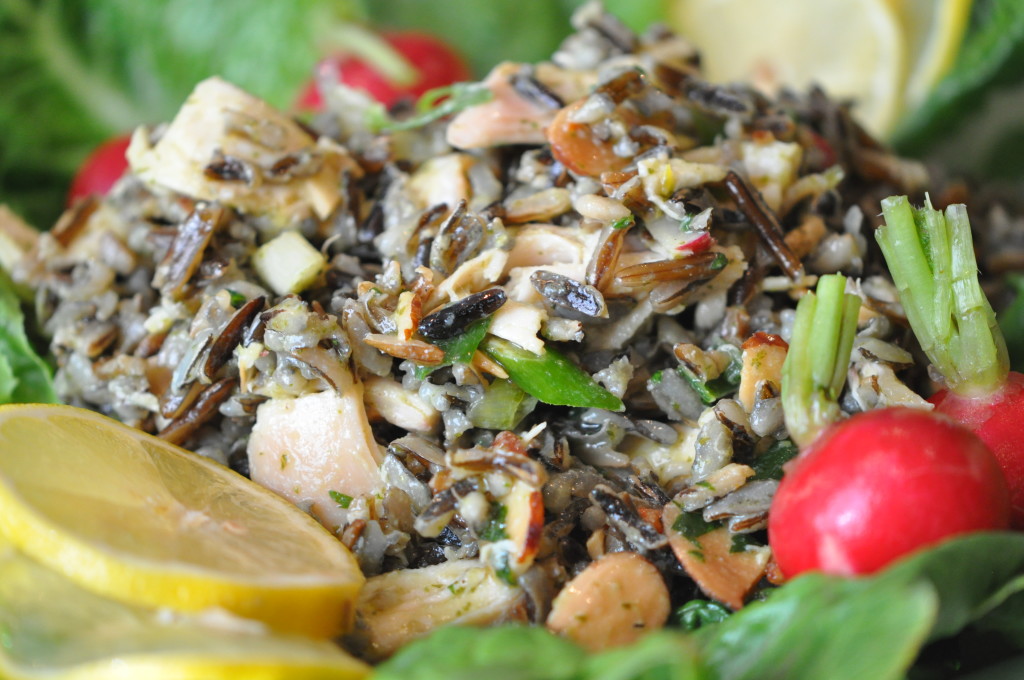
I had a friend over for lunch to celebrate both of our birthdays. I made a light lunch so we could enjoy dessert. Hey, it’s a birthday celebration after all. I made this delicious Wild Rice Salad with Smoked Chicken and Lemon Cilantro Vinaigrette, an assortment of pickled veggies and a simple salad of baby Bibb lettuce leaves tossed with the same vinaigrette as the Wild Rice Salad. We had a small cheese plate consisting of Triple Cream Brie and Aged Gouda with Peach Preserves. For dessert I made the XVOO Cake that I love so much and have never made for my friend. A glass of Sancerre makes for the perfect beverage to go along with this lovely lunch. Enjoy.

Wild Rice-Smoked Chicken Salad w/ Lemon Cilantro Vinaigrette 

Wild Rice-Smoked Chicken Salad


Serves 4 as a Luncheon Entree

4   Cups Cooked Wild Rice

3   Cups Smoked Chicken Breast, Shredded

1    Roasted Red Pepper, Diced

1   Bunch Scallions, Chopped

8   Red Radishes, Thinly Sliced and Julienned

1/2  Cup Toasted Almonds

Lemon Cilantro Vinaigrette

Fine Sea Salt and Freshly Ground Black Pepper

Toss all of the ingredients together except the vinaigrette.  Mix well and blend in enough vinaigrette to make the rice salad just a bit moist or put in the amount that suites you.   Add salt and pepper to taste.

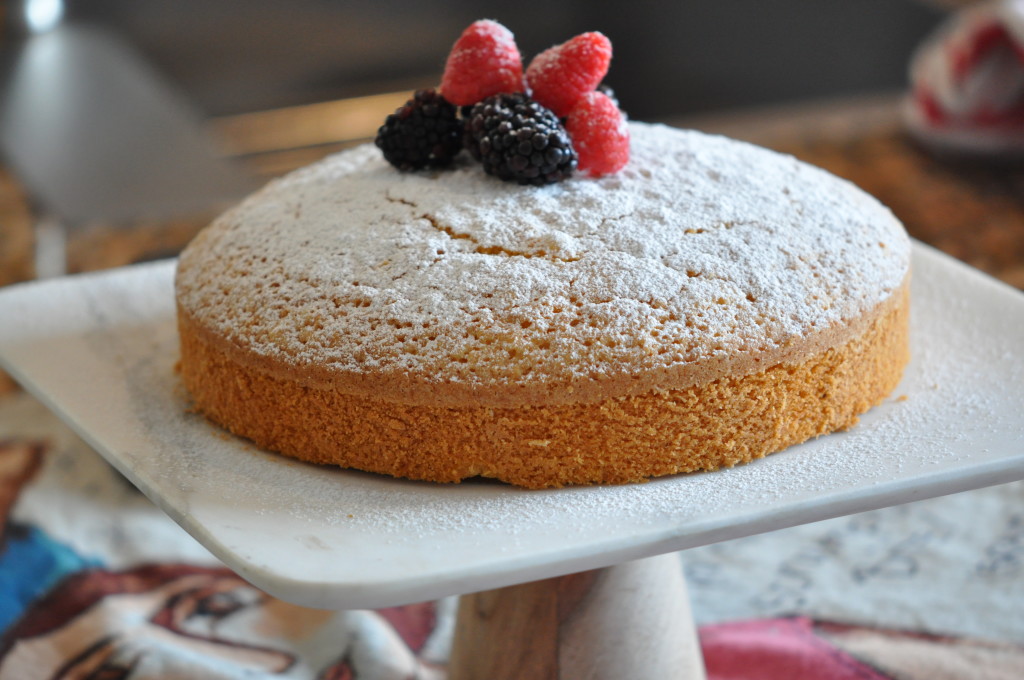
Extra Virgin Olive Oil Cake

XVOO Cake

Posted in Accompaniments, Ahh Haa Moments, Berries, Beverages, Cake, Chicken, Cornmeal, Dessert, Entree, Extra Virgin Olive Oil, Food For Thought, Fruit, Hints and Tips, Lemon, Menus, Mixed Berries, Pickled Vegetables, Pickled Veggies, Pickling, Preserves, Recipes To Share, Salad, Side Dishes, Toasted Almonds, Vegetables, Vinaigrette, Wild Rice, Wine, XVOO | Tagged , , | Comments Off on A Light Luncheon

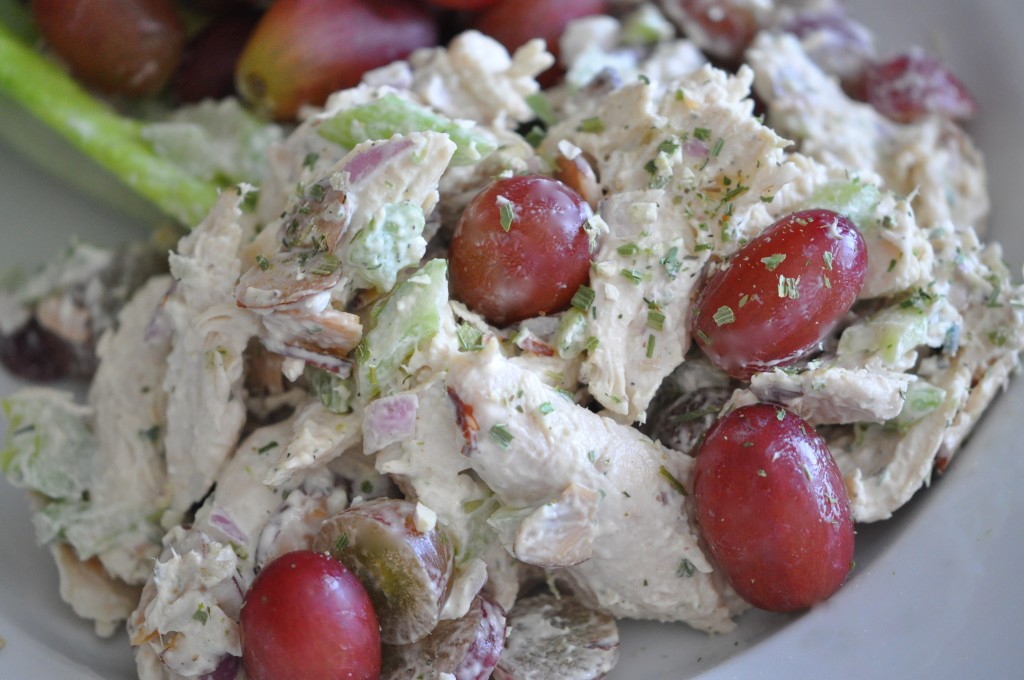
Chicken Salad Veronique

Chicken Salad Veronique

Chicken Salad Veronique is a delicious twist on the tried and true traditional chicken salad. The grapes add a nice amount of sweetness which balances with the tangy Dijon mustard. I like to dress this lightly with the mayo since we are all trying to eat lighter, especially during the heat of the summer. You can substitute light mayo without changing the flavor as long as it is Hellman’s. It really does bring out the flavor and bring out the zest. Really! I tried other mayos, and although they are quite good, their flavor changes the flavor of my recipe.

Chicken Salad Veronique

Serves 6 to 8

3          Whole Bone-In Chicken Breast with Skin On, Split in Half

3          Tablespoons XVOO

1          Teaspoon Coarse Sea Salt

½         Teaspoon Freshly Ground Black Pepper

1          Cup Mayonnaise (Hellman’s)

2          Tablespoons Dijon Mustard

1          Bunch Scallions, Thinly Sliced On The Diagonal

1          Cup Celery, Thinly Sliced On The Diagonal

2          Cups Red Seedless Grapes, Cut In Half Either Lengthwise or Crosswise

¾         Cup Toasted Sliced Almonds

1          Teaspoon Coarse Sea Salt

½         Teaspoon Freshly Ground Black Pepper

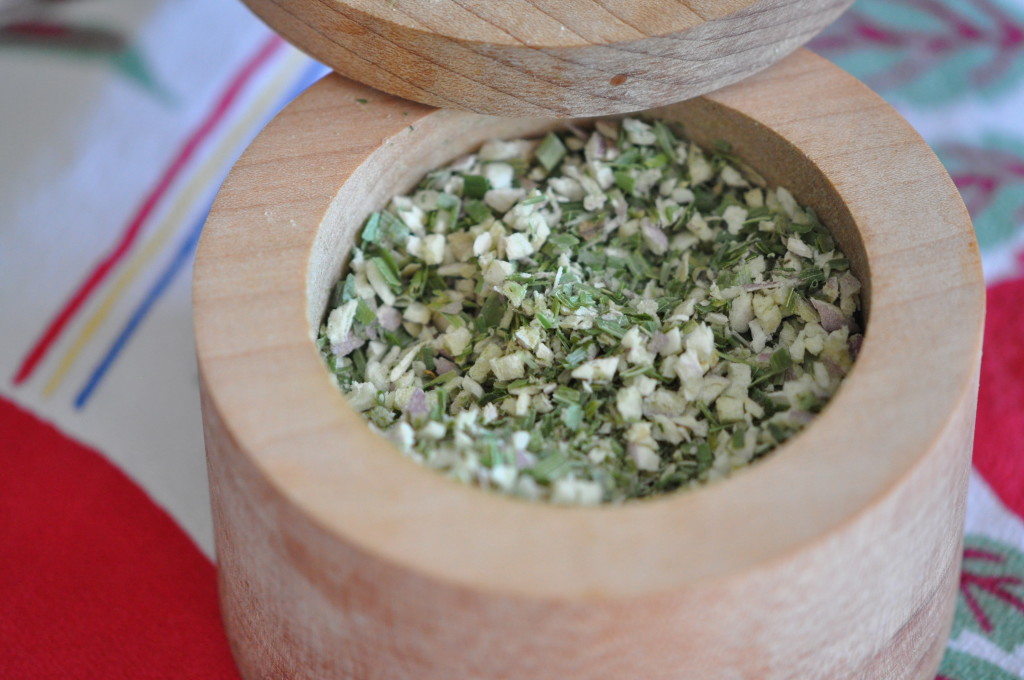
1          Tablespoon Sunny Paris Dried Herb Mix by Penzey’s

Preheat Oven to 400°.

Place the split chicken breasts (you will have six pieces) skin side up on a baking sheet, drizzle with XVOO and sprinkle with 1 teaspoon coarse sea salt and ½ teaspoon freshly ground black pepper. Roast in the oven for 30 to 40 minutes. Remove from oven and let cool until the chicken is easy to handle. Remove the skin and bones from the chicken. Cut the chicken into chunks or shred into pieces.

In a large bowl, toss the chicken with the mayonnaise, Dijon mustard, the scallion, the celery, grapes, almonds, salt, pepper and Sunny Paris.

You can serve this delicious salad immediately or chill for several hours before plating.

The chicken salad will keep in the refrigerator for 2 or 3 days if stored in an airtight container.

Hints and Tips: You can purchase the Sunny Paris from Penzey’s

http://www.penzeys.com

For me Penzey’s Sunny Paris is an essential ingredient but if you don’t have it you can just skip it.

SUNNY PARIS Hand-mixed from: shallots, chives, green peppercorn, dill weed, basil, tarragon, chervil and bay leaf.

Sunny Paris

Posted in Ahh Haa Moments, Chicken, Food For Thought, Salad | Tagged , , | Comments Off on Chicken Salad Veronique

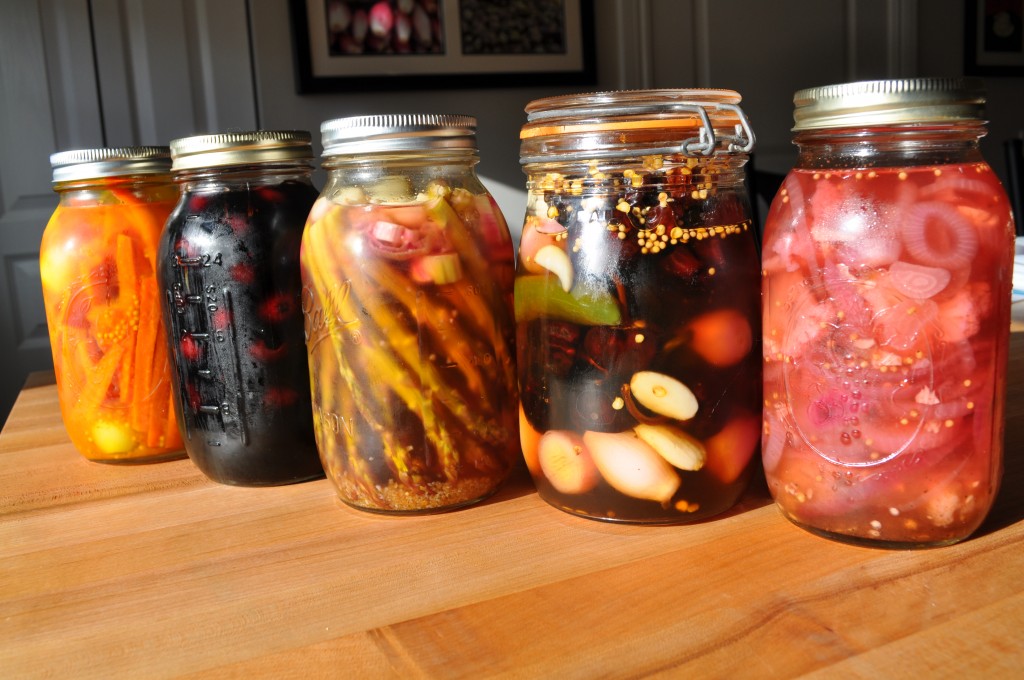
Pickling

Pickled Veggies

Now is the time to pickle.  Produce is at its’ best at the market and the prices are low.  Pickling is a synch and fun to do.  Pickling consists of combining vinegar and sugar along with spices and herbs.  You will notice I use five different vinegars throughout the pickling recipes: Apple Cider Vinegar, Red Wine Vinegar, Balsamic Vinegar, White Balsamic Vinegar and Spanish Sherry Vinegar.

I pickle the items, put them in Mason Jars and refrigerate.  This is not “Canning” since I don’t do the final steps involved with that process.  I pickle only enough of one item for a jar or two as I know we will be eating them immediately and don’t want to go through all that is involved with “Canning”.  Not that I don’t like “Canning” but sometimes I just don’t have the time.  And as you know, when you “Can” you are able to put the item on the pantry shelf for nearly an indefinite amount of time.  With the pickling I do, I can keep the pickled food for about a month in the refrigerator.

Now that I have planted the pickling seed within you, you should be ready to begin your pickling experience. Here are a whole lot of recipes for you to try.   Enjoy!

Bread and Butter Pickles
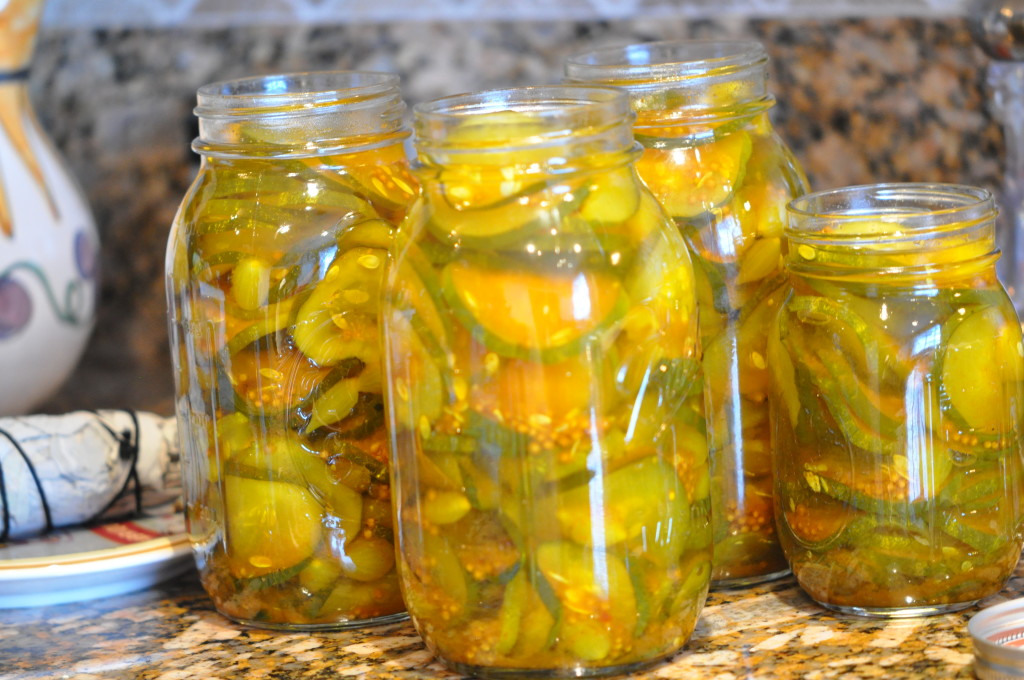
Bread and Butter Pickles

My Mother-In-Law, Katherine, made the best Bread and Butter Pickles but did not leave a recipe. I made my own concoction by trying to remember the taste of these sweet, delicious morsels. I got a big thumbs up from my Husband which says it all. I have a hard time finding Kirby Cucumbers in Florida and when I happen to come upon them at the Sunday Farmers Market I am sure to get all I can. The farmer at the market gave me extra with the promise that I bring him a jar of pickles next week. No Problem!!!

Makes 1 ½ Quarts

3          Cups Granulated Sugar

2          Cups Apple Cider Vinegar

1          Cup Spanish Sherry Vinegar

1          Cup Water

2          Bay Leaves

1          Jalapeno Thinly Sliced Crosswise

1          Tablespoon Yellow Mustard Seed

1          Tablespoon Turmeric

6          Garlic Cloves Smashed

2          Teaspoon Coarse Sea Salt

1/2      Teaspoon Freshly Ground Black Pepper

12       Kirby Cucumbers, Sliced Crosswise into 1/8″ to 1/4″ Slices (Somewhere In Between)

1          Cup White Pearl Onions, Peeled and Left Whole (You Can Use Frozen)

In a large sauce pan add the sugar, vinegars, water, bay leaves, jalapeño  mustard seed, turmeric, garlic cloves, salt and pepper. Bring the mixture to a boil for 10 minutes, until slightly reduced and syrupy.

Add the cucumbers and the pearl onions to the pan and bring back to a boil. Immediately remove from the heat and let the pickles cool in the liquid.

Put the pickles into glass canning jars loosely packing and pour in as much of the liquid as possible to cover the pickles. Cool completely in the jars before covering and refrigerating.

Pickles will last several months in the refrigerator as long as they are covered with the liquid.

Pickled Curried Carrots
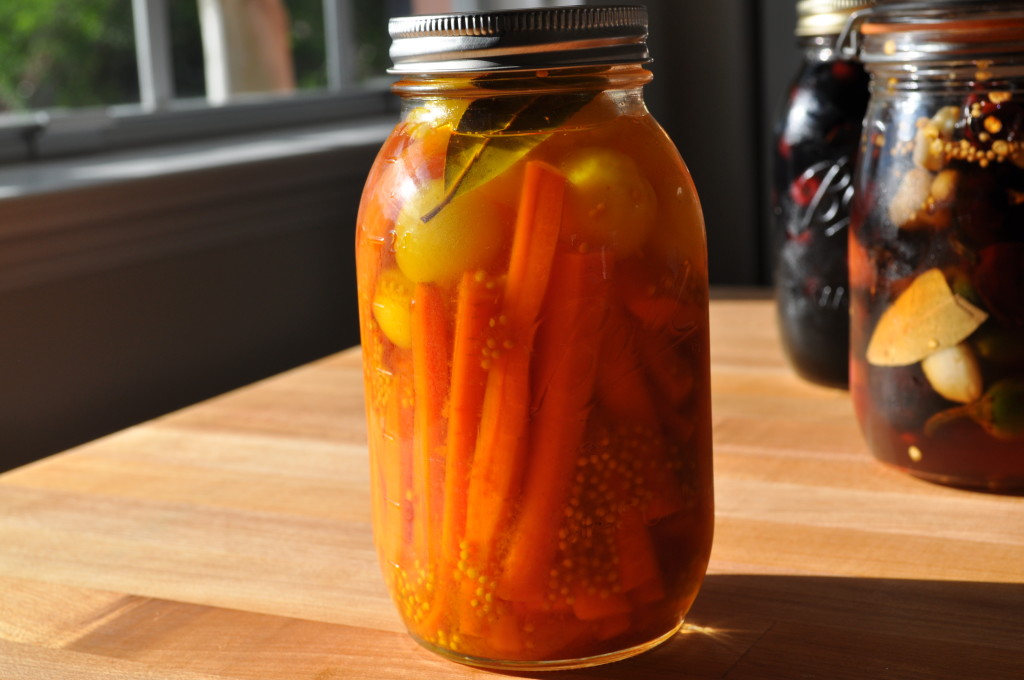
Curried Pickled Carrots

Makes 1 Quart

2          Cups Granulated Sugar

2          Cups Apple Cider Vinegar

2          Teaspoons Yellow Mustard Seed

2          Teaspoons Mild Curry Powder

1          Bay Leaf

1         Teaspoon Coarse Sea Salt

10       Small Red Pearl Onions, Peeled and Left Whole (You Can Use Frozen)

10       Medium Size Carrots, Peeled and Cut into 4” Long Sticks, 1/4” Thick

In a large non-reactive saucepan combine the sugar, vinegar, mustard seed, curry powder, bay leaf and salt. Stir to combine and bring to a boil. Lower the heat and simmer for 10 minutes until slightly syrupy. Add the onions and carrots and simmer for 3 minutes.

Place the carrots, standing straight up, and the onions in a quart sized glass jar. Carefully pour the hot liquid into the jar covering the carrots and onions. Cool to room temperature uncovered. After completely cooled, cover and refrigerate for up to one month.

Pickled Brains (aka Pickled Cauliflower)
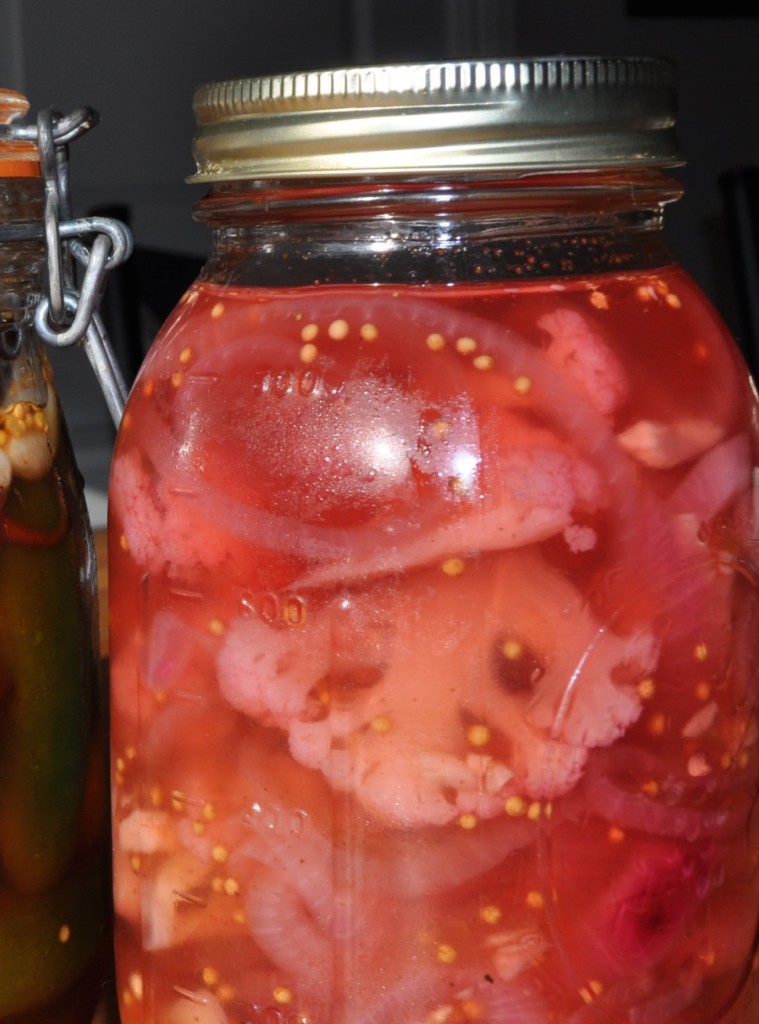
Pickled Cauliflower

Makes 1½ – 2 Quarts

2          Cups Granulated Sugar

1          Cup Apple Cider Vinegar

1          Cup Red Wine Vinegar

1          Cup Water

2          Bay Leaves

2          Red Jalapenos, Thinly Sliced Crosswise

1          Tablespoon Yellow Mustard Seed

6          Garlic Cloves, Smashed

1          Teaspoon Coarse Sea Salt

½        Teaspoon Freshly Ground Black Pepper

2          Heads Cauliflower Cut into Medium Size Flowerets

In a large non-reactive pan such as a Dutch oven, add the sugar, vinegars, water, bay leaves, jalapenos, mustard seed, garlic cloves, salt and pepper. Bring the mixture to a boil for 10 minutes, until slightly reduced and syrupy.

Add the cauliflower flowerets to the pan and bring back to a boil for one minute. Remove pan from the heat and let the cauliflower cool completely in the liquid in the pan.

Transfer the vegetable to glass canning jars loosely packing and pour in as much of the liquid as possible to cover the cauliflower. Cool in the refrigerator for one hour in the jars before covering and refrigerating.

Brains will last 4 weeks in the refrigerator as long as they are covered with the liquid.

Pickled Cherries
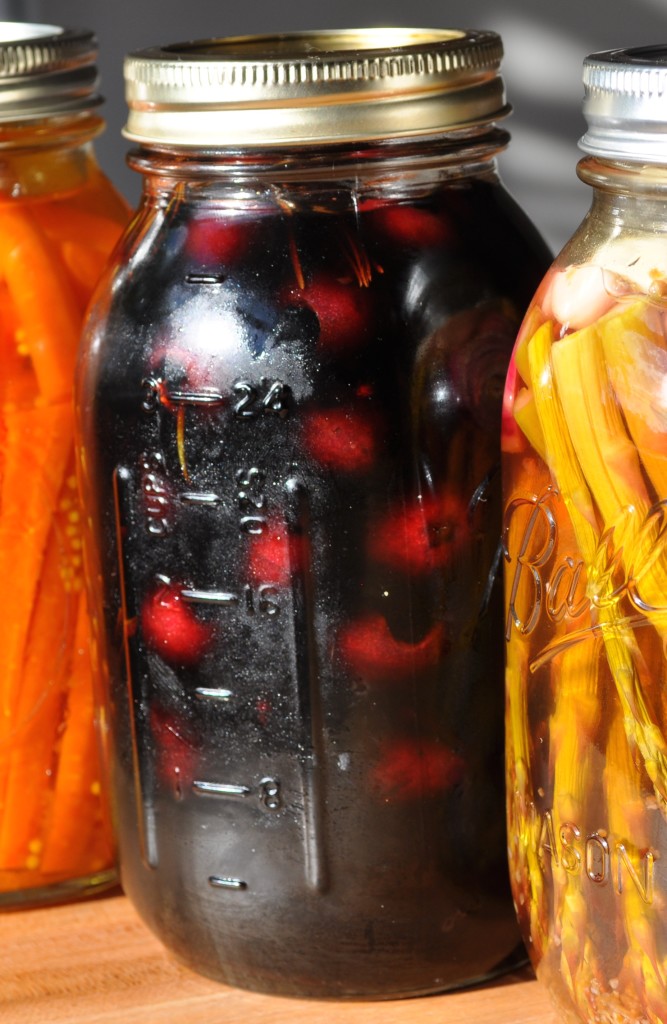
Pickled Cherries

I bought way too many cherries at the market and didn’t know what to do with them before they went bad. Of course, I could have made a pie or cobbler but that seemed too obvious. I was already in the pickling mode so I thought, “why not try pickling cherries”. This is what I came up with. The flavor is very different but delicious and the cherries go well in a field greens salad tossed with white balsamic vinaigrette, Maytag blue cheese and onion jam (remove the cherry stems first), pop them in your mouth straight from the jar, or garnish a cherry Margarita with one of these succulent jewels.

Makes About 1 Quart

1          Pound Fresh Bing Cherries with Stems

3          Sprigs Fresh Rosemary

1          Cup Granulated Sugar

1          Cup White Balsamic Vinegar

1         Cup Water

2         Teaspoons Pink Peppercorns

Wash and pit the cherries, leaving the stems attached. The easiest way to pit the cherries and keep the stems in tact is to use a cherry pitter with the cherries tilted slightly to the side to avoid hitting the stem. Put the cherries and rosemary in a 1-quart glass jar. Do not press down on the cherries.

In a small non-reactive saucepan combine the sugar, vinegar, water, and peppercorns and bring to a boil over medium-high heat, stirring to dissolve the sugar. Reduce heat and simmer for 10 minutes. Remove the pan from the heat, cool the liquid to room temperature and pour over the cherries. Cool completely, cover with a lid and refrigerate for up to 1 month.

Pickled Asparagus
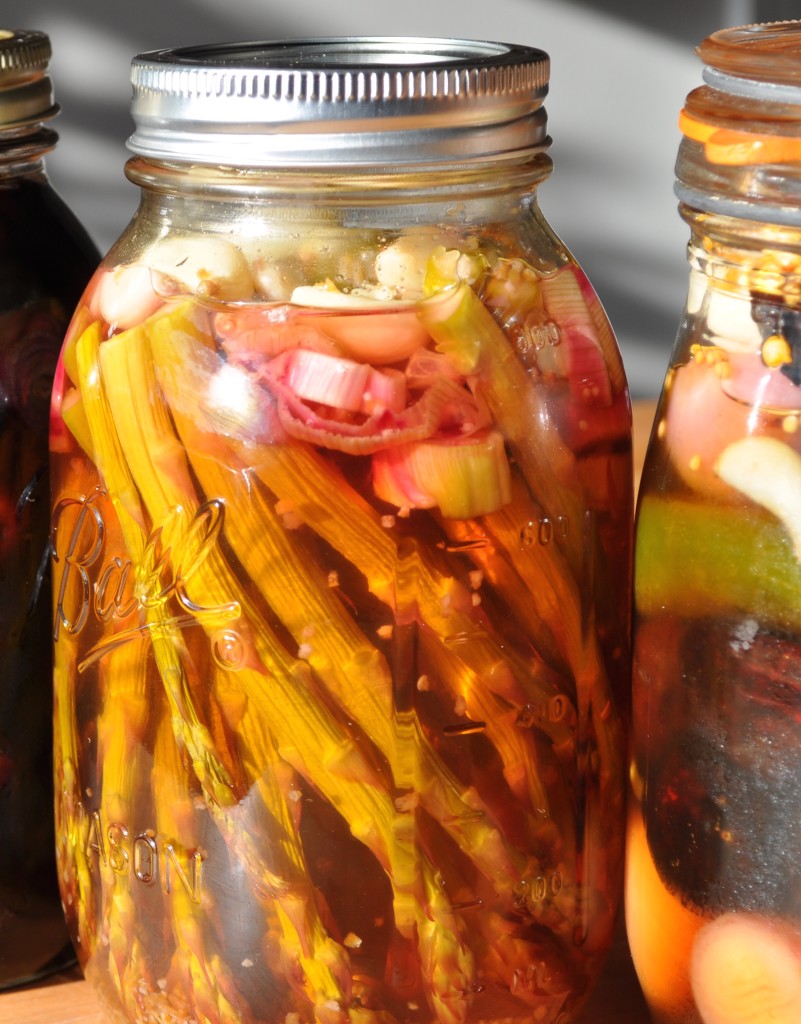
Pickled Asparagus

Makes 1 Quart

1          Cup Granulated Sugar

1          Cup Apple Cider Vinegar

1          Cup White Balsamic Vinegar

4          Garlic Cloves, Peeled and Thinly Sliced

1          Bay Leaf

1         Teaspoon Coarse Sea Salt

1          Cup Pickled Onions

1          Pound Medium Thick Asparagus Trimmed to Fit Standing Tips Up in Glass Jar

In a small saucepan combine the sugar, vinegars, garlic, bay leaf and salt. Stir to combine and bring to a boil. Lower the heat and simmer for 10 minutes until slightly syrupy. Add the pickled red onions to the liquid to heat slightly.

Place the asparagus, standing tips up, in a quart sized glass jar, alternating with the pickled red onion.  Carefully pour the HOT liquid into the jar covering the asparagus and onions. Cool to room temperature uncovered. After completely cooled, cover and refrigerate for up to one month.

 Pickled Onions – Yucatan Style

The preparation of these pickled onions is traditional to the Yucatan. They can be used in a wide variety of dishes from garnish for Snapper Escabeche, as a condiment for soft tacos to topping for a green salad or as an addition to almost any sandwich. The number of ways to use pickled onions is endless.

Makes 1 Quart

1          Cup Red Wine Vinegar

1          Cup Sugar

1          Bay Leaf

1          Tablespoon Yellow Mustard Seeds

3          Garlic Cloves, Peeled and Thinly Sliced

1          Teaspoon Coarse Sea Salt

2          Medium Red Onions, Thinly Sliced into Rings

In a medium sized saucepan put all of the ingredients except the onions and bring to a boil. Reduce heat to low and simmer 10 minutes until the consistency is a little syrupy. Pour the hot mixture over the sliced onions. Cool completely to room temperature and place in a glass jar with a lid and refrigerate. Onions will keep, refrigerated, for at least a month.

Pickled Jalapeños
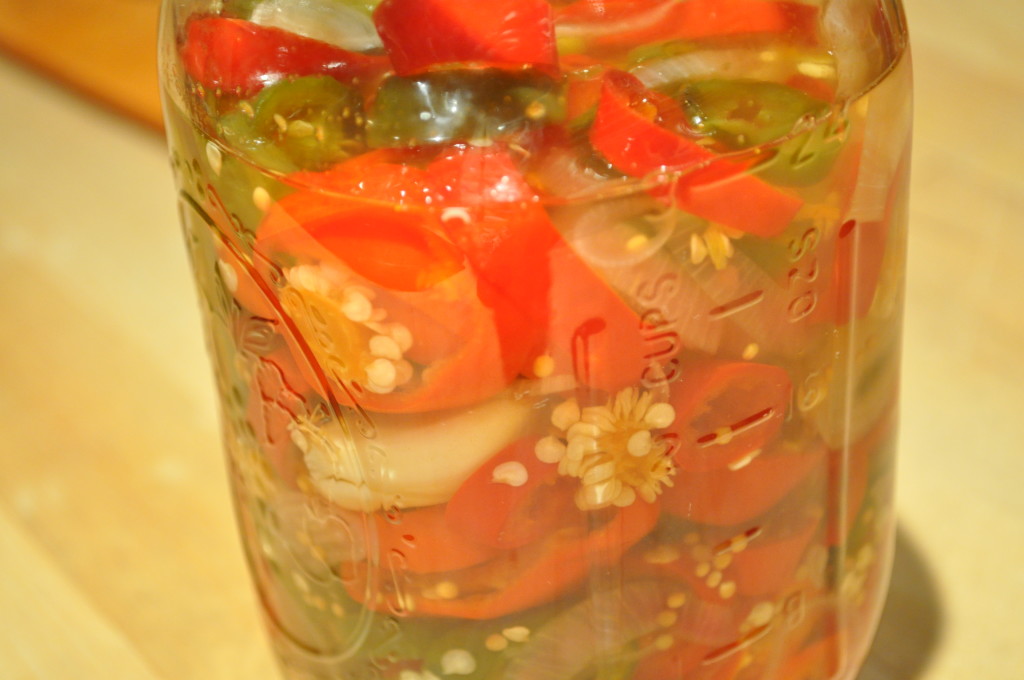
Pickled Jalapeno

Makes 1½ Quarts

2          Cups Granulated Sugar

2          Cups Apple Cider Vinegar

1          Cup Spanish Sherry Vinegar

2          Bay Leaves

1          Tablespoon Yellow Mustard Seed

6          Garlic Cloves, Thinly Sliced

1          Teaspoon Coarse Sea Salt

½         Teaspoon Freshly Ground Black Pepper

2          Pounds Red and Green Jalapeños, Stems Removed, Thinly Sliced Crosswise, Seeds Left Intact

1          Cup White Pearl Onions, Peeled and Left Whole (You Can Use Frozen)

In a large sauce pan add the sugar, vinegars, bay leaves, mustard seed, garlic cloves, salt and pepper. Bring the mixture to a boil for 10 minutes, until slightly reduced and syrupy.

Add the sliced Jalapeños and the pearl onions to the pan and bring back to a boil. Immediately remove from the heat and let the peppers cool in the liquid.

Put the peppers into glass canning jars and pour in as much of the liquid as possible to cover the peppers. Cool completely in the jars before covering and refrigerating.

Pickled Jalapeños will last several months in the refrigerator as long as they are covered with the liquid.

Pickled Green Beans

Makes 2 Quarts

4          Garlic Cloves, Peeled and Thinly Sliced

4          Sprigs Fresh Oregano

2          Cups Water

2          Cups White Balsamic Vinegar

2          Teaspoons Coarse Sea Salt

1          Cup Granulated Sugar

2          Pounds Green Beans, Trimmed to Fit Standing Up in Quart Size Glass Jars

In a medium sized non-reactive saucepan combine all of the ingredients, EXCEPT the green beans, and bring the mixture to a boil. Reduce heat and simmer for 10 minutes.

Meanwhile, place the green beans standing up in the jars. Pack the beans semi-tight. You want the liquid to surround each bean.

Pour the hot mixture over the green beans. Cool completely before covering the jars and refrigerating.   The beans keep, refrigerated, for up to one month.

Pickled Corn Relish
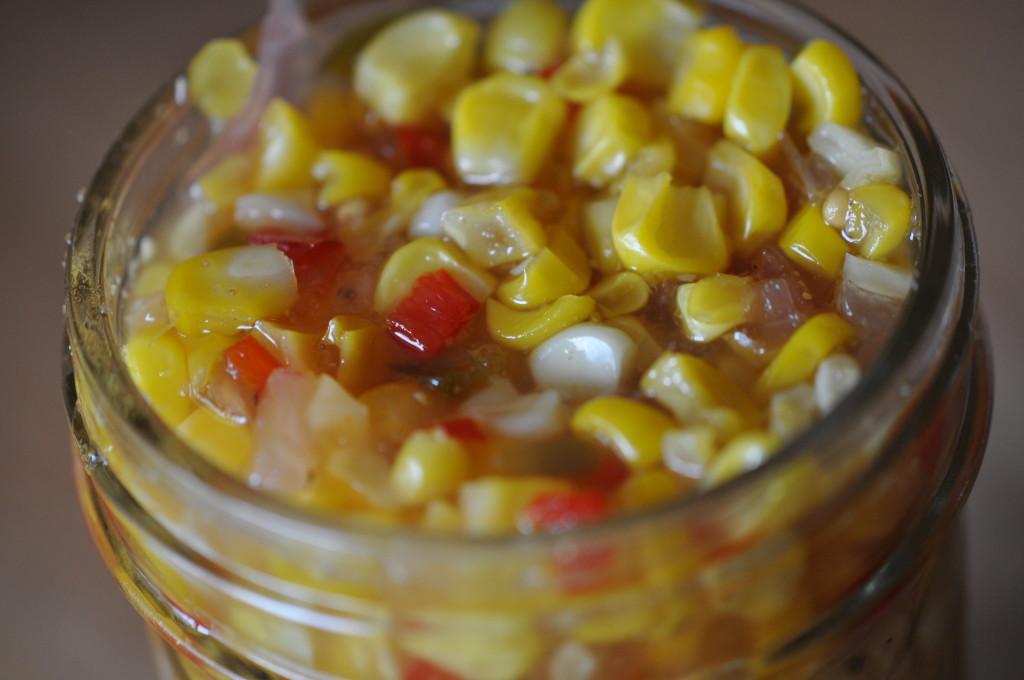
Corn Relish

I love this relish because it can be used in so many ways. It is a great accompaniment for Corn Cakes Topped with Pulled Pork, or you can use it in a tossed salad with pickled onions and Balsamic Honey Mustard Vinaigrette. I even like it on a BBQ Pork or Chicken Sandwich.

Makes About 1 Quart

2          Cups Granulated Sugar

2          Cups Apple Cider Vinegar

1          Teaspoon Yellow Mustard Seed

3          Garlic Cloves, Finely Minced

1          Tablespoon Cumin Powder

6          Cups Fresh Corn Kernels (Shucked From About 8 Ears of Corn)

1          Medium Size Red Bell Pepper, Finely Diced

½        Cup Red Onion, Finely Diced

1          Jalapeno, Seeded and Finely Diced (Don’t De-Seed If You Like It Hot)

1          Teaspoon Coarse Sea Salt

½         Teaspoon Freshly Ground Black Pepper

In a medium-large saucepan bring the sugar, vinegar, mustard seed, garlic and cumin to a boil. Cook at the boil until the mixture becomes slightly syrupy, about 7 minutes. Add the corn, red pepper, red onion, jalapeno, salt and pepper and bring back to a boil. Reduce heat to simmer and cook for 5 minutes. Remove from heat and let rest for 15 minutes.

Place the corn mixture in a quart glass jar being sure the corn is completely covered with the pickling liquid. Cool completely. Cover the jar and refrigerate for as long as a month.

Drain off the liquid when you serve the relish.

There you have it: A Pickling Frenzy. ENJOY and have FUN!


Posted in Accompaniments, Ahh Haa Moments, Condiment, Curry, Food For Thought, Onions, Pickled Fruit, Pickled Veggies, Pickling | Tagged , , , , , , , , , , , | Comments Off on Pickling

Summer Fruit Pie and Other Sumptuous Summer Fruit Desserts

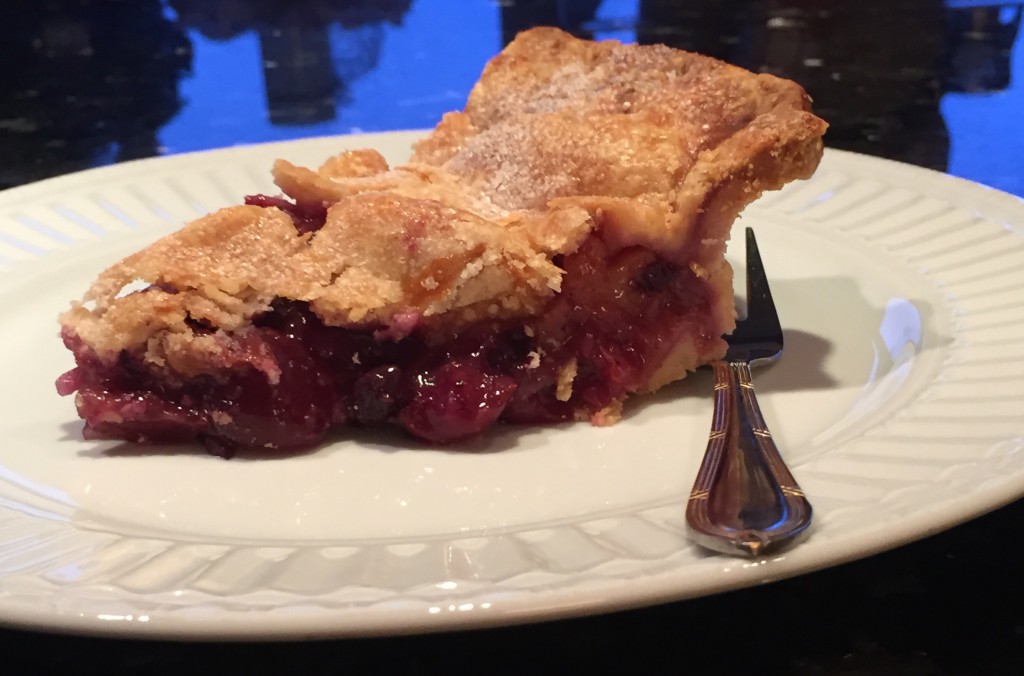
Summer Fruit Pie


Summer Fruit Pie

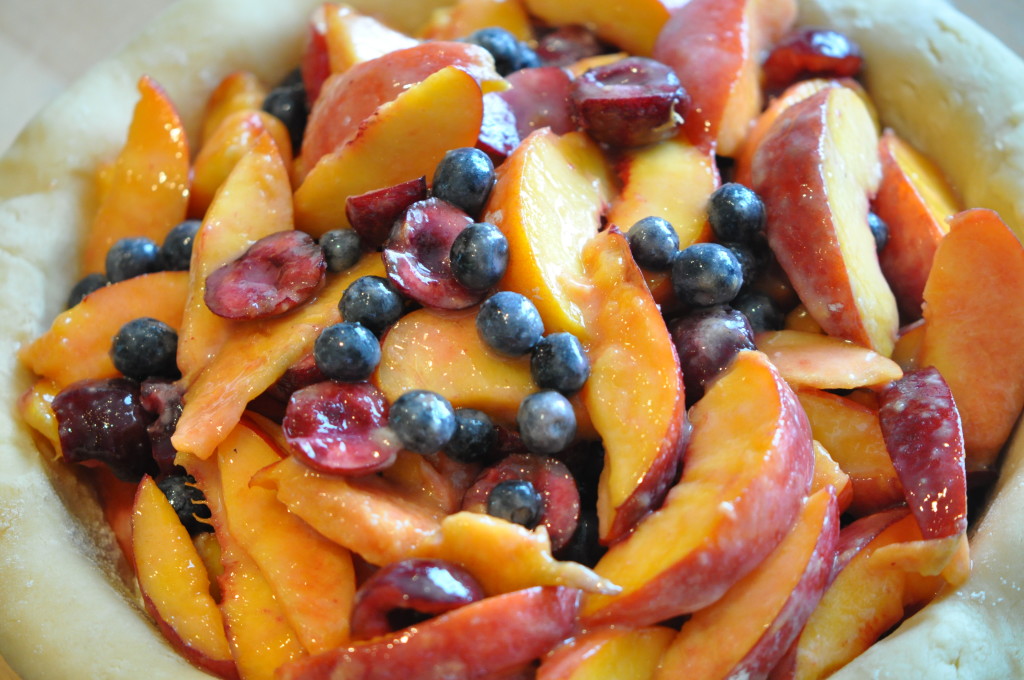
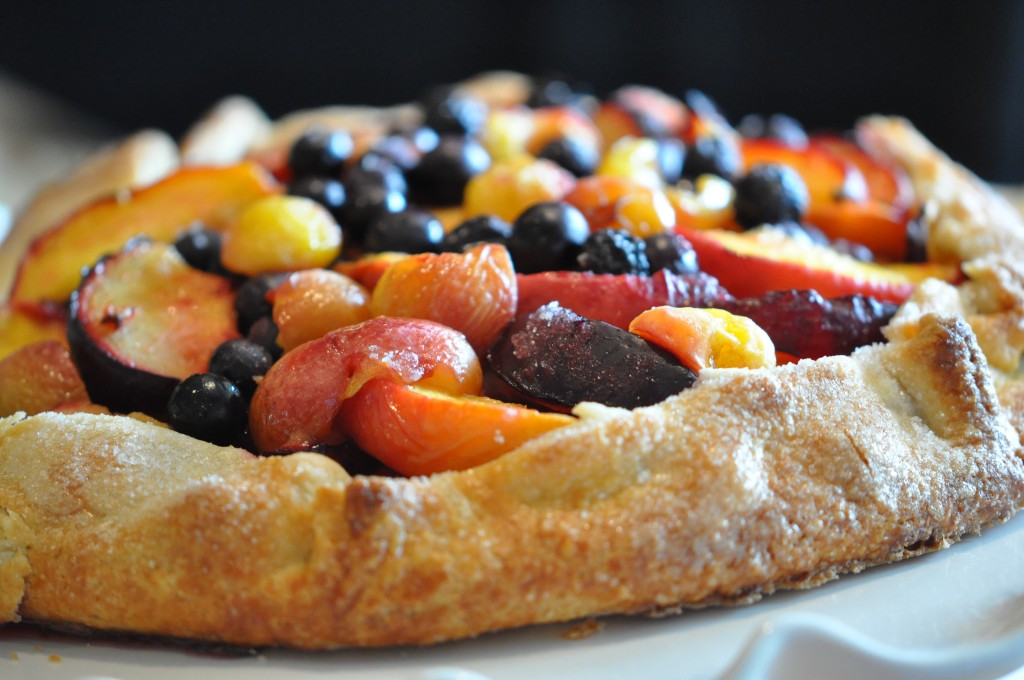
Summer Fruit PieThe time is Ripe for a Summer Fruit Pie.  This delicious melange of Peaches, Nectarines, Blueberries and Cherries is enough to send a lover of fruit to Nirvana. When selecting the peaches and nectarines, be sure they are not too soft. Firm yet ripe is the best way to describe what condition the fruit should be in. No need to take the skin off the peaches and nectarines as the skin melts away during baking. A little trick I learned from a dear departed friend oh so many years ago. Thank you Ruthie Smith.
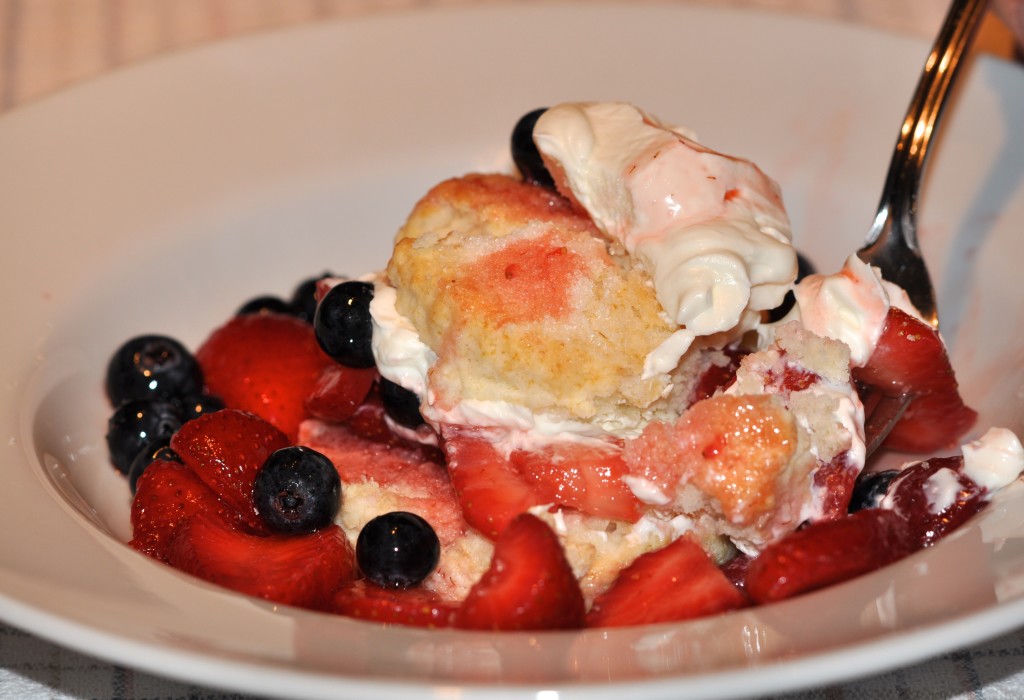
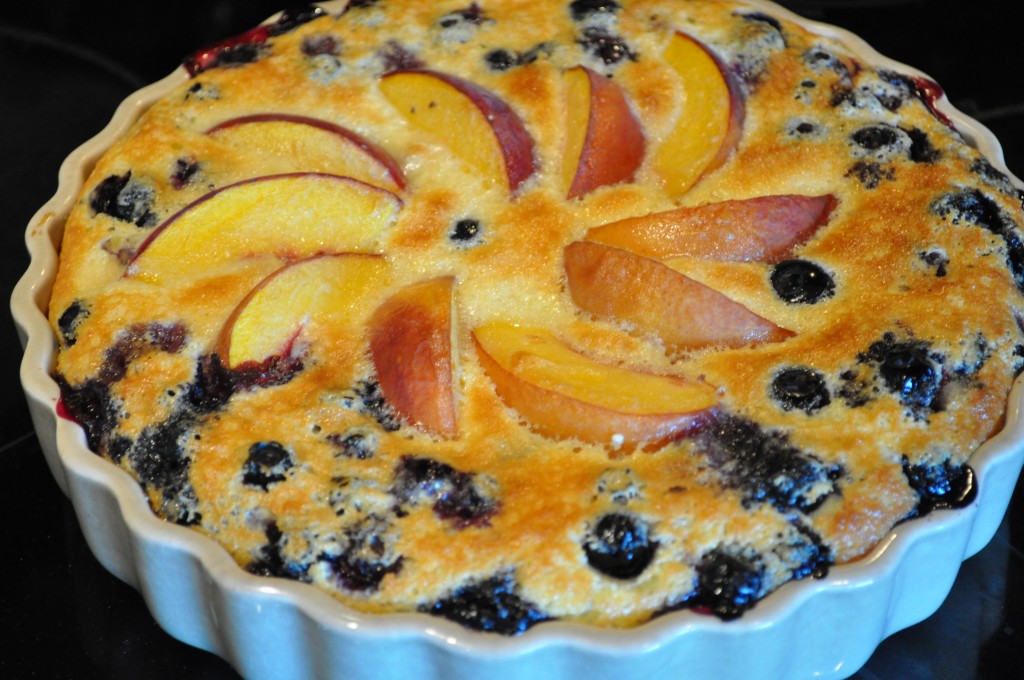
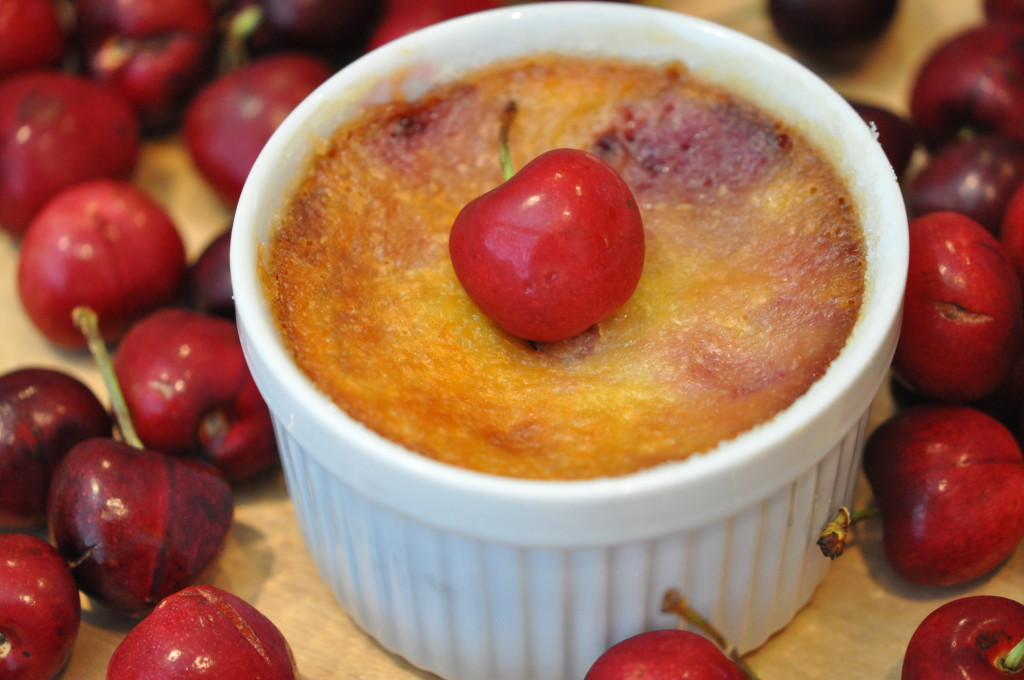
For more summer fruit desserts check out:

Strawberry Shortcake

Strawberry Shortcake

Peach and Blueberry Clafouti

Peach and Blueberry Clafouti

Cherry Clafouti

Cherry Clafouti Summer Fruit Crostada

Summer Fruit Crostada

Summer Fruit Crostada

Summer Fruit Pie

Summer Fruit Pie

Makes One 9” Deep Dish Double Crust Pie

1          Recipe Pate Sucre

3          Medium Size Peaches, Ripe But Firm, Skin On, Sliced ½” Thick

3          Medium Size Nectarines, Ripe But Firm, Skin On, Sliced ½” Thick

1 ½     Cup Fresh Blueberries

1 ½     Cup Pitted Fresh Cherries, Sliced in Half

½         Cup Granulated Sugar

¼         Cup All-Purpose Flour

¼         Cup Corn Starch

1          Teaspoon Fine Sea Salt

2          Tablespoons Cold Unsalted Butter Cut into Small Pieces

1          Large Egg Beaten with 1 Tablespoon Cold Water for Egg Wash

Coarse Sanding Sugar for Pie Top

Preheat oven to 425°. Place the oven rack in the lower third of the oven.

In a large bowl combine the Peaches, Nectarines, Blueberries, Cherries, sugar, flour, cornstarch and sea salt. Toss until well combined. Set aside.

On a lightly floured surface, roll out one disk of pate sucre into a 11” to 12” circle approximately 1/8” thick. When rolling, add a little flour to the top of the pastry so the rolling pin won’t stick. To make a evenly round circle when rolling make a quarter turn with the pastry. In other words, give a few rolls over the pastry, lift the pastry off of the rolling surface and turn it to the right 90 degrees. Do that three times while rolling and you will have a perfect circle. Gently roll the pastry up onto the rolling pin and lift over the top of a 9” deep dish pie dish and roll out. Gently press into the pie dish. You should have about a 1” overhang.

Place the fruit mixture into the pastry-lined dish evenly distributing the apples. This will allow for more even cooking. Pour any juices that may be in the bottom of the bowl over the top of the apple mixture. Dot the apple mixture with the 2 tablespoons of cold butter pieces. Brush the edges of the pastry with the egg wash.

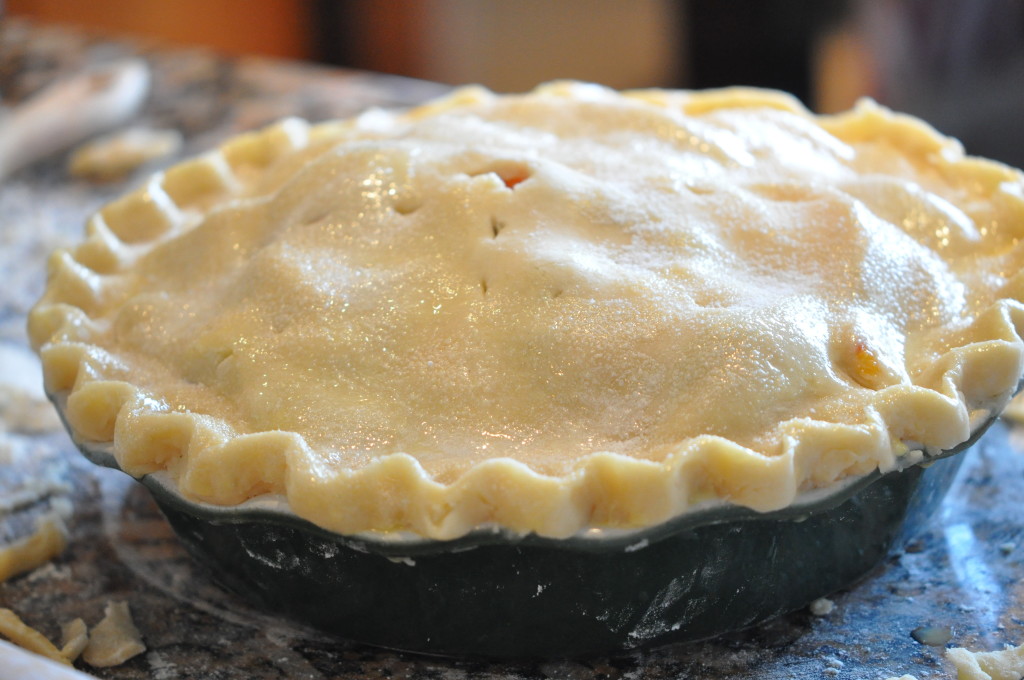
Roll out the second disk of pastry in the same manner as the first. Place the rolled pastry over the fruit. Seal the edges by trimming with a scissor. Press the edges decoratively with your thumb and forefinger.

With a sharp thin knife make a whole in the top of the pie to let out the steam while it cooks. You don’t want it to explode in the oven – and believe me, it will if you don’t vent the pie. Brush the top of the pie with the egg wash and sprinkle with the sanding sugar.

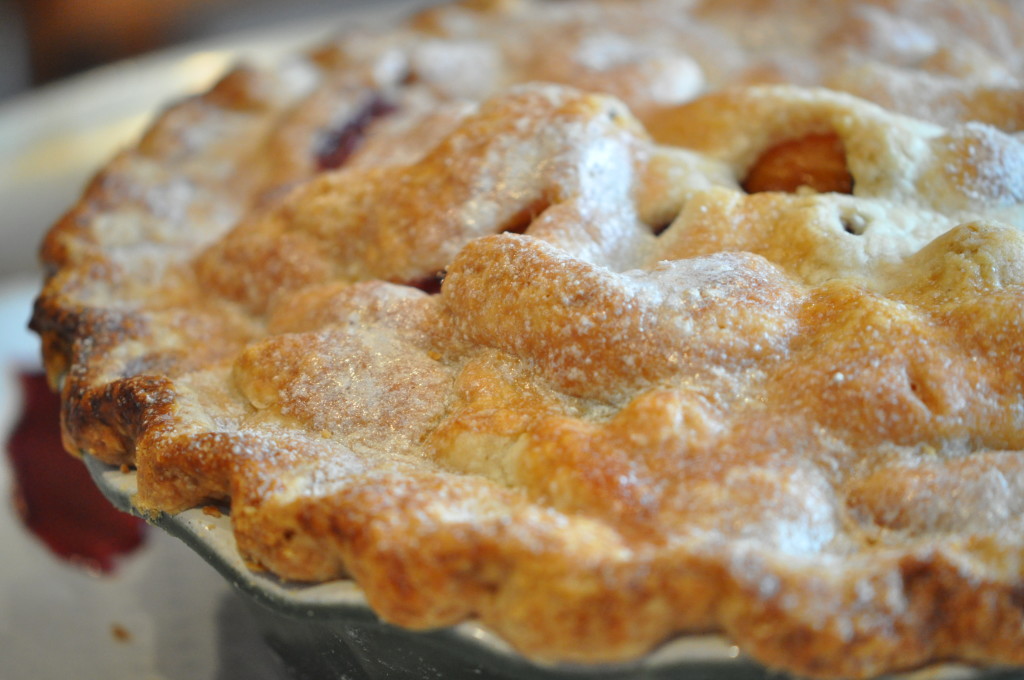
Place the pie on a sheet pan with holes (such as a pizza pan) lined with parchment paper. Bake the pie for 15 minutes at 425° and turn down the oven temperature to 375°. Bake the pie for 1 hour more or until the top is nicely browned and the juices are bubbling. You will see some of the juice leek out of the pie on the side. If the crimped edge of the pie is browning too quickly during baking make a foil circle to wrap around the edge.

Remove from the oven to a wire cooling rack and let the pie cool completely before serving.

Enjoy the Summer Fruit. It will be gone sooner than we think.

camille@camillecooksforyou.com

Posted in Ahh Haa Moments, Blueberries, Cherry Clafouti, Clafouti, Custard, Dessert, Desserts, Food For Thought, Fresh Fruit, Fruit Desserts, Mixed Berries, Nectarines, Pastry Crust, Pate Sucre, Peach and Blueberry Clafouti, Peaches, Pie, Recipes To Share, Strawberries, Summer Fruit Crostada | Tagged , | Comments Off on Summer Fruit Pie and Other Sumptuous Summer Fruit Desserts

Burgers and Ribs and Beer Can Chicken, OH MY!

The 4th of July is just a few days away and I will be firing up the Weber to grill up some delicious traditional 4th of July fare.  Here are some of my favorite grilling recipes guaranteed to make you the GRILL MASTER OF YOUR WORLD!

THE BEST BURGER EVER

Hamburger Heaven

Read this and you, too, can make the best burger you have ever eaten. The secret is not a secret at all, but a new version of the old favorite. I truly do not like most burgers. They are boring and have absolutely no taste. Even if you cook the burger rare it still is Blah. I thought about this for a very long time and decided I was going to try to make the most tasty burger but to do that you have to use tasty meat. You can’t get a flavorful burger by using just plain old ground chuck or ground sirloin. Chuck is tasteless and sirloin is dry. Even mixing the two doesn’t do justice to the burger.

Here is my solution: 50% ground chuck and 50% ground short rib. You read that right – Short Rib. You will not believe your mouth when you bite into a burger mixed with this combo.

I had the butcher take the bone off the short ribs and asked him to grind it for hamburger and to give me the same amount of ground chuck as the ground short rib. The result was the tastiest burger I have ever had. You could cook this well done and it will taste awesome.

Cook your burger the way you like – grilled, pan seared, on the griddle, broiled. It doesn’t matter. It will make your mouth scream with pleasure.

I am a purest when it comes to what to put on my burger. I really don’t like to have a burger with so much stuff on it that it sits 8 inches high and it is piled with every condiment you can think of. You can’t even taste the burger and believe me you will want to taste the burger if it is half chuck and half short rib. PLUS, the most annoying thing for me is to have to eat a burger with a fork and knife because it is too messy to eat it the way it was meant: On the bun and in your hands.

BBQ Pork Ribs

Brining the ribs makes the meat more tender and flavorful and moist. Cooking the ribs on the grill in the low-slow-indirect heat manner makes them truly delicious. You can use the Wet Brine I have here or a Dry Salt Brine. I’m starting to like the Dry Salt Brine because it is less messy and extremely easy to do. No matter which brine you choose you will have great results.

For the Dry Salt Brine

½      Teaspoon Kosher Salt For Each Pound Of Meat

OR

For the Wet Brine

8          Cups Water
½         Cup Coarse Sea Salt
½         Cup Granulated Sugar
1          Teaspoon Whole Black Peppercorns
2          Bay Leaves

For the Ribs

2         Racks Pork Back Ribs (About 2 Pounds Each Rack) Membrane Removed from        Backside of Ribs
½         Cup Southwest Spice Rub
1½      Cups BBQ Sauce

BBQ Ribs

BBQ Ribs

For The Wet Brine

In a 3-quart saucepan combine all the brining ingredients and bring to a boil to dissolved the salt and sugar. Remove from the heat and add 4 cups of ice to the pan. Cool the brine completely before pouring over the ribs.

Place the racks of ribs in a plastic container or ceramic deep-sided dish and pour the cooled brine over the ribs. Refrigerate for no more than 4 hours and no less than 1 hour.

After the required amount of brining time, remove the ribs from the brine and pat dry with a paper towel. Discard the brine.

OR

For The Dry Brine

Sprinkle the Kosher salt all over the ribs on both sides and gently rub it around. Refrigerate for 2 to 3 hours before grilling.

After Brining rub the racks of ribs with the Southwest Spice Rub. Let stand at room temperature for 30 minutes before grilling.

If using a charcoal burning grill, build a split fire. When the coals are ashy white and hot place the ribs, meat side up, in the center of the grill with no coals. You want to maintain a cooking temperature of 300° to 325° for the entire time. Cover the grill with its lid and cook the ribs low and slow for about 1¼ hours. They should be tender but not falling apart. After that time generously brush the ribs with the BBQ Sauce. Return the lid to the grill and cook for 30 minutes more.

Remove the ribs from the grill and let rest 15 minutes before serving.

Beer Can Chicken

Beer Can Chicken

Beer Can Chicken

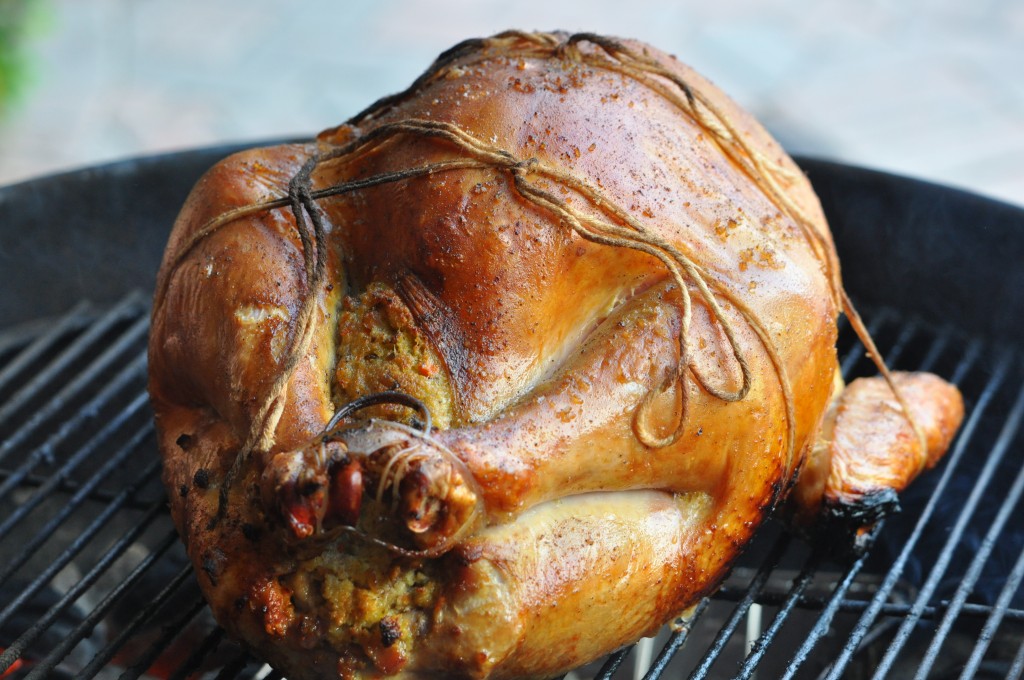
Even though the chicken is pretty goofy looking sitting on a can of beer, on the grill, looking like a Saturday Night Live Skit waiting to happen, chicken cooked over a can of beer is the most succulent chicken I have ever tasted.  You won’t get a beer flavored chicken but one so moist you will be astounded. Once you taste this delight I doubt if you will ever cook a roasted chicken in any other manner.

1    Can Imported Beer, Pop Top Pulled
1     5 LB. Roasting Chicken
¼   Cup XVOO
1    Tablespoon Coarse Sea Salt
1     Teaspoon Freshly Ground Black Pepper
1     Tablespoon McCormick’s Montreal Seasoning

If using a charcoal burning grill, build a split fire.  Light the fire and when the coals turn white and you can hold your hand over it by 5 inches for only a few seconds you have a medium hot fire.  Place the grill over the coals.  If using a gas grill, heat the grill to medium high leaving the center burner off.

Meanwhile, rinse the chicken with cold water and pat dry with paper towels.  Rub the olive oil all over the chicken and sprinkle the salt, pepper and Montreal seasoning inside and outside of the chicken.  Place the chicken over the OPENED can of beer.  Place the chicken sitting on the beer can onto the grill.  Place the cover on the grill (or close it if using a gas grill) and cook the chicken for 1 1/4 to 1 1/2 hours or until an instant read thermometer registers 185 when inserted into the thickest part of the thigh and 165 when inserted into the thickest part of the breast.  Carefully remove the chicken and beer from the grill onto a platter.  Lift the chicken off of the can and let the chicken rest for 15 minutes before carving.

Have a Happy, Delicious, Safe 4th of July!

Posted in Ahh Haa Moments, BBQ, BBQ Ribs, BBQ Sauce, Beer, Burgers, Charcoal Grill, Chicken, Food For Thought, Hamburgers, Sauces | Tagged , | Comments Off on Burgers and Ribs and Beer Can Chicken, OH MY!

Cornmeal Biscotti with Dried Cranberry And Pistachio

Cornmeal Biscotti with Pistachio and Dried CranberryHere’s a Biscotti recipe that will delight everyone. The cornmeal gives the Biscotti crunch, the cranberries give sweetness and the pistachios give sophistication. I think you will be very pleased with the results.

Makes About 2 Dozen Slices

4          Ounces (1 Stick) Butter, Room Temperature

1          Cup Granulated Sugar

3          Large Eggs

1        Teaspoon Pure Vanilla Extract

1¼      Cups All-Purpose Flour

1¼      Cups Cornmeal (Medium to Fine Stone Ground)

½         Teaspoon Baking Powder

¼        Teaspoon Salt

1          Cup Chopped Pistachios

1          Cup Chopped Dried Cranberries or Dried Cherries

Preheat oven to 375°.

In a small bowl whisk together the flour, cornmeal, baking powder and salt.

In the bowl of a standing mixer fitted with the paddle attachment, cream the butter and sugar until light and fluffy. Add the eggs, one at a time, making sure each egg is incorporated before adding the next. Add vanilla. Mix in the dry ingredients and blend until well combined.   Add the chopped pistachios and cranberries (or cherries). Mix well.

Transfer the dough to a parchment lined cookie sheet pan and make two long loaves, each about 3 inches wide, spacing them several inches apart. The dough is extremely soft, almost a stiff-like batter. Flour your hands when making the logs and you will find it much easier to handle the dough.

Bake for 15 – 20 minutes or until the tops start to brown and crack just slightly. Remove from oven and let cool 10 minutes. Slice the loaves into ½ inch to ¾ inch slices and lay cut side down onto an unlined cookie sheet pan. Bake for 10 minutes: turn slices over and bake for an additional 10 minutes or until the slices have firmed up and are toasted. Remove from pan and cool on a wire rack.

Biscotti will keep in an airtight container for at least a month. (These slices are so good that the most likely be eaten in a day or two).

Hints and Tips: When I baked the logs side-by-side with a few inches of separation, they spread out and touched each other. At first I thought this was a problem but it turned out to be exactly what should happen. When I took them out of the oven after the first baking I ran a knife done the middle to separate the two loaves. The touching loaves once separated had no effect on the cutting of the slices.

camille@camillecooksforyou.com

Posted in Ahh Haa Moments, Biscotti, Cookies, Cornmeal, Dessert, Dried Cranberries, Dried Fruit, Food For Thought, Pistachio | Comments Off on Cornmeal Biscotti with Dried Cranberry And Pistachio

Lemon Curd

DSC_0676

Nothing says spring and summer like Lemons and Lemon Desserts. Recently I was asked for my Lemon Curd recipe and decided to blog about Lemon Curd Tartlets with Italian Meringue. What I love about this Lemon Curd recipe is the simplicity of the preparation and the deliciousness of the tangy lemon topped with sweet meringue. This is a marriage made in Lemony Heaven.

Don’t be thrown off by the many steps to making and putting the tarts together. You can make the pastry, bake off the tart shells and make the lemon curd a day in advance of serving. Actually, you could even make the curd two days in advance since the longer it sits the better set it will be. Make the meringue on the day of serving.

Store the Lemon Curd in a glass jar and not a plastic container. There is something about putting it in a jar that helps to keep its thick consistency.

Lemon Curd Tartlets

Lemon Curd Tartlets Lemon Curd Tartlets

Makes Eight 4″ Tartlets

1         Recipe Pate Sucre

1         Recipe Lemon Curd

1         Recipe Italian Meringue

To Assemble the Tarts

Divide the Pate Sucre into 8 equal pieces. Roll each piece, one at a time, into 6 inch rounds, 1/4 inch thick and gently place into the tart pans with removable bottoms. Press the dough into the sides and bottom of the tart pan and with the rolling pin, roll over the tart pan to trim the dough.

Prick the bottom of each tart with a fork and refrigerate for 30 minutes before baking. Place a round piece of foil in the bottom of each and bake for 10 minutes. Remove the foil and bake for another 10 minutes until the shells are golden brown. Rotate the pan when removing the foil round. (The reason for the foil round is to keep the pastry from puffing up.)

Remove the tartlets from the oven and cool completely on a wire rack. (You can bake the tartlets the day before.) Store on the counter uncovered.

When ready to serve,fill each tart with the Lemon Curd and top with some of the Italian Meringue. Brown the meringue with a kitchen torch or place under a preheated broiler and cook the meringue until lightly browned. Keep your eye on them as it takes only seconds to brown the meringue.

Lemon Curd

Lemon Curd

Makes 2 1/2 Cups

10       Large Egg Yolks (Reserve the Whites for Another Use)

¾         Cup Granulated Sugar

1          Cup Freshly Squeezed Lemon Juice (From About 6 Large Lemons)

Finely Grated Zest of 3 Lemons

6          Tablespoons (3 Ounces) Unsalted Butter, Room Temperature

In a medium size heatproof bowl whisk together the yolks, sugar, lemon juice and zest. Place bowl over a pan of simmering water being sure the bottom of the bowl does not touch the water. Whisk the mixture with a wire whisk continually until the mixture becomes thickened to the consistency of pudding, about 10 minutes. (You must whisk continually to prevent the eggs from scrambling.)

Remove the bowl from the pan and whisk in the butter by bits until completely incorporated. Transfer the curd to a clean bowl and place a piece of plastic wrap directly onto the surface of the curd to prevent a skin from forming. Cool to room temperature before refrigerating.

(For a very smooth consistency, strain the warm curd through a fine mesh sieve into a bowl. Proceed as above. Personally, I like the little bits of zest in the curd and I usually skip the straining step.)

camille@camillecooksforyou.com

Posted in Ahh Haa Moments, Dessert, Food For Thought, Italian Meringue, Lemon, Pate Sucre | Tagged | Comments Off on Lemon Curd

A Simple Light Dinner For A Spring Evening

What could be better than a simple light dinner now that the weather is starting to get warmer? Many of us are using our verandas to relax and enjoy the beautiful weather and to partake in our evening meal. Much of the preparation for this menu can be done in advance: The beets and cherry tomato compote can be made days in advance and the vinaigrette the day before.  The Clafouti is best made on the day of serving but it is so incredibly easy that it won’t interfere with your time on the veranda.  And, of course, by now you are an expert in making Crème Fraiche and most likely there is a jar in your refrigerator.

Springtime Dinner Menu

Blood Orange Salad with Roasted Baby Yellow Beets, Fresh Fennel and Watercress Drizzled with Orange Infused Vinaigrette

Mussels with Chorizo Sausage and Cherry Tomato Compote

Peach and Blueberry Clafouti

““““““““““

Blood Orange Salad with Roasted Baby Yellow Beets, Fresh Fennel and Watercress Drizzled with Orange Infused Vinaigrette

Blood Orange Salad with Yellow Beets and Fennel

If you cannot find Blood Oranges use Navel Oranges instead and to keep the color interesting use Baby Red Beets.

Serves 4 

6           Roasted Baby Yellow Beets Cut into Quarters

1          Medium Fresh Fennel Bulbs, Trimmed of Frons, Core Removed and Thinly Sliced Lengthwise (use a Mandolin if you have one)

2          Blood Oranges, Skin and White Pith Cut Off, Sliced in Half Lengthwise and Each Half Sliced into ¼” Slices Crosswise

3          Cups Baby Watercress, Trimmed of Long Thick Stems

Orange Infused Vinaigrette

Put the vinegar, orange juice, shallot and mustard in a blender and process until pureed. With the motor running add the oil in a slow and steady stream and blend until completely emulsified. Add the salt and pepper and blend until combined. Transfer to a glass jar or a squeeze bottle and refrigerate until ready to use.

In a medium bowl toss the fennel, oranges and beets with some of the vinaigrette; enough to barely coat the salad. Divide the salad evenly between 4 salad plates and top each plate with some of the watercress. Lightly drizzle some of the Orange Infused Vinaigrette over the watercress. Do not overdress the salad as you want to be able to taste each component. 

Mussels with Chorizo Sausage and Cherry Tomato Compote

Mussels Mussels

There’s something so very appealing about the aroma of mussels: The sweet smell of the sea is evident in these little crustacean morsels. The best mussels are mid-size from Prince Edward Island (PEI), Nova Scotia. They are readily available and easy to find. When buying them, ask your fishmonger to remove the beard: That little black thing sticking out of the shell. Most likely it is already done but confirm to be sure.

Serves 4 As A First Course

2          Tablespoons XVOO

½         Cup Red Onion, Thinly Sliced

4          Roasted Garlic Cloves, Smashed

1          Pound Fresh Chorizo Sausage Removed from Casing

½         Cup Madeira Wine

½         Cup Home Made Chicken Stock or Low Sodium Canned Chicken Broth

1          Cup Cherry Tomato Compote

1          Teaspoon Coarse Sea Salt

½         Teaspoon Freshly Ground Black Pepper

Pinch of Crushed Red Pepper Flakes

3          Pounds PEI Mussels, Cleaned and Beards Removed

1          Tablespoon Fresh Flat Leaf Parsley, Finely Chopped

4          Thick Slices Crispy Garlic Crostini

In a large sauté pan, large enough to hold all of the mussels, heat the oil over medium heat. Add the red onion and roasted garlic and sauté until onions just begin to soften. Add the Chorizo Sausage and sauté until sausage is cooked through. Add the wine and stock and reduce by half. Add the cherry tomato compote, salt, pepper, crushed pepper flakes and bring to a rapid boil. Lower the heat and simmer slowly uncovered for 10 minutes.

Add the mussels to the pan and toss to get the mussels and sauce incorporated. Bring to a boil and cover the pan. Reduce the heat and cook until the mussels are completely open, about 3 to 5 minutes.

Divide the mussels and sauce between 4 bowls and sprinkle with chopped parsley. Put the Crostini on the edge of the bowl with part of it in the mussels. Serve immediately.

Peach and Blueberry Clafouti

Peach and Blueberry Clafouti

A Clafouti is a simple custard and fruit pudding-like dessert. Super easy since there is no crust to deal with and it is delicately delicious. I like to keep the skin on the peaches because it adds a bit more flavor and, besides, most of the skin will melt away. This is a dessert that can be made at the last minute without any fuss.

1          Tablespoon Melted Unsalted Butter

1          Tablespoon Granulated Sugar

3          Medium Size Peaches, Sliced Into Wedges

1          Cup Fresh Blueberries

½         Cup Granulated Sugar

1          Tablespoon Lavender Sugar (Optional)

6         Tablespoons All-Purpose Flour

½         Teaspoon Fine Sea Salt

1/4         Teaspoon Freshly Grated Nutmeg

3          Large Eggs

1½      Cups Heavy Cream

1          Teaspoon Pure Vanilla Extract

            Crème Fraiche for Garnish

Preheat oven to 375°. Brush a 10”  shallow ceramic or glass baking dish (pictured) with the melted butter and sprinkle the 1 tablespoon granulated sugar evenly in the dish.

Arrange the peaches in a concentric circle on the bottom of the dish and distribute the blueberries evenly over the peaches.

In a small bowl combine the ½ cup granulated sugar, Lavender sugar, flour, sea salt and nutmeg.

In the bowl of a standing mixer beat the eggs until light and fluffy. With the mixer speed on low, gradually add sugar/flour mixture and heavy cream in thirds, beginning and ending with the sugar/flour mixture and mix until completely incorporated. Gently blend in the vanilla.

Pour the mixture over the peaches and blueberries and bake for 40 minutes, until the custard is firm and has taken on a light golden color.

Serve warm or at room temperature with a dollop of crème fraiche.

Enjoy the change in the weather and enjoy this menu.

camille@camillecooksforyou.com

Posted in Accompaniments, Ahh Haa Moments, Beets, Blood Oranges, Blueberries, Cherry Tomato Compote, Chicken Stock, Chorizo Sausage, Clafouti, Custard, Dessert, Entree, Fennel, Food For Thought, Fruit, Fruit Desserts, Hints and Tips, Menus, Mussels, Peaches, Recipes To Share, Salad, Sausage, Seafood, Vinaigrette | Comments Off on A Simple Light Dinner For A Spring Evening

Corned Beef and Cabbage Refresher Course

I will be cooking my traditional Oven Braised Corned Beef with Irish Beer and Irish Whiskey on Tuesday along with the best Irish Soda Bread ever and if you click on the links you will go directly to the recipes. I am going to cook my cabbage a couple of different ways just to shack it up a bit and keep things interesting.  I am going to make Roasted Cabbage and Sautéed Cabbage. After making these two recipes I have decided that I like cabbage cooked all ways.  

Oven Braised Corned Beef with Irish Beer and Irish Whiskey

Dinner Is Served

Irish Soda Bread

Irish Soda Bread Roasted Cabbage

Roasted Cabbage

Sautéed Green Cabbage

Sautéed Cabbage

Happy St. Patrick’s Day to All. 

Erin go Bragh!

camille@camillecooksforyou.com

Posted in Accompaniments, Ahh Haa Moments, Beer, Cabbage, Corned Beef, Food For Thought, Vegetables, Whiskey | Tagged , | Comments Off on Corned Beef and Cabbage Refresher Course