Chicken Breast Stuffed with Mozzarella, Spinach, Sun Dried Tomatoes and Prosciutto

Here is a delicious chicken dish that is sure to please your guests. It not only tastes great but also looks really beautiful when sliced and placed on each diner’s plate. This is also a perfect dish for a buffet. Slice each breast and arrange either in a concentric circle or arrange on a round plate spoke fashion. Serve with a little of the sauce and have the rest on the side for each person to help themselves. I did this stuffed chicken breast for many catered parties and it was always a big hit.

Serves 6

For the Stuffed Chicken

6          Boneless Skinless Single Lobe Chicken Breasts, 5 to 6 Ounces Each

6          Slices Prosciutto, Thinly Sliced

3          Cloves Roasted Garlic, Smashed

¼         Cup Fresh Basil Leaves

6          Scallions, Thinly Sliced Crosswise

¼         Cup Sun Dried Tomatoes Packed in Oil, Drained and Julienned

1          10 Ounce Bag Fresh Spinach

3          Ounces Shredded Whole Milk Mozzarella

2          Tablespoons Unsalted Butter

2          Tablespoons XVOO

Fine Sea Salt and Freshly Ground Black Pepper

Flour for Coating Chicken

For the Mushroom Marsala Sauce

1          Cup Red Onion, Thinly Sliced

3          Cloves Garlic, Minced

1          Lb. Baby Bella Mushrooms, Sliced

1          Cup Marsala Wine

2          Cups Homemade Chicken Stock or Canned Low Sodium Broth

1          Teaspoon Coarse Sea Salt

½         Teaspoon Freshly Ground Pepper

2          Tablespoons All-Purpose Flour

For the Stuffed Chicken

Lay the chicken breast between two pieces of plastic wrap and with a meat mallet lightly pound the thickest part of the chicken breast to the same thickness as the thinnest part.

Sprinkle a little salt and pepper on each breast and on each, place a slice of Prosciutto, an equal portion of the roasted garlic, basil leaves, scallions, sun dried tomatoes, spinach and mozzarella. Carefully roll the chicken breast and secure with a toothpick or tie with butcher twine. Refrigerate for at least 2 hours.

When ready to cook, preheat your oven to 425°F.

Dredge each rolled breast in the flour. Shake off excess. Meanwhile, in a skillet large enough to hold all of the chicken breasts heat olive oil and butter over medium high heat. When the butter stops sizzling add the chicken breast to the pan and gently brown the chicken on all sides, about 10 minutes total. Remove the chicken to a half sheet pan and place in the oven. Cook for 10 minutes.

While the chicken is cooking in the oven, to the pan used to brown the chicken add the onion and garlic and sauté until onion is translucent and beginning to caramelize. Add the sliced mushrooms and continue sautéing until the mushrooms start to just release their juices. Sprinkle two tablespoons flour over the mixture and stir to coat. Cook the mixture for two minutes. Add the Marsala wine cook until reduced and thickened. Add the chicken stock and continue cooking until slightly thickened. Season the sauce with salt and pepper.

Remove the chicken from the oven. Take out the picks (or cut twine) and place the chicken breasts in the pan with the sauce. Gently simmer in the sauce for a few minutes turning each breast to coat with the sauce. Transfer the chicken breasts to a cutting board and let them rest for a few minutes. Slice the breasts into three or four pieces on the diagonal. Spoon some of the sauce on each plate and arrange the slices on top of the sauce.

camille@camillecooksforyou.com

Posted in Accompaniments, Ahh Haa Moments, Cheese, Chicken, Chicken Stock, Food For Thought, Mushrooms, Sauces, Stuffed Chicken Breast | Tagged , , , , , | Comments Off on Chicken Breast Stuffed with Mozzarella, Spinach, Sun Dried Tomatoes and Prosciutto

Wild Rice Recipes

It’s the middle of September and Fall is visibly on it’s way. Here in South Carolina the grass goes brown and dormant for the winter and it’s starting to turn colors now. The leaves on the Forests’ Trees are starting to show hints of color change as well. The weather is a bit cooler, especially in the evening, and it makes me want to start cooking recipes for the cooler (and colder) season that will be coming upon us sooner rather than later.

Here is the first of my winter faves that feature Wild Rice as the main ingredient. My initial experience with Wild Rice came in 1979. I was working at La Vielle Maison in Boca Raton, a Mobile Guide 5 Star restaurant. I fell in love with Wild Rice and ever since those days at La Vielle I’ve introduced Wild Rice to the restaurants I worked in as a Chef. When I was catering, I introduced Wild Rice  to many of my customers, also. The response was overwhelmingly great.

Wild Rice-Smoked Chicken and Lemon Cilantro Vinaigrette

Wild Rice and Chicken Soup with Mushrooms

Wild Mushroom Soup with Wild Rice and Chestnuts


Wild Rice and Vegetable Salad


Enjoy the cooler weather!

camille@camillecooksforyou.com

Posted in Food For Thought | Comments Off on Wild Rice Recipes

Two More Peach Recipes

I can’t help myself with all these peachy recipes. The recipes are so good I couldn’t resist the temptation to share. Try the Peach Tart Tatin with a dollop of Peach Semi-Freddo. I hope you give them a try.

Peach Tart Tatin

Makes One 10” Tart Tatin

½         Recipe Pate Sucre

¾         Cup Granulated Sugar

3          Tablespoons Water

¼         Unsalted Butter, Cut Into Pieces, Room Temperature

6          Fresh Peaches, Medium Ripe 

Preheat oven to 425°F.

Bring a pot of water to boiling. Drop the peaches into the boiling water for 15 to 20 seconds. With a slotted spoon, remove the peaches to a dish. Peel the skin and cut one peach in half, the remainder into quarters. Remove the pits.

In a 10” heavy ovenproof skillet with 2” sides combine the sugar and water. Over medium heat bring to a boil to dissolve the sugar. Once dissolved turn heat up to high and cook until the syrup becomes amber in color, swirling the pan occasionally and brushing down the sides with a wet pastry brush. Remove from the heat and add the butter stirring until melted and smooth. Cool for a minute or two. Place one peach half in the center round side down. Arrange the quarters round side down in a tight circle. Press remaining peach half and quarters round side down on top of the first layer.

Over medium heat cook the peaches until caramel is bubbling and thick, about 10 minutes.

In the meantime, roll out the pasty to an 11” circle and place on top of the warm peaches and tuck pastry edges round the peaches. Bake until crust is golden brown and the filling is thickened and dark, about 30 to 35 minutes.

Remove from oven and let cool for 10 minutes. Place a platter over the pan and carefully invert the tart onto platter. Serve warm or at room temperature with whipped cream or Peach Semi-Freddo.

Hints and Tips: This tart is usually made in a cast iron pan. I don’t have one and I used a non-stick Calphalon pan that worked perfectly as nothing stuck to the bottom. Plus the cast iron pan would be very heavy when inverting.

When inverting the tart I used an 11” tart pan with a removable bottom instead of a platter. It was super easy as the tart pan fit perfectly over the pan that held the tart. It was also not messy. Once inverted I then removed the side of the tart pan and left the tart on top of the removable bottom.

Peach Semi-Freddo

Makes 2 Quarts

2          Cups Peach Jam

8          Large Egg Yolks

1          Cup Granulated Sugar

1          Cup of Reserved Peach Syrup

½         Teaspoon Fine Sea Salt

4         Large Egg Whites, Room Temperature

¼        Cup Granulated Sugar

2         Cups Heavy Whipping Cream (36%)

¼        Cup Sugar

In a 2-quart saucepan, heat the jam over medium low heat. Once heated through remove from heat and strain the jam in a fine mess strained set over a bowl. Reserve one cup of the syrup. Set aside to cool to room temperature.

In a large heatproof bowl beat the yolks with the sugar, until combined, with a wire whisk. In a slow and steady stream add the 1 cup reserved peach syrup to the eggs and sugar whisking the whole time.

Place the bowl over a pan of simmering water, being careful to not let the water touch the bottom of the bowl, and whisk the egg mixture continuously until very thick and hot. It will be thick enough when you lift the whisk and the mixture lies down slowly in a ribbon shape and takes a moment to sink back into itself. Be patient, as this will take about 20 minutes. Remove the bowl from the heat and whisk for a few more minutes to help cool it down. Place the bowl in an ice water bath to cool completely, gently whisking every few minutes. Once cooled, fold the drained peaches into the cooked egg mixture (This is called the custard). Set aside.

Place the 4 large egg whites into the bowl of a standing mixer fitted with the whisk attachment and slowly beat the whites to break them up, about 30 seconds. Gradually increase the speed to high and continue to beat the whites until very soft peaks form. White the mixer running on high, gradually add the ¼ cup sugar. Beat the egg whites until stiff peaks form and the sugar is completely dissolved. Fold thoroughly, but gently, into the cooled custard.

In a clean standing mixer bowl fitted with the whisk attachment, beat the cream on medium high for a minute. Add the ¼ cup sugar and beat until light and fluffy and peaks form when the whisk is lifted out of the cream.

Fold the whipped cream into the custard thoroughly, but gently.   Put the Semi-Freddo into an air-tight container, covered and freeze for at least 8 hours or overnight before serving. Semi-freddo will last in the freezer for up to one month.

Enjoy!!

Have a very peachy day!

camille@camillecooksforyou.com

Posted in Accompaniments, Ahh Haa Moments, Cream, Custard, Dessert, Dessert/Pastry, Desserts, Food For Thought, Fruit Desserts, Pastry Crust, Pate Sucre, Peaches, Semi-Freddo | Comments Off on Two More Peach Recipes

Pork Tenderloin with Ancho Chili Preserves

It’s still peach season and I am continuing to take advantage of the season by make preserves, pies, cobblers and gelato with this year’s beautiful crop of South Carolina Peaches. I came up with this Pork Tenderloin recipe using the Ancho Chili Preserves I make with Peach Jam.

If you don”t make your own peach preserves there are plenty of good quality preserves on your grocer’s shelf.

Serves 4

1          1.5 to 2 Pound Pork Tenderloin Trimmed of Silver Skin and Fat

1          Teaspoon Coarse Sea Salt

½         Teaspoon Ground Black Pepper

½         Teaspoon Garlic Powder

¼         Cup All-Purpose Flour

¾         Cup Ancho Chili Preserves

2          Tablespoons XVOO

1          Tablespoon Unsalted Butter

2          Cups Homemade Chicken Stock or Canned Low Sodium Chicken Stock

Preheat oven to 375°F.

In a large skillet or sauté pan heat the oil and butter until hot and the butter has stopped bubbling, over medium high heat.

Rub the pork tenderloin all over with the salt, pepper and garlic powder. Dredge the pork in the flour. Reserve 1 tablespoon of the flour for the sauce. Sauté the tenderloin on all sides until golden brown, about 4 minutes on each side. Spread ½ cup of the Ancho Chili Preserves on the top of the pork. Transfer the pan to the oven and roast for 20 minutes, or until an instant read thermometer reads 140°F when inserted into the middle of the pork.

Remove the pork from the pan and set aside to rest for 10 minutes. In the mean time, drain most of the fat from the pan, leaving about 1 tablespoon of the fat. Over medium heat add 1 tablespoon of flour to the remaining fat and cook for a minute or two to make a roux. Add the chicken stock and blend it well with the roux in the pan. Add ¼ cup of the Ancho Chili Preserves and cook the sauce until nicely thickened.

Slice the pork into ½ inch slices. Spoon a bit of sauce on the plate and top with the pork.

I served my pork tenderloin with Vegetable Couscous and Braised Brussels Sprouts.

Enjoy!

camille@camillecooksforyou.com


Posted in Accompaniments, Ahh Haa Moments, Ancho Chili Preserves, Brussels Sprouts, Chicken Stock, Condiments, Couscous, Entree, Extra Virgin Olive Oil, Food For Thought, Pork, Pork Tenderloin | Tagged , , , | Comments Off on Pork Tenderloin with Ancho Chili Preserves

BBQ Season In Full Swing

Don’t let the dog days of summer get you down. The BBQ Season is in full swing and there is no better way to keep your kitchen cool than to use your outdoor grill. Be it a gas grill or a grill that uses briquettes, these recipes work well on either. The best part about grilling is the clean up: NO POTS and PANS to deal with. I love to BBQ for that reason alone.

Here are some of my favorite recipes for the BBQ. I’ve also included a couple of salads and a dessert. The dessert is the perfect way to end a meal cooked on the grill. It’s S’Mores Tart. It takes in all of the ingredients of the fun scout recipe and bumps it up a few notches. A more sophisticated take on Camp Fire S’Mores.

BBQ Pork Loin Ribs

Brining the ribs makes the meat more tender and flavorful. Cooking the ribs on the grill in the low-slow-indirect heat manner makes them truly delicious.

BBQ Ribs

 Marinated and Grilled Flank Steak

Nothing says summer more so than steak on the grill.  With the flavorful marinade in which the steak bathes and cooks, the aroma is quintessentially summer.  If you don’t have a grill you can do this on a cast-iron grill pan.  Just be sure to turn on the exhaust fan. The smoke will be intense.

Marinated and Grilled Flank Steak

Marinated and Grilled Flank Steak

Grilled Tenderloin of Beef

Rack of Pork on the Grill


 Beer Can Chicken


Grilled Whole Turkey


Maine Lobster on the Grill

Grilled Maine Lobster with Potatoes and Corn


Cedar Plank Grilled Seafood Fest


Grilled Shrimp


Moroccan Potato Salad

Roasted Moroccan Potato and Olive Salad

Asian Slaw


S’Mores Tart

There you have it. A lot of BBQ ideas for you to look over. I think I have given a wide range of recipes that will be appreciated by all.

Happy BBQ Season!!

camille@camillecooksforyou.com

Posted in Accompaniments, Ahh Haa Moments, BBQ Ribs, BBQ Sauce, Beef, Beer, Brine, Cedar Plank Grilling, Charcoal Grill, Chicken, Chocolate, Corn, Cranberries, Dessert, Dessert/Pastry, Desserts, Entree, Fennel, Fish, Food For Thought, Garlic, Graham Cracker Crust, Hershey's Special Dark Chocolate, Italian Meringue, Lemon, Lobster, Meat, Pork, Potato, Recipes To Share, Salad Dressing, Seafood, Shrimp, Sides, Sugar, Tarts, Turkey | Tagged , | Comments Off on BBQ Season In Full Swing

Peach Season Deliciousness

It’s the beginning of June and Peach season has started here in South Carolina. At Greenville’s Saturday Market I picked up the beginning of this season’s Peaches and set out to make some of my favorite Peach Desserts.

Peaches make the perfect summertime desserts. My Mom wasn’t big on dessert making but she never missed the opportunity to make something wonderful with fresh peaches. Maybe it wasn’t a cobbler but it sure was delicious. In fact the favorite way for us to have peaches in summertime when growing up was macerated in a glass of Dad’s homemade red wine. When I was a kid we were allowed to eat the peaches but not drink the wine.

You will notice that some of the recipes have blueberries. The reason for this is I believe peaches and blueberries are perfect partners for summertime desserts. Another important notable recipe reference concerns the preparation of the peaches. I do not peel them in any of the recipes. The peach skin dissolves in recipes with long cooking time (jam, pie, cobbler), plus leaving the skin on enhances the color of the filling. 

Here are a few of my Peach Recipes. I’ve included two non-dessert Peach Recipes: Ancho Chili Reserves and Peach Infused White Balsamic Vinaigrette. Click on any of the recipe titles or photos to go directly to that recipe.

Peach Jam

 Peach Cobbler

Peach Clafouti

Peach Shortcake

Summer Fruit Crostada

Summer Fruit Crostada

Summer Fruit Crostada

Summer Fruit Pie

 Ancho Chili Preserves

Peach Infused White Balsamic Vinaigrette

Hints and Tips: Peach Jam is a great accompaniment to Cheeses and Charcuterie. Ancho Chili Preserves are a delicious with Maryland Crab Cakes. The Peach Infused White Balsamic Vinaigrette is great when paired with a salad topped with blue or goat cheese.

Have a Very Peachy Summer!

camille@camillecooksforyou.com

Posted in Accompaniments, Ahh Haa Moments, Ancho Chili Preserves, Crostada, Dessert, Dessert/Pastry, Desserts, Food For Thought, Jam, Peaches, Pie, Salad Dressing, Shortcake, Tarts | Tagged , , , , , , , | Comments Off on Peach Season Deliciousness

Squash Blossoms Stuffed

I found these beautiful blossoms at the market yesterday and I could not be any more excited about something this wondrous. In all of the years I lived in FLL I could not find Squash Blossoms at any market. I could order on line but they were no where in sight in any of the stores in town. Now that I live in a real farm to table community I have no trouble finding gems like these or other hard to find produce items.

Tonight I stuffed and battered the blossoms. I coated them with a light batter and quickly fried these gorgeous flowers from God. I did not want to stuff with any thing heavy or overpowering so I chose to stuff with a small thin slice of Cappicola and a little saffron rice I had left over from a previous night’s dinner. The results were spectacular and the only thing I would change is to make more since 2 per person was not enough.

Here is what I did:  Heat about two inches of grape seed oil or canola oil in a deep sided pan to 350ºF. Use a candy thermometer since you should be as accurate as possible when heating oil.

For the batter I stirred together 3/4 cup of all purpose flour and 1/2 teaspoon of fine sea salt. I slowly added 8 ounces of Club Soda whisking the whole time to blend and smooth the batter. It will be thickish but not gloppy. A few lumps are ok.

Dip the flowers into the batter and gently shake off any excess batter. Place in the hot oil and fry until crispy and slightly golden, turning them in the oil to get all sides crisp and golden, about 3 minutes total. (Do not crowd the pan.)

Drain on a paper towel for a moment. Serve immediately. No sauce necessary as you do not want to hide the flavor of these glorious blossoms.

Posted in Accompaniments, Ahh Haa Moments, Food For Thought, Fried, Squash, Squash Bloxxoms, Vegetables, Zucchini, Zucchini Flowers | Comments Off on Squash Blossoms Stuffed

Strawberry Season’s Bounty

It’s Strawberry Season in South Caroline and I am taking advantage of the most beautiful Strawberries I have ever seen. We found a place called Strawberry Hill, USA, in Gaffney, South Carolina, where we thought we would be able to pick our own Strawberries. Thankfully they pick them for you. Whew, happy for that. I picked up 2 gallons of just picked Strawberries to make Strawberry Semi-Freddo and Strawberry Jam. It’s been a great week.

Here are the recipes for both. Enjoy!

Strawberry Semi-Freddo

Strawberry Semi-Freddo

Makes 2 Quarts

3          Cups Fresh Strawberries, Hulled and Sliced

¼         Cup Granulated Sugar

8          Large Egg Yolks

1          Cup Granulated Sugar

1          Cup of Reserved Strawberry Juice

½         Teaspoon Fine Sea Salt

4         Large Egg Whites, Room Temperature

¼        Cup Granulated Sugar

2         Cups Heavy Whipping Cream (36%)

¼        Cup Sugar

In a 2-quart saucepan cook the strawberries and ¼ cup sugar over medium heat, stirring often. Cook the strawberries until they soften and begin to break up, about 5 minutes. Set aside to cool. Once cooled, strain the strawberries in a fine mess strained set over a bowl. Reserve one cup of the strawberry juice.

In a large heatproof bowl beat the yolks with the sugar, until combined, with a wire whisk. In a slow and steady stream add the 1 cup reserved strawberry juice to the eggs and sugar whisking the whole time.

Place the bowl over a pan of simmering water, being careful to not let the water touch the bottom of the bowl, and whisk the egg mixture continuously until very thick and hot. It will be thick enough when you lift the whisk and the mixture lies down slowly in a ribbon shape and takes a moment to sink back into itself. Be patient, as this will take about 20 minutes. Remove the bowl from the heat and whisk for a few more minutes to help cool it down. Place the bowl in an ice water bath to cool completely, gently whisking every few minutes. Once cooled, fold the drained strawberries into the cooked egg mixture (This is called the custard). Set aside.

Place the 4 large egg whites into the bowl of a standing mixer fitted with the whisk attachment and slowly beat the whites to break them up, about 30 seconds. Gradually increase the speed to high and continue to beat the whites until very soft peaks form. With the mixer running on high, gradually add the ¼ cup sugar. Beat the egg whites until stiff peaks form and the sugar is completely dissolved. Fold thoroughly, but gently, into the cooled custard.

In a clean standing mixer bowl fitted with the whisk attachment, beat the cream on medium high for a minute. Add the ¼ cup sugar and beat until light and fluffy and peaks form when the whisk is lifted out of the cream.

Fold the whipped cream into the custard thoroughly, but gently.   Put the Semi-Freddo into an air-tight container, covered and freeze for at least 8 hours or overnight before serving. Semi-freddo will last in the freezer for up to one month.

Strawberry Jam

With this recipe you can do the whole sterilized jar thing if you are not going to refrigerate. I don’t bother because once the Jam is cooled and covered they will last for at least a month in the refrigerator. But, trust me when I tell you, they are so good they will be eaten before you know it. Adding blueberries gives the jam and richer, darker color.

Strawberry Jam


Makes 1 Quart

3 Cups Granulated Sugar
2/3 Cup Water
8 Cups Fresh Strawberries, Rinsed, Hulled and Cut into Half Length-Wise (OR Sliced into Quarters if  Strawberries are Large)                                                                                                    1/2 Cup Fresh Blueberries, Rinsed and Picked Over

Place sugar and water in a large heavy pan such as a Dutch oven. On high heat, bring the sugar and water to a boil and cook until the sugar is completely dissolved and slightly syrupy, about 5 minutes. Add the strawberries and blueberries, toss the berries in the sugar syrup until they are completely coated with the syrup and bring back to a full boil. Reduce heat to medium low and simmer the berries, stirring often, until they are cooked through and the syrup is thick and dark red, about 45 minutes. During the cooking, skim off as much of the foam as possible.

Transfer the preserves to a glass jar and cool completely before covering. Store in refrigerator. Preserves will last for at least a month refrigerated.

Tip: To dissolve the sugar crystals that form on the side of the pan, cover with a lid for about 5 minutes. This takes the place of brushing down the side of the pan with cold water. This is much easier and way more effective.

Skimming off the foam makes the preserves clear and not cloudy. The foam you are skimming off is a chemical re-action between the berries and the sugar and if not skimmed off the foam will crystallize and your preserves will become grainy and sugary.

If you have any questions, feel free to comment on the blog or e-mail me.  camille@camillecooksforyou.com

Strawberry Fields Forever 

Posted in Accompaniments, Ahh Haa Moments, Food For Thought, Jam, Semi-Freddo, Strawberries | Tagged , | Comments Off on Strawberry Season’s Bounty

Easter Brunch 2017

Easter Brunch 2017

Frittata with Ricotta, Italian Sausage and Ham

Tomato Bacon Asparagus Quiche

Cranberry Orange Bread

Bloody Marys and Mimosas

Roasted Boneless Leg of Lamb with  Lamb Sauce

Honey Baked Ham with Cranberry-Citrus Compote

Potatoes Au Gratin

Asparagus Mimosa

Roasted Beets, Orange and Fennel Salad with Humbolt Fog Goat Cheese

French Rose’ Wine

Dessert

Apple Tart Frangipane with Caramel Sauce and Cinnamon Gelato

Easter Sunday is just around the corner and here are a few suggestions for Easter Brunch.  In our home the Easter Brunch is pretty much the same menu each year with only a few variations. Frittata is always on the menu along with Leg of Lamb and Honey Baked Ham. Asparagus is at it’s most perfect at this time of year so you will always find it on the Easter Sunday Menu.


Happy Easter!!

camille@camillecooksforyou.com

Posted in Accompaniments, Ahh Haa Moments, Apples, Asparagus, Beets, Blue Cheese, Caramel Sauce, Cheese, Cheese Sauce, Dessert, Dessert/Pastry, Desserts, Easter, Egg Dishes, Eggs, Entree, Fennel, Food For Thought, Frittata, Fruit Desserts, Goat Cheese, Italian Sausage, Lamb, Lamb Sauce, Luncheon Salads, Meat, Menus, Pate Sucre, Potato, Quiche, Quick Bread, Roasted Beet Salad, Sausage, Tarts, Vinaigrettes and Dressings | Tagged , , , , , , , , | Comments Off on Easter Brunch 2017

Oven Braised Corned Beef with Irish Beer and Irish Whiskey

I know we all have heard the phrase “Erin go Bragh” when St. Patrick’s Day is approaching.  And I know that many us that are Irish on that one day only have no idea what it means.  Here is the definition and pronunciation of that famous phrase:

Erin go Bragh is the anglicisation of an Irish language phrase, Éirinn go Brách, and is used to express allegiance to Ireland.

So Erin go Bragh to all of my true Irish friends and all of us wannabes.

I will be cooking my traditional Oven Braised Corned Beef with Irish Beer and Irish Whiskey on St. Paddy’s Day along with the best Irish Soda Bread ever and if you click on the links you will go directly to the recipes.  This year I am going to cook my cabbage a few of different ways just to shake it up a bit and keep things interesting.  I am going to cook the cabbage traditionally with the corned beef and I will also be roasting and sautéing cabbage as well. 

Oven Braised Corned Beef with Irish Beer and Irish Whiskey

When buying the corned beef be sure to buy the flat end.  This is the largest part of the brisket, the most evenly marbled and the tenderest.  The tip end is stringy and not very flavorful.  I had to look really hard through the meat section to find a large piece like I use in this recipe.  There seemed to be only two to three pound pieces and that, to me, is hardly worth the effort.  Besides, the shrinkage factor is crazy.  You can buy your corned beef a week in advance as there will be a better selection in size and, as long as you keep it in the bag it comes in, it will fine.  This size corned beef will serve six but there will not be any left over.

You might think that with all of the beer and whiskey in the recipe it will have a strong alcohol flavor.  But it doesn’t.  In fact there is no beer or whiskey flavor at all.  The beer does wonders for the taste and texture of the corned beef and the whiskey mellows the taste even more giving it a subtle sweetness.  If you prefer not to use beer or whiskey you can substitute homemade chicken stock or low sodium canned chicken broth.  My result was a delicious, melt in your mouth corned beef.

If there is a packet of seasoning in the bag the corned beef comes in, use it.  You can never add too much flavor.  Don’t use any salt as the corned beef has enough in the brine to flavor everything in the pan.

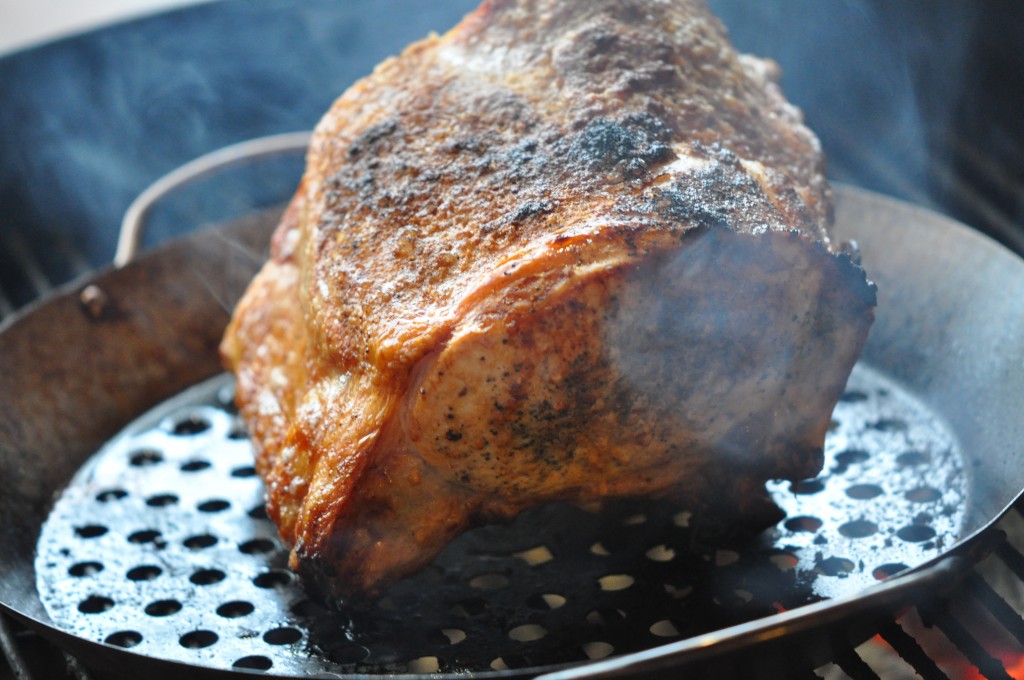
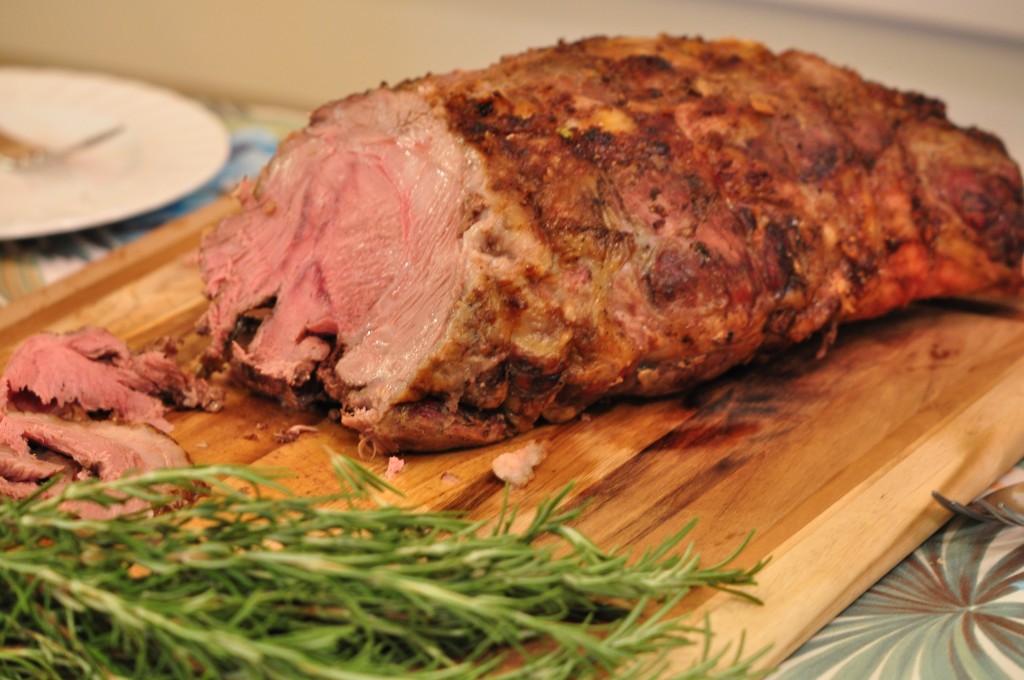
Corned Beef Nestled In The Pot
Serves 6

1        4 ½ to 5 Pound Corned Beef Brisket, Flat End

6        Garlic Cloves, Smashed

2        Large Onions, Thickly Sliced

2        Tablespoons Pickling Spice

2      Bay Leaves

2      12 Ounce Bottles of Beer (Not Light Beer) Such as Harps Lager

1/2  Cup Irish Whiskey

12    Medium Size Carrots, Peeled, Cut Crosswise on an Angle Into 1″ Pieces

6        Medium Size Yukon Gold Potatoes, Unpeeled and Cut Into Quarters

1       Pound Boiler Onions, Peeled and Left Whole with Root End Attached

1      Large Head Savoy Cabbage, Cut Into Six Wedges with Core Left Intact (Leaving the core intact keeps the cabbage leaves together making it easier to handle and it looks good as well.)

Preheat the oven to 325º F.

Rinse the corned beef with cold water to remove all of the brine the meat has been sitting in.  Place the corned beef into a large Dutch Oven. Add the garlic, onions, pickling spice, bay leaves, beer and whiskey. On the stove top bring the liquid to a boil.  (It is always good to put a hot pan into the oven when cooking something such as this.  It removes all of the time in the oven being wasted to get the pan and its contents hot.)  Cover with a lid and place in the oven. Braise 3 hours, turning the meat in the pan half way through the cooking time.

At the end of the 3 hours, remove the pan from the oven, turn the meat again, add the carrots and potatoes, scattering them around the meat. Replace the lid and place back in the oven for an additional hour. Remove the pan from the oven and transfer the meat to a platter. Cover with foil to keep warm (if you have a warming oven or warming draw place the corned beef there on medium low). Keep the carrots and potatoes in the pan with all of the liquid and add the onions and the cabbage to the pan, being sure to nestle the cabbage in the liquid and spoon some of the liquid over each wedge.  Bring the liquid back to boil. Replace the lid, place back in the oven and braise for 30 to 40 minutes, until the cabbage is cooked and tender. Remove the pan from the oven.

Trim off some of the fat from the corned beef.  Slice the meat against the grain and decoratively arrange meat and vegetables on a large platter.  Drizzle some of the pan juices over the meat and vegetables.

Serve with prepared horseradish and coarse whole-grain mustard.
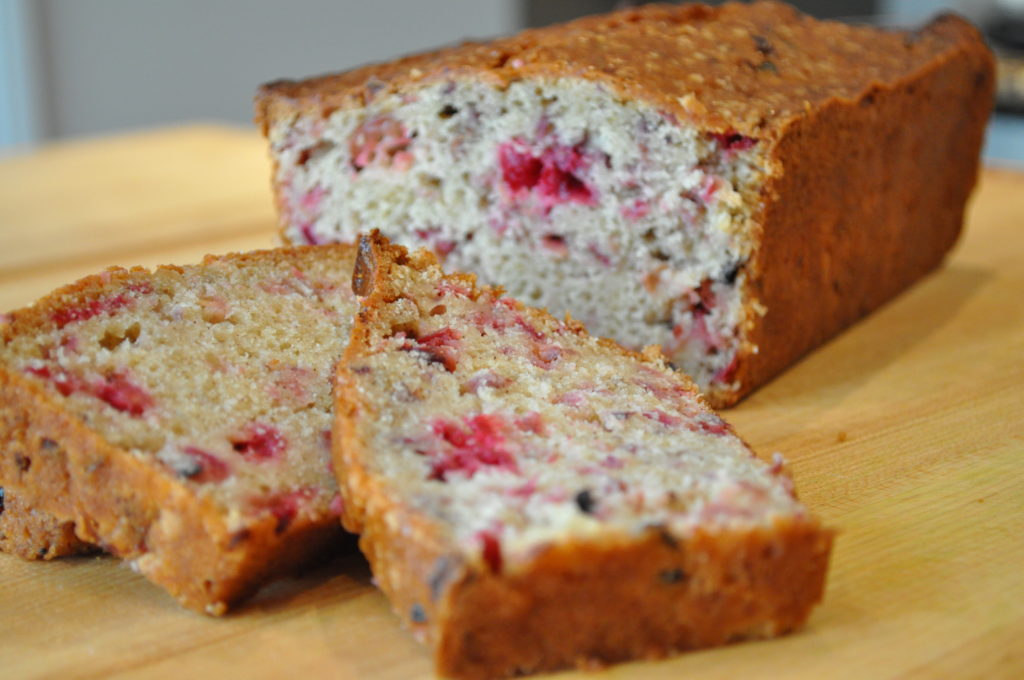
Irish Soda Bread

Irish Soda Bread

Makes 1 Loaf

4          Cups All Purpose Flour

 1/3       Cup Granulated Sugar

 1          Teaspoon Fine Sea Salt

 2          Teaspoons Baking Powder

 1          Tablespoon Caraway Seeds, Optional

 4          Tablespoons Unsalted Butter (Preferably Irish Butter), Cold and Cut into 8 Pieces

 2          Cups Golden or Dark Raisins,  Soaked in Whiskey  (Optional.  In a small bowl, pour 1/4 Cup Whiskey over the raisins and let them soak for a few minutes.  Drain well before using.)

1 ½     Cups Buttermilk

1          Large Egg

1          Teaspoon Baking Soda

1          Large Egg Yolk (For the Glaze)

1          Tablespoon Heavy Cream (For the Glaze)

Preheat oven to 350 Degrees F.  Line a sheet pan with parchment paper.

In a large bowl whisk together the flour, sugar, salt, baking powder and the optional caraway seeds.

Cut in the butter with your finger tips or a pastry cutter.  (Using your fingers is the most efficient way to cut in the butter.  Just be sure the butter is super cold.)  Add the raisins and stir until evenly distributed.

In a small bowl, lightly beat the egg with a fork and add the buttermilk.  Add the baking soda and stir to combine.  Pour the buttermilk mixture into the flour mixture all at once and combine with a fork until all of the liquid is absorbed and the mixture starts to hold together.  Turn the dough out onto a lightly floured surface and gently knead until the dough comes together.  Don’t over work it or it will be a tough bread.

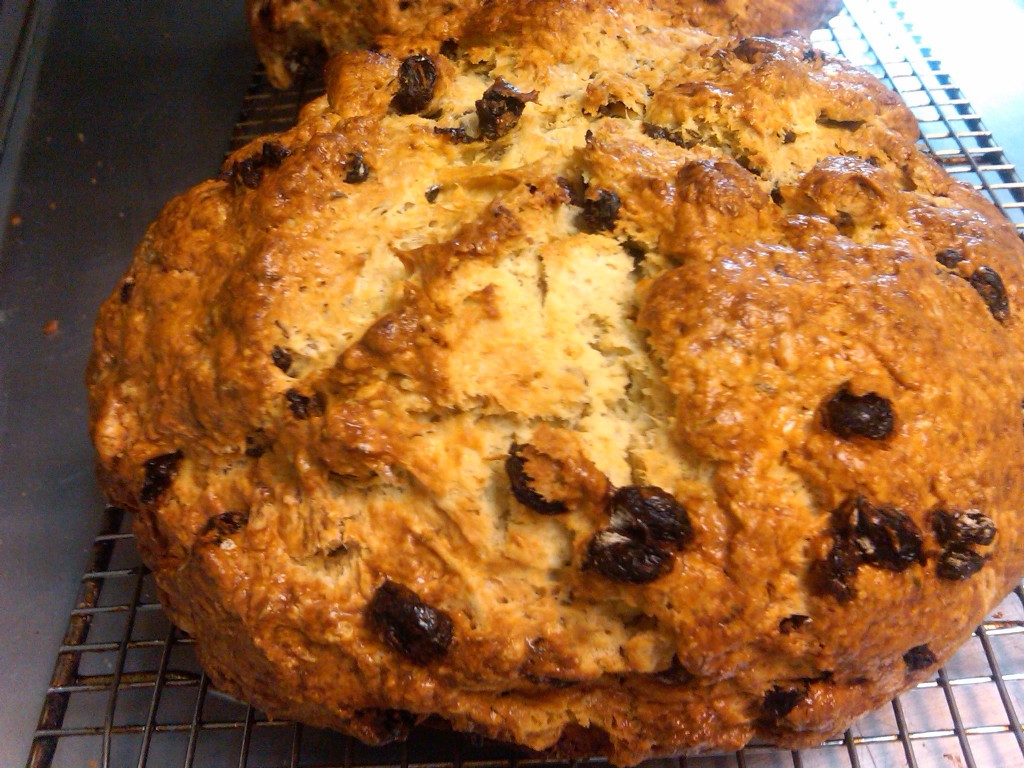
Form the dough into a round, domed shape 7 to 8 inches in diameter.  Place on prepared sheet pan.

In a small bowl mix together the egg yolk and cream and brush the top of the bread all over with the egg wash.  Cut a cross into the top of the bread about half an inch deep.

Place the sheet pan in the oven and bake the bread for 60 to 70 minutes, rotating the pan half way through the baking time.  Bake until the bread is golden brown and a wooden skewer comes out clean when inserted into the center.

Remove from the oven and transfer to a wire cooling rack.  Cool completely before cutting.

Roasted Cabbage

Roasted Cabbage

Serves 4 to 6

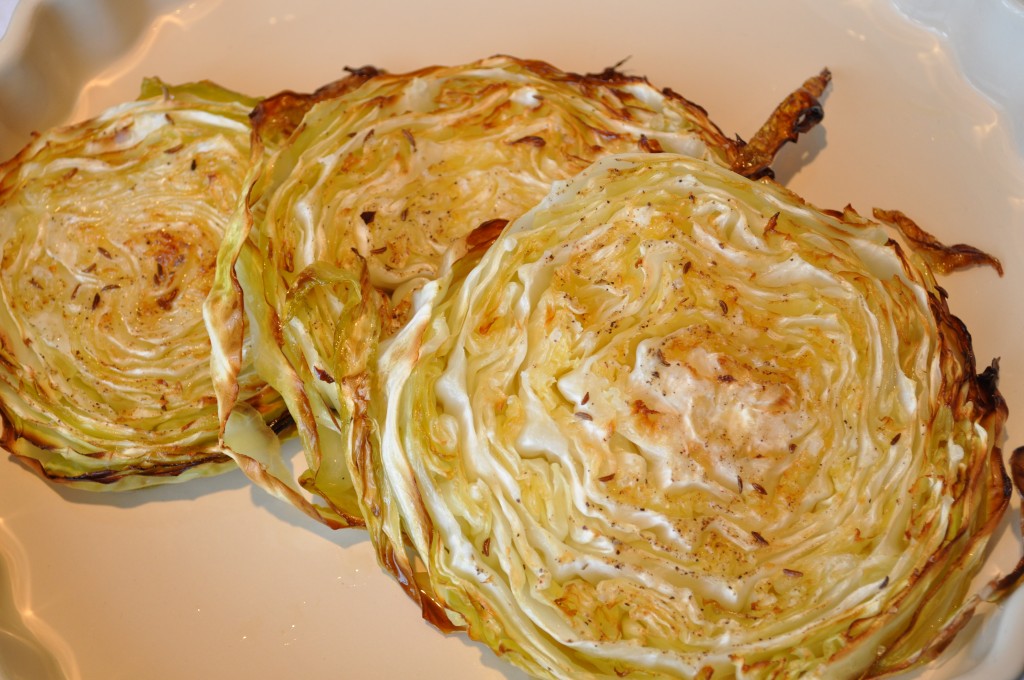
1          Medium Size Head Green Cabbage, Cut into  1”  Thick Slices

1          Tablespoon Vegetable Oil

1          Teaspoon Coarse Sea Salt

½         Teaspoon Freshly Ground Black Pepper

¼         Teaspoon Caraway Seeds

½         Teaspoon Garlic Powder

2          Tablespoons Unsalted Butter (Preferably Irish Butter), Cut into Bits

1     Cup Corned Beef Cooking Liquid, Homemade Chicken Stock or Low Sodium Canned Chicken Broth

Preheat oven to 400°.

Line a sheet pan with heavy duty foil and spray with cooking spray such as Pam Original.

Place the slices of cabbage on the sheet pan and drizzle with the vegetable oil, evenly sprinkle the salt, pepper, caraway seeds and garlic powder over the slices.  Dot each piece with several bits of butter.  Pour the cooking liquid or chicken stock into the bottom of the pan.

Roasted until cabbage is softened and golden brown, 35 to 40 minutes.  Transfer to a plate and serve immediately. 

Sautéed Green Cabbage

Sautéed Cabbage

Serves 4 to 6

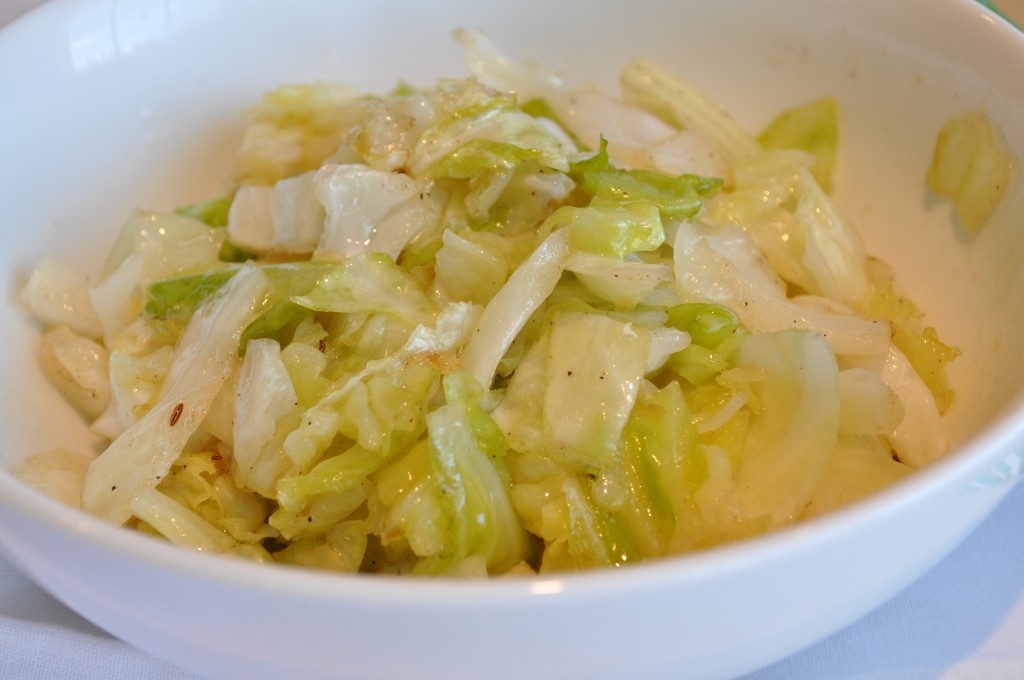
1          Medium Head Green Cabbage, Coarsely Chopped

1          Tablespoon Vegetable Oil

3          Tablespoons Unsalted Butter (Preferably Irish Butter)

1          Teaspoon Coarse Sea Salt

½         Teaspoon Freshly Ground Black Pepper

½         Teaspoon Caraway Seeds

½         Teaspoon Garlic Powder

2          Tablespoons Granulated Sugar

¼         Cup Irish Whiskey 

Preheat a large sauté pan over medium high heat.  Add the vegetable oil and the butter.  When the butter stops foaming and begins to turn golden add the chopped cabbage.  Do not disturb the cabbage for about two minutes.  After that time toss the cabbage in the pan and add the salt, pepper, caraway seeds, garlic powder and sugar.  Continue to sauté the cabbage, for 10 minutes, tossing the cabbage around in the pan every few minutes.  Deglaze the pan with the whiskey and continue to cook until the cabbage is soft and slightly caramelized, about 5 to 7 minutes.

Transfer to a bowl and serve immediately.

Happy St. Patrick’s Day to All.

Erin go Bragh!

camille@camillecooksforyou.com

Posted in Accompaniments, Ahh Haa Moments, Bread, Cabbage, Carrots, Corned Beef, Entree, Food For Thought, Irish Soda Bread, Onions, Potato | Tagged , , , , , , , | Comments Off on Oven Braised Corned Beef with Irish Beer and Irish Whiskey