A Thanksgiving Feast

When Jim and I moved to our new home just before Thanksgiving eight years ago we wanted to give thanks for our good fortune of being able to purchase a brand new home.  And of course the best way to celebrate was to have a Thanksgiving Dinner with all of our friends.  Since our family is not in Florida and nearly all of our friends are transplanted from other parts of the country and world without any family close by, we named our Thanksgiving Feast “Thanksgiving for the Homeless”.

That first year we had 14 people for dinner.  I prepared the Turkey, Stuffing, Gravy and Cranberry Sauce and everyone else brought either a side dish or a dessert.  We were so overzealous in our preparation that we had enough side dishes and desserts to feed 50 people.  What a hoot!!!  But, boy-oh-boy, did we ever get organized.  We made lists of who brought what and how much; we limited the desserts to three instead of 30.  The food everyone brought was beyond fabulous:  Mashed Potatoes, Sweet Potatoes (these changed every year and all years were my favorite), Corn Pudding, Brussels Sprouts, Green Beans with Garlic, Poached Asparagus, Pumpkin Pie, Apple Pie, Pecan Pie and it goes on and on.

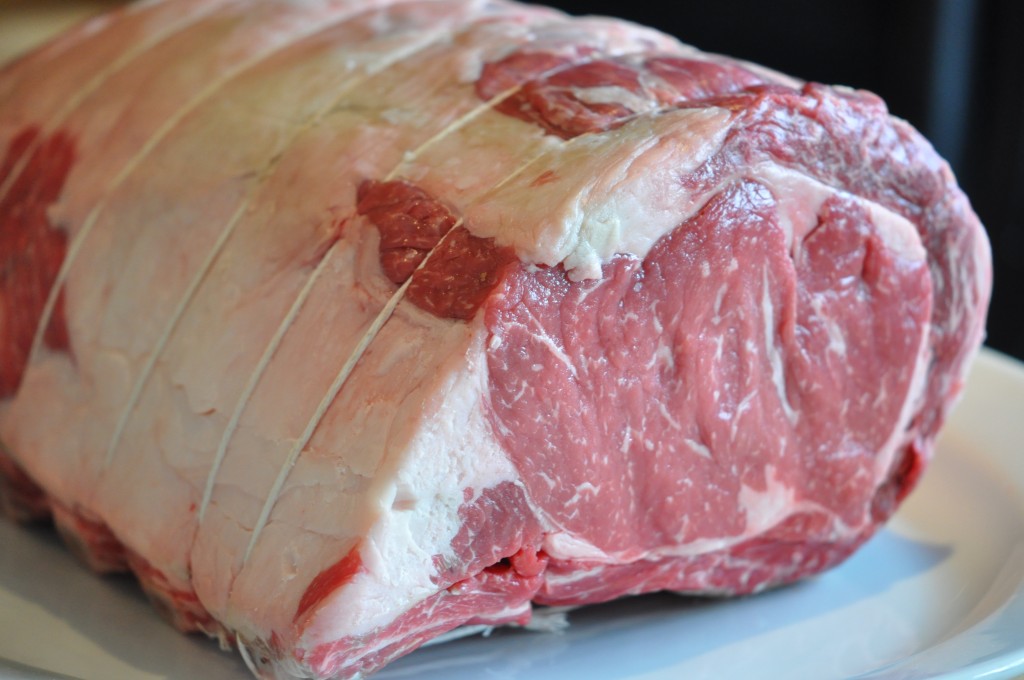
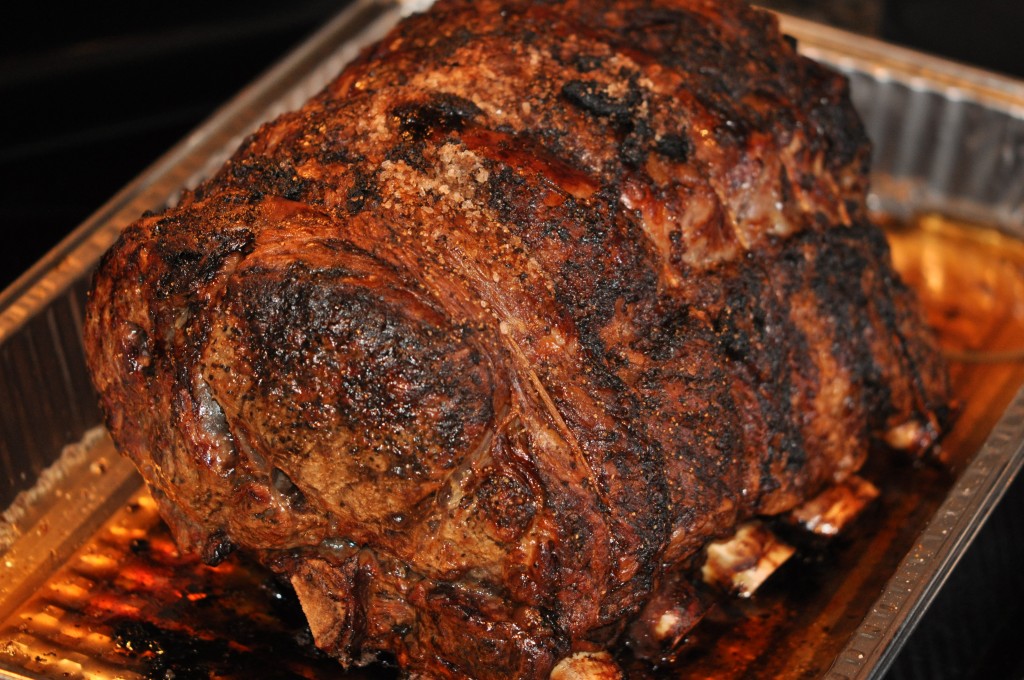
When the group grew to over 14 people I started to add another meat besides the turkey to please the crowd.  We have had Pulled Pork, Fresh Ham, Smoked Ham, Veal Rack, Prime Rib, and Beef Tenderloin.

How I loved those Thanksgiving Feasts with our “Florida Family”.  This year we are not going to be here for Thanksgiving and we are surely going to miss our “Florida Family” on this special day.  Instead of spending the Holiday in Sunny Florida we are going to be up North with our “Biological Family” for the first time in many years and we are so looking forward to being together with our family.  This will be the first year in eight that I am not cooking one thing for Thanksgiving.  I will miss cooking for everyone and miss enjoying the delicious dishes they brings each year.  I will especially miss being together with all of the people I love in Florida.

So to take away the “Jones” for cooking on Thanksgiving and to blog about what I make for Thanksgiving each year, I cooked Thanksgiving Dinner yesterday so that I can share the recipes and pictures with you.

I know everyone has their traditional Thanksgiving menu each year with the wonderful dishes that have been a part of Thanksgiving for many years, even generations.  I’m not going to even try to compete with the Mashed Potatoes your mom made and now you make:  Mashed Potatoes are so very personal.  I am going to give you a menu with a few different things you might want to try in additional to what you normally do.

Thanksgiving Feast 2011

Roast Turkey with Cornbread and Andouille Sausage Stuffing

Roasted Corn Pudding

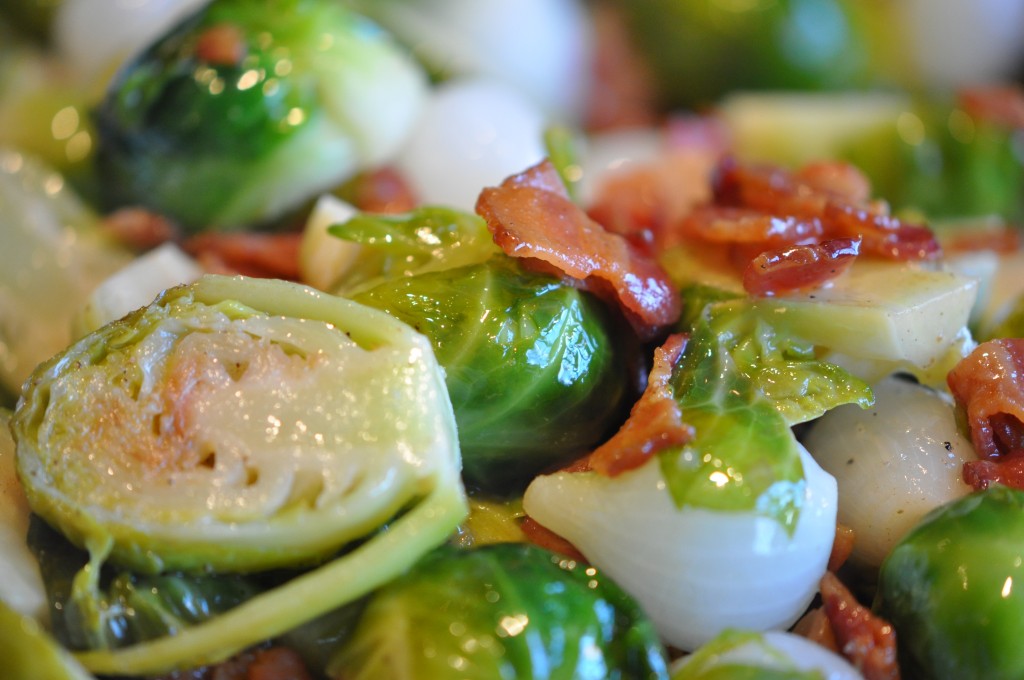
Brussels Sprouts with Pearl Onions and Bacon

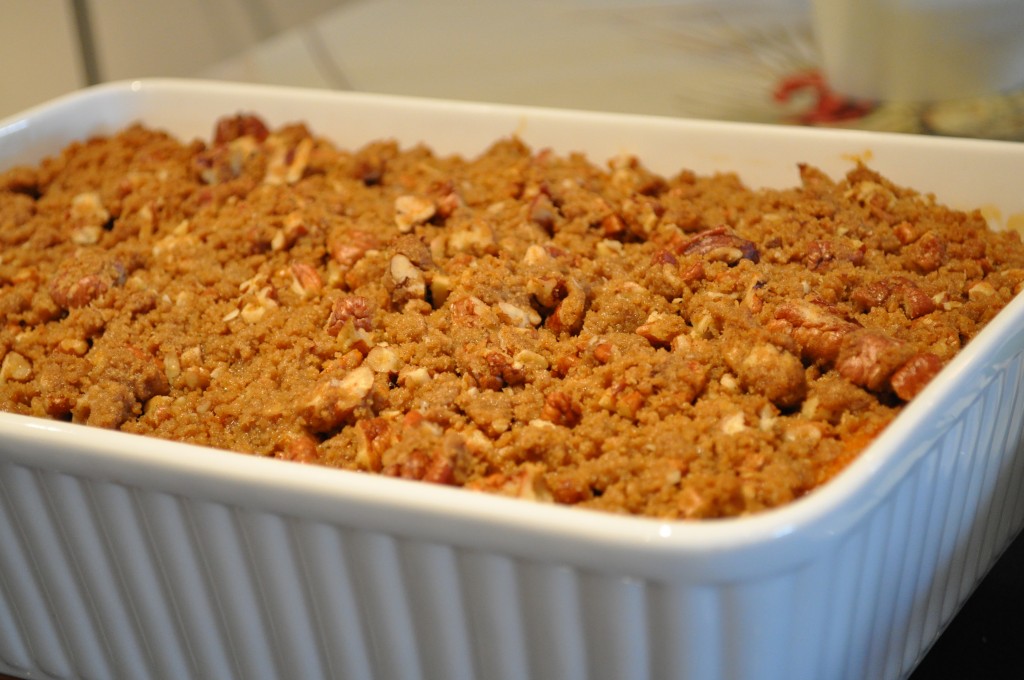
Sweet Potato Casserole with Pecan Streusel Topping

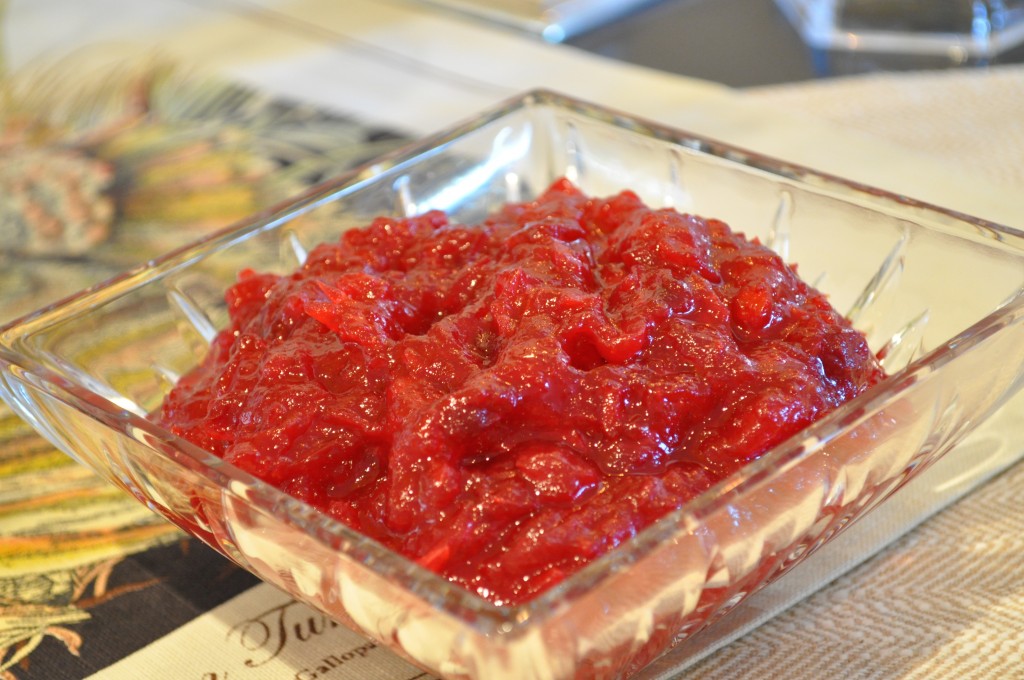
Cranberry Kumquat Compote

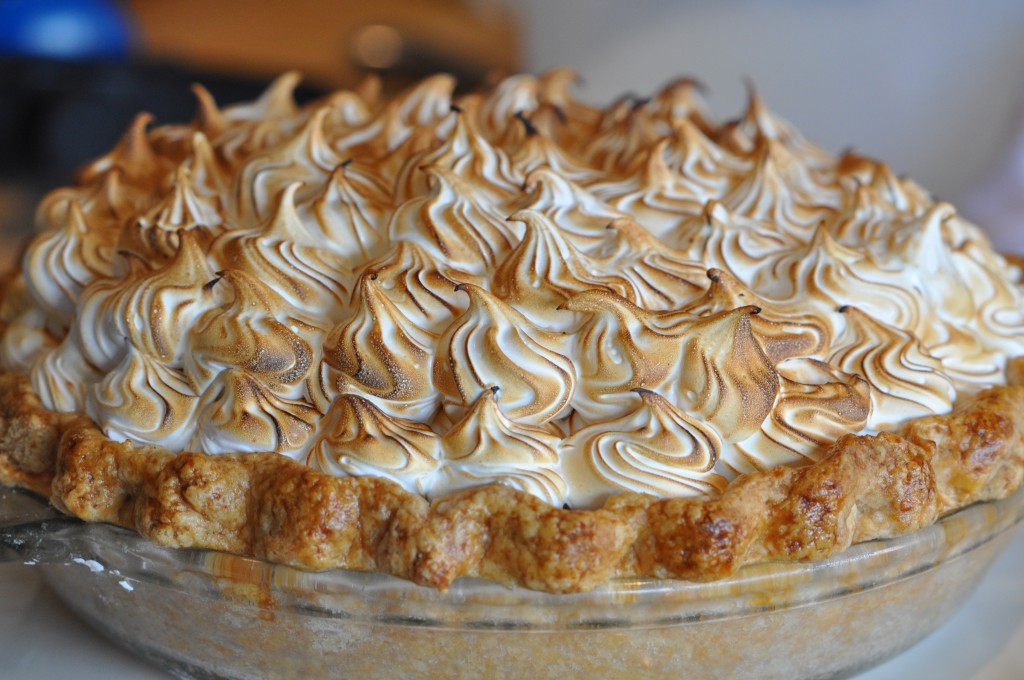
Traditional Pumpkin Pie Topped with Italian Meringue
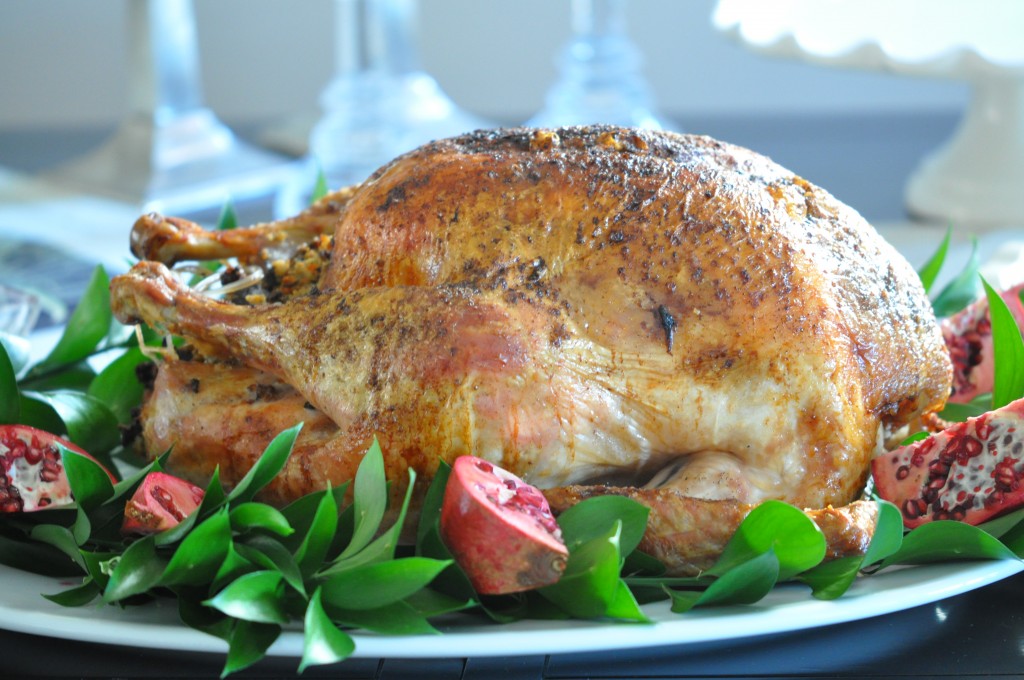
Roasted Turkey with Cornbread and Andouille Sausage Stuffing

Roasted Turkey with Cornbread and Andouille Sausage Stuffing

Every oven is different and things can get really scary when roasting a turkey.  If the turkey doesn’t have the little pop up gage in the breast there is always the question of it being done or not.  The best way to take a lot of the mystery out of cooking the big bird is to use a probe thermometer.  You stick the probe end of the thermometer wire into the thickest part of the thigh and the other end of the wire into an instant read thermometer.  If you don’t have a probe that came with your oven then this instant read probe thermometer is absolutely the best way to go.  It’s worth the investment.  You can get one of these wonderful gadgets at any kitchen store.

  1        Cup (2 Sticks) Unsalted Butter, Melted

1        23-25 Pound Fresh Turkey, Rinsed Well and Patted Dry

Cornbread and Andouille Sausage Stuffing (Recipe Below)

Coarse Sea Salt Freshly Ground Black Pepper

6        Large Carrots Coarsely Cut into Pieces

2        Large Spanish Onions Coarsely Cut into Pieces

6        Celery Stalks Coarsely Cut into Pieces

Reserved Turkey Neck

8        Cups Homemade Turkey Stock or Canned Low Sodium Chicken Broth

1        Cup All-Purpose Flour

Greenery for Garnish

Preheat oven to 350 Degrees F with the rack in the lowest part of the oven.

Place cut up carrots, onions and celery into a large roasting pan.  (Laying flat on the bottom of the pan will act as a roasting rack.  The veggies cooked with the turkey in this way will give your gravy more flavor.)  Place the turkey, breast side up, in the pan on top of the veggies.  Fold the wing tips under.  Season the turkey body cavity and the neck cavity with salt and pepper.  Loosely stuff the turkey body cavity and the neck cavity with the Cornbread and Andouille Sausage stuffing.  (Put left over stuffing into a buttered heat proof dish and bake at 350 degrees F 40-50 minutes.  Serve as a side dish besides the stuffing in the bird.)   Tie the legs together with butcher’s twine.  Fold the neck cavity skin under and secure with a skewer or long pick.  Rub the turkey all over the melted butter and pour some of the butter over the veggies.  Sprinkle the turkey with salt and pepper.

Place the turkey in the preheated oven and roast for 4½ to 5 hours.  Baste the turkey occasionally (about every 45 minutes).  Do this quickly; keeping in mind that each time you open the oven door you loose about 25 to 40 degrees of heat and it takes time to recover the heat.  The turkey is done when an instant read thermometer reads 175 degrees F when inserted into the thickest and meatiest part of the thigh.

Remove the turkey from the oven and transfer to a large platter.  Cover with foil and let rest for at least 30 minutes or up to 1 hour before serving.  Remember the turkey will continue to cook when covered with the foil.

Place the roasting pan over two burners.  Over medium high heat bring the juices, fat and veggies to a boil.  Sprinkle the veggies with 1 cup all-purpose flour.  Stir this all together, scraping the bits off the bottom of the pan and let it cook for about 5 minutes to get rid of the raw flour taste, stirring the whole time.

Meanwhile heat the turkey stock.  Slowly add the hot stock to the pan stirring the whole time.  Let this cook until thickened, about 10 minutes.  Strain the stock into a large sauce pan and slowly bring back to a simmer.  Season the gravy with salt and pepper to taste.

Gravy Hints and Tips:  You can make the Turkey Stock by boiling together 10 cups water, two cut up carrots, a cut up onion and several cut up stalks of celery, the turkey neck, a bay leaf, ½ teaspoon whole black peppercorns, a few sprigs of fresh thyme and fresh parsley.  Lower heat to simmer and cook for two hours covered.

If the gravy is too thin for your liking, blend cornstarch and water together to a smooth thin paste and stir into boiling gravy a little at a time until the desired thickness is reached.  If the gravy is too thick for your liking, add hot stock until the desired thickness is reached.
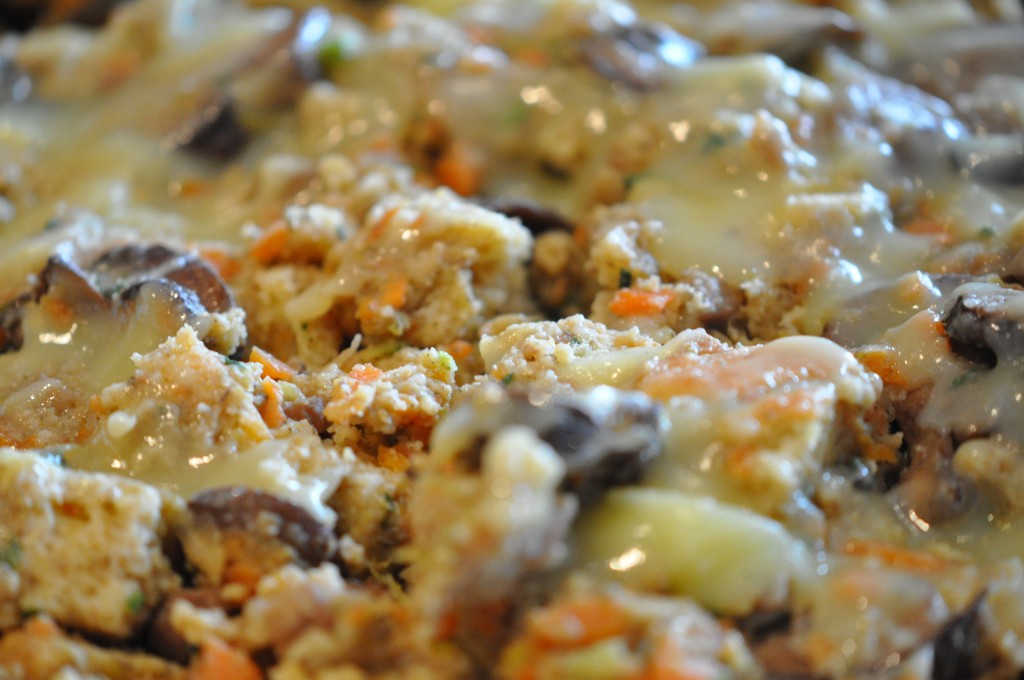
Cornbread and Andouille Sausage Stuffing

Cornbread and Andouille Sausage Stuffing

Makes Enough Stuffing for a 25 lb. Turkey with Extra to Bake as a Side-Dish

You can make the cornbread several days in advance.  Wrap it in plastic wrap and store in the refrigerator for up to a week or in the freezer for a month.

I get the Andouille Sausage from my friend Drew who is from New Orleans and when he goes home to visit his family, he always brings me back a nice “Stick” of Andouille.  If you don’t want the spice Andouille can give you, you can use whatever sausage is to your liking.  A mild polish sausage is great in the recipe as well.  You can get a good quality Andouille locally at your grocer.

Don’t bother to dice the veggies by hand.  Do it in the food processor.  Just be sure you don’t puree them.  DO cut the chestnuts by hand.  If yo put them in the processor they turn to mush.

If you don’t want to go through the whole roasting and peeling of the chestnuts (I don’t) you can purchase cooked and peeled chestnuts in the jar.  I found them at my grocery store and Williams-Sonoma has them for sure.

When you triple the cornbread recipe, cook in three 9” pans instead of one large pan.  Doing this won’t compromise the integrity of the cornbread.

Cornbread and Andouille Sausage Stuffing

1        Loaf Golden Cornbread

1        Pound Loaf Pepperidge Farm White Bread, Crust Removed

1        Lb. Smoked Andouille Sausage

12      Ounces Unsalted Butter

1        Lb. Celery, Finely Diced

1        Lb. Carrots, Finely Diced

2        Medium Onions, Finely Diced

3        Cups Cooked and Peeled Chestnuts, Medium Dice

6        Large Eggs, Lightly Beaten

1        Tablespoon Rubbed Sage

3        Teaspoons Coarse Seat Salt

1½    Teaspoons Freshly Ground Black Pepper

2        Cups Chicken Stock

Cube the Cornbread and White Bread into 1” pieces and let dry over night in a cooled oven with the door closed.

In a large sauté pan melt the butter over medium heat and add the celery, carrot and onion and cook until the vegetables are soft, not browned, about 15 minutes (this is called “sweating the vegetables”).  Cool slightly.  Add all ingredients, except the chicken stock, and gently mix so as not to make bread mushy.  Add the stock gradually and continue to mix gently.

Cool completely before stuffing bird.

Hints and Tips:  Never stuff a cold bird with warm stuffing.  This is how bacteria can form.  It’s best to make the stuffing the day before and refrigerate it over-night.  Bring the turkey and stuffing out of the refrigerator no more than an hour before stuffing and roasting.
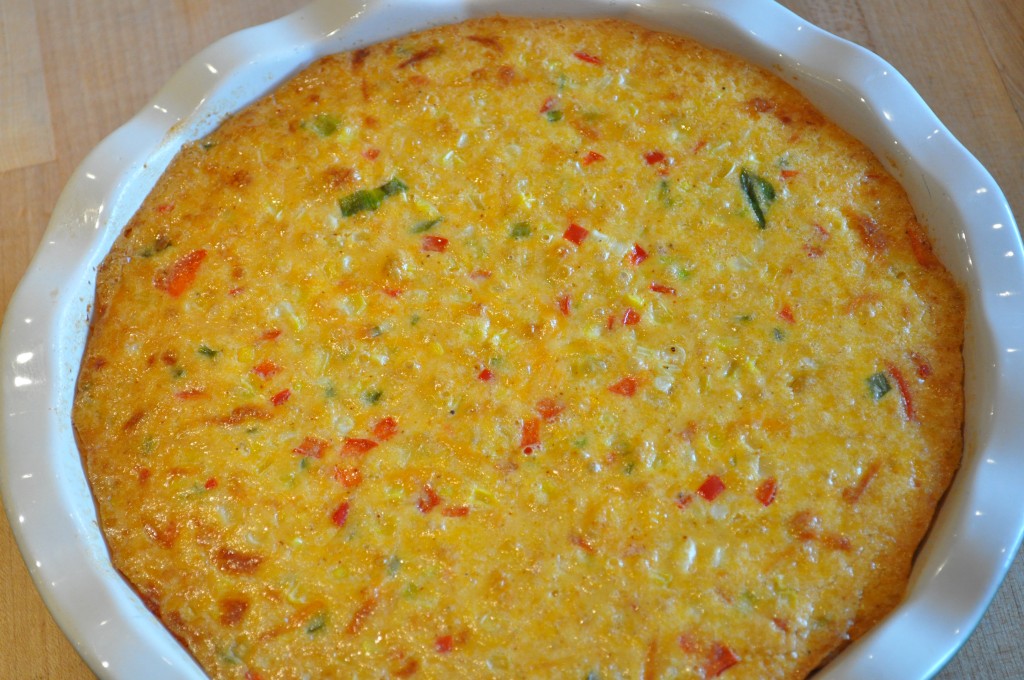
 

Roasted Corn Pudding

  2        Tablespoons Olive or Corn Oil

6        Cups Fresh Yellow Corn Kernels Cut off the Cobbs (from 6 to 8 ears) or the Equivalent of Frozen Corn Kernels

2        Tablespoons Unsalted Butter

1        Cup Chopped Scallions

2        Cups Chopped Red Bell Pepper

1        Chopped Jalapeño Seeds and Veins Removed (Optional)

6        Large Eggs

2        Large Egg Yolks

1 ½    Cups Heavy Cream

1 ½    Cups Half and Half

1 ½    Cups Grated Cheddar Cheese

1 ½    Cups Grated Jack Cheese

1        Teaspoon Mild Chili Powder

1        Teaspoon Ancho Chili Powder

1/2     Teaspoon Chipotle Powder

1        Tablespoon Sea Salt

1        Teaspoon Ground Black Pepper Pinch of Freshly Grated Nutmeg

Preheat the oven to 350 degrees F. Spray the inside of Large Baking dish (13x9x3 high) with cooking spray.  Bring a medium large pot of water to boil.

Remove corn kernels from the Cobbs.  Toss with two tablespoons corn or olive oil.  Place on a cookie sheet pan with sides and roast in oven for 10 minutes.  Longer if using thawed frozen corn to dry it out.

Melt the butter in a sauté pan and sauté onion and peppers over medium-high heat for 4 minutes.  Add chili, ancho and chipotle powders and gently sauté for 1 more minute.  Remove pan from heat and cool slightly.

Whisk together the whole eggs, egg yolks, heavy cream, and half-and-half in a large bowl.  Add salt, pepper and nutmeg.  Add the cooked corn, the onion-pepper mixture, grated cheeses and pour into the baking dish.

Place the dish in a larger pan and fill the pan 1/2 way up the sides of the dish with the boiling water.  Bake the pudding for 1 hour and 15 minutes or until the top begins to brown and a knife inserted in the center comes out clean.  Serve warm.


Brussels Sprouts with Pearl Onions and Bacon

  Serves 12 – 15

1        Lb. Bacon, Cut Crosswise into Thin Strips

3        Lbs. Brussels Sprouts, Medium in Size, Cut in Half Length-Wise

1        Lb. White Pearl Onions, Skins Removed

2        Tablespoons Unsalted Butter

2        Tablespoons XVOO

1        Cup White Wine

½       Cup Homemade Chicken Stock or Low Sodium Chicken Broth

1        Teaspoon Coarse Sea Salt

½       Teaspoon Freshly Ground Black Pepper

In a sauté pan large enough to hold all of the Brussels Sprouts and Pearl Onions in a single layer, cook the bacon until all the fat is rendered and the bacon is crisp.  Remove the bacon from the pan and drain on paper towels.  Set aside.  Discard the bacon fat.  (If you don’t have a pan large enough to cook all of the Sprouts and Onions together then do it in smaller batches.)

In the same pan over medium high heat, heat the butter and oil.  When the butter stops foaming add the Brussels Sprouts and the Pearl Onions to the pan and sauté tossing around in the butter and oil.  Add the salt and pepper.  Toss around.  Deglaze the pan with the white wine and reduce the wine by half.  Add the chicken stock and reduce by half.  This should take only a few minutes.  Reduce the heat to medium and cover the pan with a lid.  Cook until the sprouts are tender and the onions are cooked through, about 7-10 minutes.

Add the cooked bacon bits to the pan and toss around to combine.  Transfer to a serving dish and serve immediately.

Hints and Tips:  To peel the Pearl Onions, bring a pot of water to a boil.  Add the onions and let simmer for two minutes.  Drain and quickly transfer to a bowl of ice water to cool down.  When cool, easily remove the skins from the onions.                  

Sweet Potato Casserole with Pecan Streusel Topping

  Serves 12 – 15

For the Topping

1     Cup All Purpose Flour

3/4  Cup Firmly Packed Light Brown Sugar

1      Teaspoon Salt

1      Teaspoon Cinnamon

8      Tablespoons (1 Stick) Cold Unsalted Butter, Cut into 1/2 Inch Cubes

1½   Cups Chopped Pecans

For the Sweet Potatoes

7        Lbs. Sweet Potatoes

¼       Cup Heavy Cream

2        Teaspoons Pure Vanilla Extract

8        Tablespoons (1 Stick) Unsalted Butter Melted

3        Large Eggs

½       Cup Maple Syrup

½       Cup Orange Blossom Honey

¾       Cup Firmly Packed Light Brown Sugar

2        Teaspoons Fine Sea Salt

1        Teaspoon Freshly Ground Black Pepper

¼       Teaspoon Freshly Grated Nutmeg   Preheat oven to 450 Degrees

To prepare the topping, in a bowl, stir together the flour, brown sugar, salt and cinnamon.  Using your fingers, a pastry blender or two knives cut in the butter until the flour mixture has been completely absorbed into the butter.  The mixture should hold together when squeezed with your hand but still crumble apart easily.  Stir in the pecans, Set aside.

To prepare the sweet potatoes, put them a large roasting pan and add a small amount of water.  Cover the pan tightly with aluminum foil and roast until the potatoes are tender and easily pierced with a knife, 1 to 1 1/2 Hours.  (Don’t forget to pierce the potatoes with a knife before roasting.)  Cool the potatoes completely.  Once cool, remove the skins from the potatoes.  Refrigerate the potatoes for several hours.  This will make them much easier to handle and cut.

Reduce the oven temperature to 350 Degrees.

Remove the potatoes from the refrigerator and cut the flesh into 1/2 cubes.  Transfer one-fourth of the potatoes to a large bowl and mash with a potato masher.  Set aside.

In a bowl, whisk together the cream, vanilla, butter, eggs, maple syrup, honey, brown sugar, salt, pepper and nutmeg.  Add the cream mixture to the mashed sweet potatoes and stir until well combined. Combine this mixture with the cubed potatoes and GENTLY stir to combine.  (Gently toss so as not to mash the cubes.)

Transfer the mixture to a 3-quart rectangular baking dish that has been sprayed with bakers spray such as PAM and sprinkle with the Streusel topping.  Bake until the topping is golden and crispy and the potatoes are hot and cooked all the way through, 45 to 60 minutes.  Let cool for 10 minutes before serving.

Hints and Tips:  To test the potatoes to be sure they are hot all the way through, insert a thin bladed knife into the center of the dish and leave it there for 30 seconds.  If the knife blade is hot then the potatoes are ready.

You can do some of this recipe in advance.  The streusel topping can be made the day before and refrigerated until you are ready to use it.

The potatoes can be cooked the day before as well, but peel them while they are still warm.

Cranberry-Kumquat Compote

My mother had a kumquat tree growing outside of her home in Florida.  The kumquats would bloom every year just before Thanksgiving.  We would have a great time picking them and making this wonderful compote for our Thanksgiving Feast.  I have kept the tradition going although my mother and the tree are long gone.  We are able to find the kumquats in the grocery store in Florida at Thanksgiving time but if you can’t get them where you are, they are available almost all year on line.

I don’t like to add any other flavorings to this dish as I love the taste of the two bitter fruits as they are.  You can always add cinnamon and nutmeg if you like those flavors.  Adding won’t hurt this recipe.  You can even add diced jalapenos, seeds and all, for a really different take on this compote.  Adding one large jalapeno gives it just enough heat without it being to hot.

Makes 4 Cups

1        Pint Fresh Kumquats

2        Cups Granulated Sugar

2        Cups Water

2        12 Ounce Bags Fresh or Frozen Cranberries

1        Teaspoon Coarse Sea Salt

Wash the kumquats and slice in half length-wise.  Remove and discard the center, bitter pit and seeds.  Place the kumquat peels in a food processor fitted with the steel blade and pulse to finely chop the peels.  Be careful not to puree.

In a large pot such as a Dutch oven combine the sugar and water and bring to a boil.  Boil until the sugar is dissolved and becomes a bit syrupy, about 5 minutes.  Add the cranberries, kumquats, salt and bring to a rolling boil.  Lower the heat to simmer and cook, uncovered, for 30 minutes, stirring often.  Skim the foam that will float to the top as you go along.

Remove the pan from the heat and cool completely.  Store in air-tight containers and refrigerate for up to one month.    

Traditional Pumpkin Pie Topped with Italian Meringue

Anyone who knows me knows I am a purist when it comes to food.  Only organic and fresh for me:  Nothing frozen, canned or precooked.  BUT once in a while I have to make the exception to my rule and Pumpkin Pie filling comes under the exception category.  I have made Pumpkin Pie with fresh pumpkin, pumpkin I have picked, white pumpkin, you name it.  The only pumpkin I like for Pumpkin Pie is the good old standard – Libby pumpkin puree.  My mother used it and I am continuing the tradition.  The pumpkin puree by Libby is consistent.  I never have to second guess the product.  I guess you can say I am only 99¾% pure.  DO NOT USE PUMPKIN PIE FILLING IN THE CAN.  When you reach for the puree on the shelf don’t grab the wrong one.

To take it even further, I use the recipe on the can.  The proportions are perfect.  I am giving Libby complete credit for the Pumpkin Pie but the Meringue Topping is my idea.  I thought it would be fun to do something different for the topping.  (So did Martha, but she used Meringue like you put on a Lemon Meringue Pie.  Totally different Meringues but the idea of doing something other than whipped cream is a good idea.)

If the Italian Meringue is too daunting for you or you just don’t have the time with everything else that is going on, go ahead and use whipped cream to top the pie.  But, please, do me a favor and don’t use cool whip!!  Please!!!!

¾       Cup Granulated Sugar

½       Teaspoon Fine Sea Salt

1        Teaspoon Ground Cinnamon

½       Teaspoon Ground Ginger

¼       Teaspoon Ground Cloves

¼       Teaspoon Freshly Ground Nutmeg

2        Large Eggs

1        15 Ounce Can Libby’s Pumpkin Puree (NOT PUMPKIN PIE FILLING)

1        12 Ounce Can Evaporated Milk

1        Disk of Pate Sucre (Pastry Crust)  Recipe Below, Rolled Out to Fit a 9″ Deep Dish Pie Pan, Flute the Edges

Preheat oven to 425 degrees F (400 if using a convection oven).

In a small bowl combine the sugar, salt, cinnamon, ginger, cloves and nutmeg.

In a larger bowl beat the eggs lightly, add the pumpkin puree and the spice mix.  Blend well.  Slowly add the evaporated milk.  Mix well.

Pour into unbaked pie shell.  Bake at 425 for 15 minutes.  Turn the oven down to 350 Degrees F.  Bake 40 – 50 minutes or until a thin bladed knife inserted into the center of the pie comes out clean.

Cool on a wire rack completely before topping with Italian Meringue.

Hints and Tips:  I found that baking a pie in a glass dish is the best way to get a crispy cooked crust.  If you don’t have a glass dish, ceramic works just as well.  If you don’t have either I suggest you purchase one.  You will be so glad you did.  They are sold at the grocery store for as little as $6.00

You can make the pie the day before and refrigerate it overnight.  When you are ready to top it with the meringue, bring the pie to room temperature before topping it.  If the pie is cold and the meringue is warm condensation will develop between the pie and the meringue.  You don’t want this.  Also, when you take the pie out of the refrigerator to bring it to room temperature there may be a little moisture on top of it.  Blot it lightly with a paper towel.

Italian Meringue

 6          Large Egg Whites at Room Temperature

½         Teaspoon Cream of Tartar Pinch of Fine Sea Salt

2 2/3  Cup Sugar

2/3      Cup Water

You have to do the two steps to this recipe simultaneously.  Have a standing mixer ready to go along side your stove.  You will also need a candy thermometer.

Begin by beating the egg whites on medium speed to break up the whites.  Add the cream of tartar and the salt and beat at high speed until stiff peaks form, not dry peaks.

At the same time bring the water and sugar to a boil over high heat, swirling the pan in the beginning to help dissolve the sugar.  Do not stir with a spoon.  Once it begins to boil, cover it with a lid for a minute or two to help dissolve the sugar crystals that form on the side of the pan.  Do this instead of washing the crystals down with a brush.  Doesn’t work!!!!   Remove the lid and boil the sugar/water mixture until it reaches 238 Degrees F on the candy thermometer.  As soon as it reaches 238 Degrees F quickly pour the mixture into a 4 cup measuring cup (don’t burn yourself).

With the mixer on low, slowly add the syrup in a slow and steady stream to the egg whites.  When all of the syrup is in, turn the mixer on high and beat until the meringue is cool.  This will take about 10 minutes.

Place some of the meringue in a pastry bag fitted with a French tip or star tip and decoratively pipe the meringue onto the pie.  Complete a full circle around the pie using either of the tips.  Then do a second full circle on top of the first circle.  You will most likely not use all of the meringue but go ahead and be generous with it.  After the meringue is piped onto the pie, torch it with your blow torch to give it a little brown color.  This also sets the meringue.  If you don’t have a blow torch (mine is industrial size) put the pie under the broiler about five or six inched below the heat.  Stand there and watch it turn a light brown color.  Don’t take your eyes off of it for it will surely burn.  It will take only a minute or two to brown under the broiler.

Refrigerate the pie for several hours before serving.

Pate Sucre (Pastry Crust, Pie Crust)

Enough for a 13 Inch Tart or Two 9” Pie Crusts   For the Pastry 3½     Cups All Purpose Flour 1/2     Cup Granulated Sugar 1        Teaspoon Fine Sea Salt 8        Ounces Cold Unsalted Butter (2 Sticks) Cut Into 16 Pieces ½       Scant Cup Cold Vegetable Shortening Such as Crisco 5 – 6   Tablespoons Ice Water

My personal preference for making this or any pastry crust is to use my fingertips.  To make it my way, place the flour, sugar and salt in a large bowl and whisk to combine.  Add the cut up butter and blend into the flour mixture using your fingertips.  Work quickly so butter does not get too soft.  Blend until the mixture resembles coarse meal or small peas.  Add the vegetable shortening in the same manner.  When all is mixed take a small amount and press it together in the palm of your hand.  If it stays together it is time to add the water.  Start with 5 tablespoons of the ice water and pour over the mixture.  Gather the mixture together into a ball.  If it is too crumbly and won’t stay together add a little more water.  You want the mixture to come together nicely.  Not dry or wet.  Turn the dough out onto a lightly floured surface and form it into two balls. Flatten into disks and wrap the disks in plastic.  Refrigerate for 1 hour.

If this all seems to daunting, use your food processor following this next set of directions:  Place the flour, sugar, and salt in the bowl of a food processor fitted with the steel blade. Pulse a few times to combine. Add the butter and shortening to the flour. Pulse the mixture until the mixture forms crumbs the size of peas. With the motor running, add the ice water all at once through the feed tube. Keep hitting the pulse button to combine the mixture and the dough comes together. Turn the dough out onto a lightly floured surface and form it into two balls. Flatten into disks and wrap the disks in plastic.  Refrigerate for 1 hr.

Whew, that was a long posting.  I hope you read it all and maybe, just maybe, you will try at least one of my recipes. If you have any questions please contact me by posting directly on this blog or e-mailing me at:

camille@camillecooksforyou.com

HAPPY THANKSGIVING!!!!  WE HAVE SO MUCH TO BE THANKFUL FOR.

I have been informed that many of you are having a problem finding the “Leave a Comment” place on the blog.  It is a little hard to find.  At the end of this posting there are a few very faint lines which list all of the categories and and tags related to the blog.  At the very end of the bottom line you will see either “Leave a Comment” or a number and the word “Comment” (for example: “4 Comments”). Click on to this link and it will take you to the comment area.  I hope this helps.

Posted in Ahh Haa Moments, Bread, Desserts, Food For Thought, Hints and Tips, Menus, Recipes To Share, Stuffing, Turkey, Vegetables | Tagged , , , , , , | Comments Off on A Thanksgiving Feast

Fall Is Time For Pie

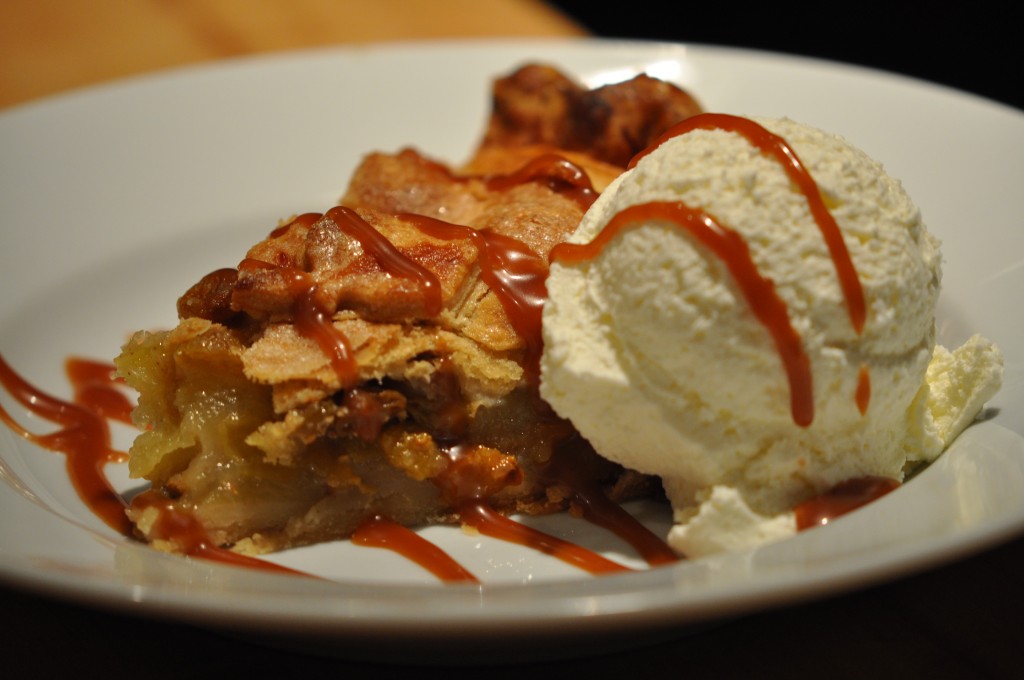
Apple Pie With Vanilla Gelato And Caramel Sauce

With the change of season and the weather a bit cooler (even in Florida) it means more indoor cooking.  So turn the ovens on and let’s get started.

I have been spending a great deal of time in the kitchen cooking up some of the things that I would never do in the summer.  For instance I made a great Chicken Pot Pie recently.  Never would I think about doing that in the summer.  The summer in Florida is way too hot to eat hearty food.  I also made an Apple Pie.  Something I never do for just the two of us but we had our cousins in for the weekend and thought what better way to their hearts than with a great Apple Pie.

Since both of these dishes had Pastry Crust (also known as Pie Crust, Pate Brisee and Pate Sucre) I realized I had a theme going.

Pie Crust may seem like a daunting  task but once you get it, no longer is it a task but a pure pleasure of accomplishment.  At least that’s how it is for me.  It took me years to make the perfect crust (I’ve been told it is wonderful) and because I have made so many pies in my career, I feel it is time for me to share my expertise with you and make it an easy exercise.  I am going to guide you through the preparation and I promise, you will be on your way to making the flakiest, most tender and deliciously delicious crust.

As I have said in the past, to make the preparation of any dish easier you must have all of your  ingredients (Mes En Plas) ready to go.  In this case you will need to have ready  Unbleached All-Purpose Flour, Salt, Sugar (for sweet pastry) Cold Unsalted Butter, Cold Crisco and Ice Water.  That’s it.

Here is the recipe for enough pastry for a two crust pie.

Pate Sucre (Pastry Crust, Pie Crust)

Pate Sucre is French for Sweet Pastry Crust, Pate Brisee is French for Unsweetened Pastry Crust.  You can use this sweet pastry crust for a savory dish such as Pot Pie.  Just don’t add the sugar.  The rest stays the same.  This recipe will make enough pastry for a two crust pie.

3½     Cups All Purpose Flour

1/2     Cup Granulated Sugar

1        Teaspoon Fine Sea Salt

8        Ounces Cold Unsalted Butter (2 Sticks) Cut Into 16 Pieces

½       Scant Cup Cold Vegetable Shortening Such as Crisco

5 – 6   Tablespoons Ice Water

My personal preference for making pastry crust is to use my fingertips.  To make it my way, place the flour, sugar and salt in a large bowl and whisk to combine.  Add the cut up butter and blend into the flour mixture using your fingertips.  Work quickly so butter does not get too soft.  Blend until the mixture resembles coarse meal or small peas.  Add the vegetable shortening in the same manner.  When all is mixed take a small amount and press it together in the palm of your hand.  If it stays together it is time to add the water.  Start with 5 tablespoons of the ice water and pour over the mixture.  Gather the mixture together into a ball.  If it is too crumbly and won’t stay together add a little more water.  You want the mixture to come together nicely.  Not dry or wet.  Turn the dough out onto a lightly floured surface and form it into two balls. Flatten into disks and wrap the disks separately in plastic.  Refrigerate for 1 hour.

If this all seems to daunting, use your food processor following this next set of directions:  Place the flour, sugar, and salt in the bowl of a food processor fitted with the steel blade. Pulse a few times to combine. Add the butter and shortening to the flour. Pulse the mixture until the mixture forms crumbs the size of peas. With the motor running, add the ice water all at once through the feed tube. Keep hitting the pulse button to combine the mixture and the dough comes together. Turn the dough out onto a lightly floured surface and form it into two balls. Flatten into disks and wrap the disks separately in plastic.  Refrigerate for 1 hour.

Hints and Tips: Letting the pastry rest for 1 hour in the refrigerator gives the glutens enough time to rest.  This resting period makes for a much more tender crust and it will not shrink, either when rolling it out or when it cooks.  I like to take it out of the refrigerator about 10 minutes before rolling so it isn’t too cold.  When too cold it will crack when you roll it and cracking makes it almost impossible to handle.

Now that you have this great recipe let’s make an Old-Fashioned Apple Pie.  Who doesn’t like Pie?!!!!

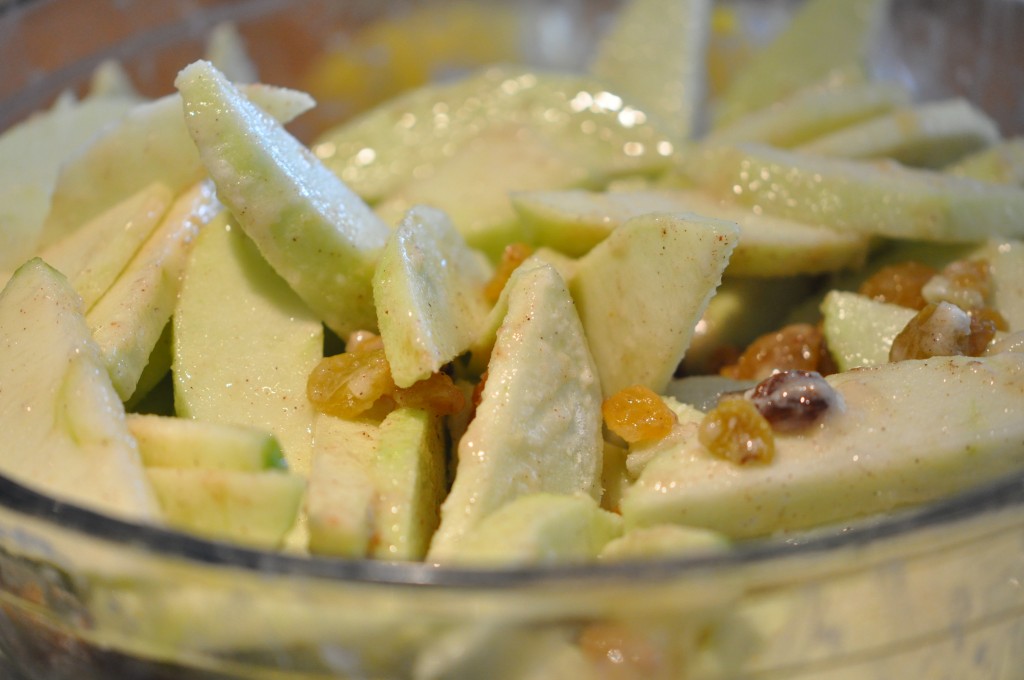
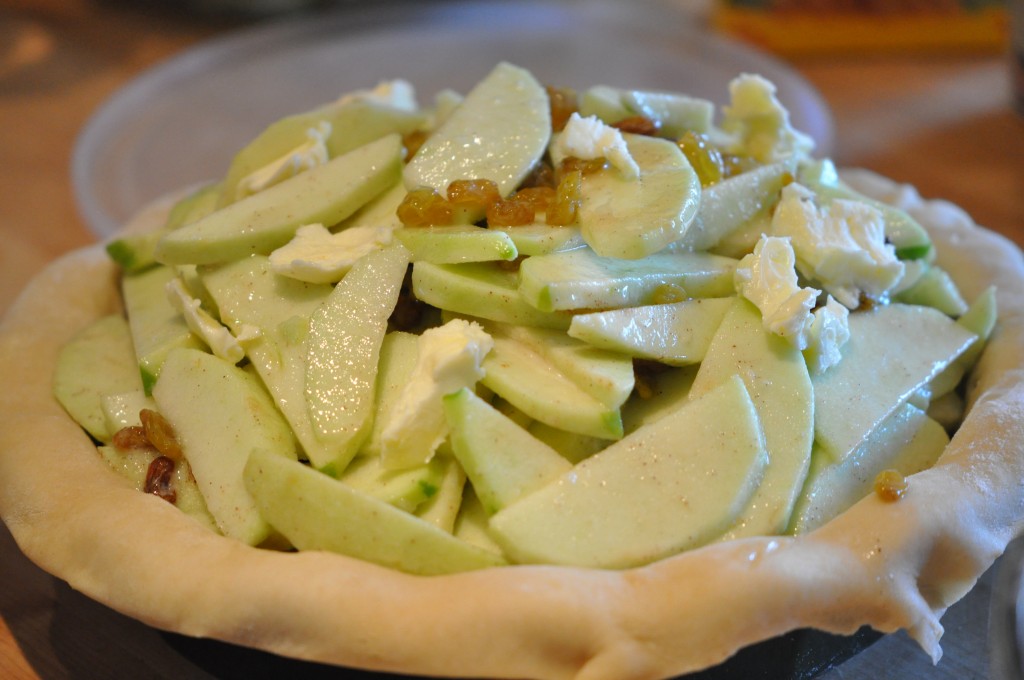
Apples And Raisins

Old-Fashioned Apple Pie

I like to add golden raisins and pecans to my Apple Pie but if you don’t want to just leave them out.  The best type of dish to use, to insure a cooked bottom crust, is a glass or ceramic pie dish.  Tin pie pans just don’t give you that cooked and crisp bottom crust.  Placing the pie dish on a pan with holes also helps because the air can circulate around the pie.  Why place the pie on a pan when cooking is what you might ask.  The reason is to catch any juices that will escape from the pie and to keep the juices off the bottom of your oven.  Lining the pan with parchment won’t allow the juices to go through the pan if it has holes and the pie dish won’t stick to the pan.  All of these suggestions are tried and true.  I have made thousands of pies over my career and these suggestions will help you to make pie baking an easy and enjoyable experience.

Before The Top Crust Is Put Into Place

1        Recipe Pate Sucre

7-8     Large Granny Smith Apples (About 5 Pounds) Peeled, Cored and Sliced

¼” Thick

1        Cup Golden Raisins (Optional)

1        Cup Toasted Pecans (Optional)

1        Cup Granulated Sugar

¼       Cup All-Purpose Flour

¼       Cup Corn Starch

1        Teaspoon Fine Sea Salt

1        Teaspoon Ground Cinnamon

½       Teaspoon Ground Nutmeg

2        Tablespoons Fresh Lemon Juice (DO NOT USE BOTTLED)

2        Tablespoons Cold Unsalted Butter Cut into Small Pieces

1        Large Egg Beaten with 1 Tablespoon Cold Water

Coarse Sanding Sugar for Pie Top

Preheat oven to 425 Degrees F (400 if using a convection oven).  Place the oven rack in the lower third of the oven.

In a large bowl combine the apples, raisins, pecans, sugar, flour, corn starch, sea salt, cinnamon, nutmeg and lemon juice.  Toss until well combined.  Set aside.

On a lightly floured surface, roll out one disk of pastry into a 11 or 12 inch circle approximately 1/8” thick.  When rolling add a little flour to the top of the pastry so the rolling pin won’t stick.  To make a evenly round circle when rolling make a quarter turn with the pastry.  In other words, give a few rolls over the pastry, lift the pastry off of the rolling surface and turn it to the right 90 degrees.  Do that three times while rolling and you will have a perfect circle.  Gently roll the pastry up on the rolling pin and lift over the top of a 9” deep dish pie dish and roll out.  Gently press into the pie dish.  You should have about a one inch overhang.

Place the apple pie mixture into the pastry lined dish evenly distributing the apples.  This will allow more even cooking.  Pour any juices that may be in the bottom of the bowl over the top of the apple mixture.  Dot the apple mixture with the 2 tablespoons of cold butter pieces.  Brush the edges of the pastry with the egg wash.

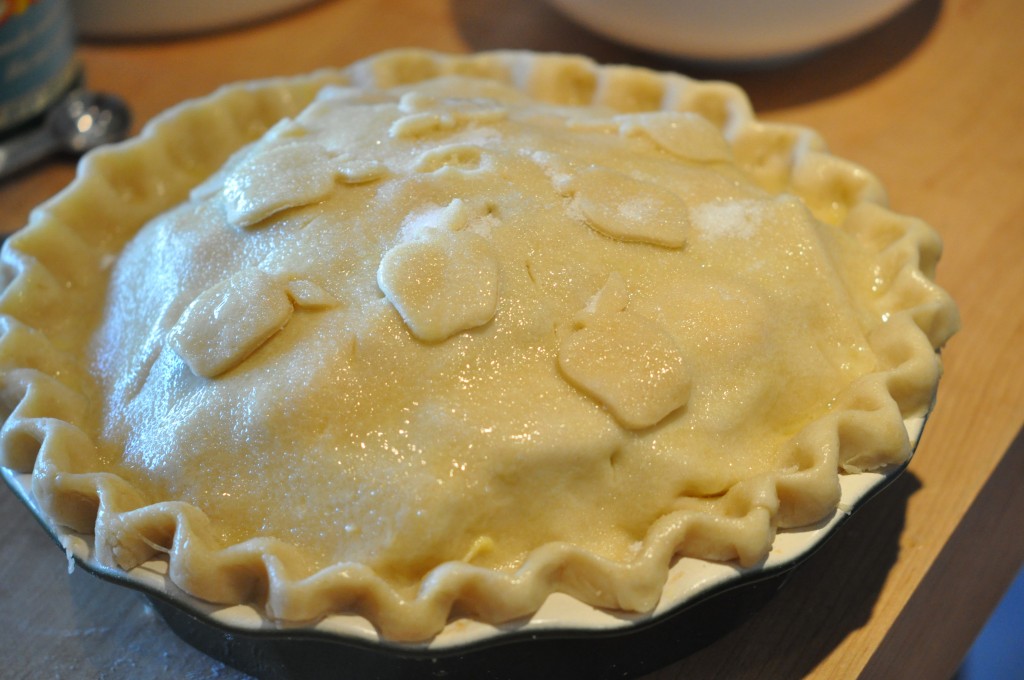
Roll out the second disk of pastry in the same manner as the first.  Place the rolled pastry over the apples.  Seal the edges by trimming with a scissor.  Press the edges decoratively with your thumb and fore-finger.

With a sharp thin knife make a whole in the top of the pie to let out the steam while it cooks.  You don’t want it to explode in the oven – and believe me, it will if you don’t vent the pie.  Brush the top of the pie with the egg wash and sprinkle with the sanding sugar.

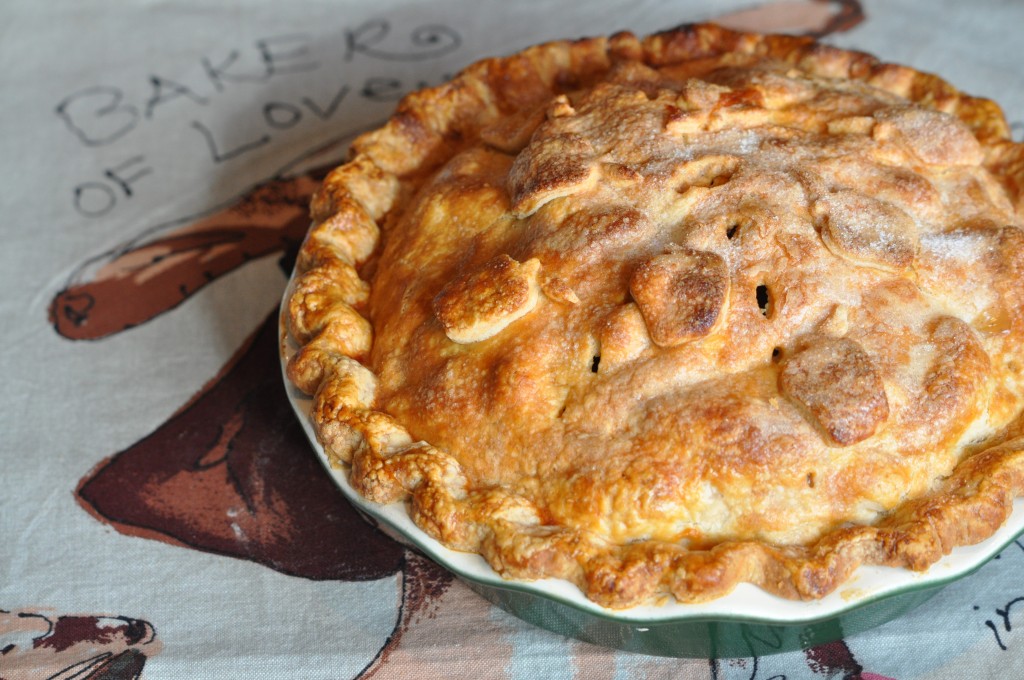
Place the pie on a sheet pan with holes (such as a pizza pan) lined with parchment paper.  Bake the pie for 15 minutes and turn down the oven temperature to 375 Degrees F (350 if using a convection oven).  Bake the pie for 1 hour more or until the top is nicely browned and the juices are bubbling.  You will see some of the juice leek out of the pie on the side.  To be sure the apples are cooked, insert a skewer into the vent at the top of the pie.  There should be no resistance when the skewer goes through the apples.

If the pie is not cooked through and the crust is beginning to get too brown, loosely cover the pie with aluminum foil by making a tent.  You do not want to crush the pie or cover the vent tightly.

Remove from the oven to a wire cooling rack and let the pie cool completely before serving.  I like to serve this pie with caramel sauce and Vanilla Ice Cream or Gelato.

Just Before Going Into The Oven

Apple Pie Made With Love

Caramel Sauce

Be sure to use a large deep pan when making Caramel Sauce.  The sugar gets so hot that when you add the cream it bubbles and boils up and can easily boil over.  When adding the cream be sure to do it slowly.

Makes 3 Cups

2        Cups Granulated Sugar

1/4     Cup Water

2        Cups Heavy Cream, Heated

In a large, deep heavy sauce pan put 2 cups sugar and 1/4 cup water.  Swirl pan over high heat until sugar is dissolved and cook until mixture turns brown NOT BURNT.  Remove from heat and add 2 heated cups heavy cream slowly as not to have the cream and sugar boil over.  Mix and return to heat.  Continue cooking over high heat until temperature on candy thermometer reaches 235 degrees.  Remove from heat and let cool.

Store the caramel sauce in an air-tight container for up to one month.

So there you have it.  Apple Pie, so delicious and so satisfying.  Also, so much instant gratification.  And isn’t that what cooking really good food is all about?  I hope you enjoy making and eating this Apple Pie.  Don’t forget, if you have any questions please ask either by e-mailing me or commenting directly on the blog.

camille@camillecooksforyou.com

All Recipes are Copyright 2011.


Posted in Desserts, Food For Thought, Fruit Desserts, Hints and Tips, Recipes To Share | Tagged , , , , , , , | Comments Off on Fall Is Time For Pie

A Very Busy Month

It has been a while since I’ve posted to the blog but I have been busy cooking, writing recipes, experimenting, entertaining and even working.  Yes, working.  I had a few parties this past month and I did some entertaining at home as well.

The pictures will tell the story of my month and I will post some of the recipes.  The one recipe so many people are asking for is the birthday cake I made for Jim’s celebration in August:  A yellow cake with the real deal ganache.

So feast your eyes and if there is a recipe you would like, let me know and I will post it on this blog.

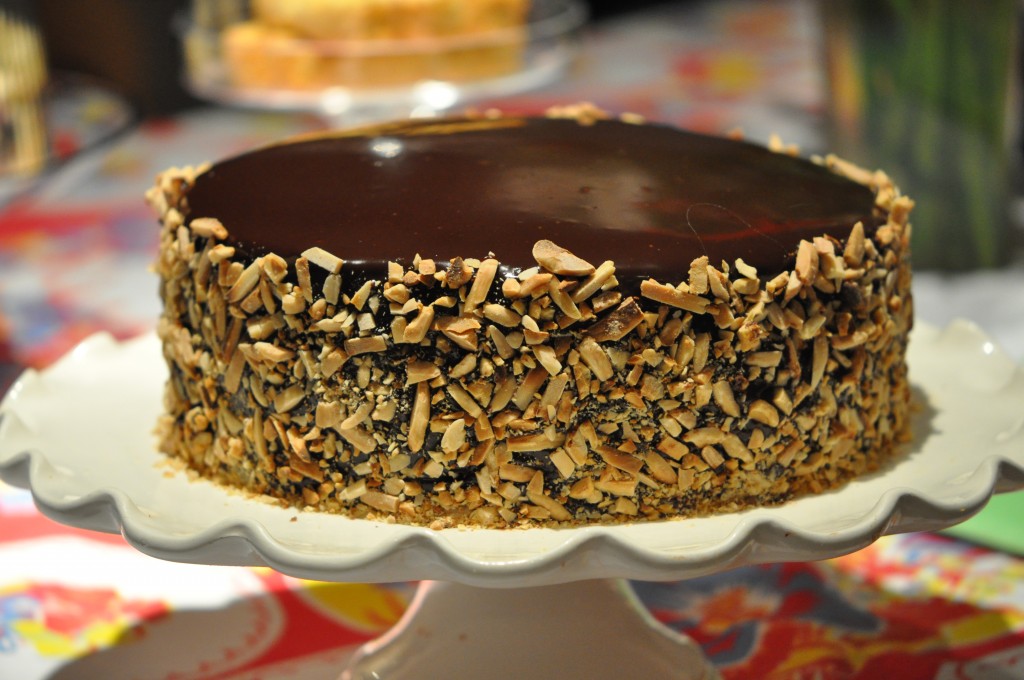
Yellow Cake With The Real Deal Ganache

Ganache is by far the simplest way to frost and cake.   Chefs and bakers always want it to seem so difficult, but once you frost a cake with ganache you will never do any other chocolate frosting.  Just pour it over the cake and let it run down the sides.  The nuts will hide any imperfection.

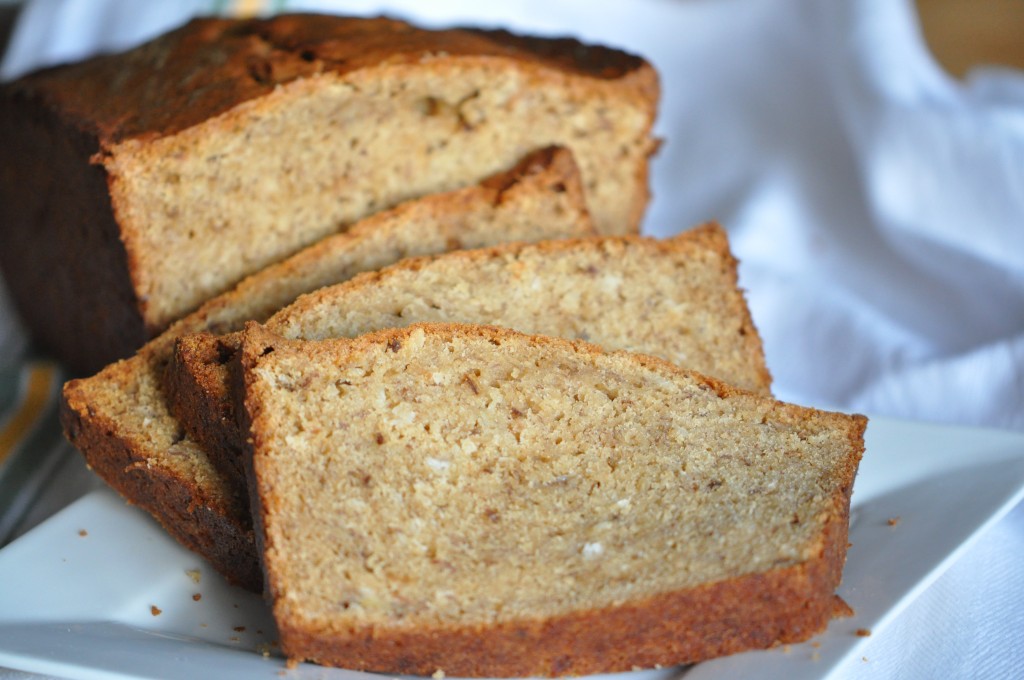
Banana-Toasted Coconut Bread

Never waste the over-ripe bananas.  This moist, delicious and so easy quick bread is a wonderful addition to breakfast or afternoon coffee break.  Try it with a shmear of cream cheese and a little dab of Fig Preserves.

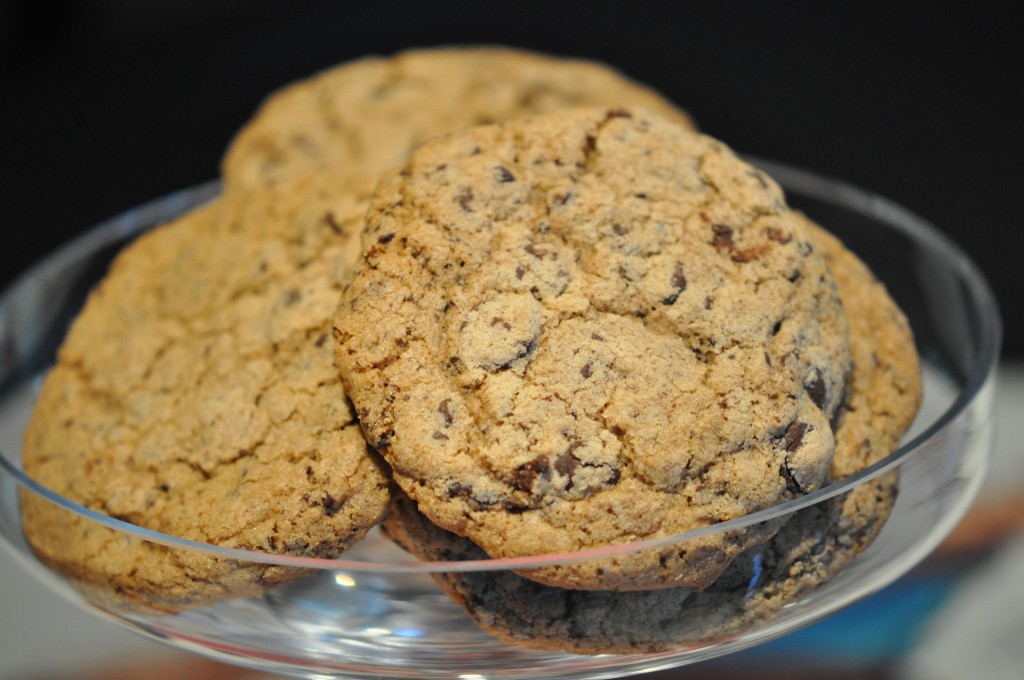
Chewy-Chocolaty Chocolate Chip Cookies

The secret to these chewy chocolate chip cookies is in the recipe.  See if you can find it.  I know the secret and you will, also, once you make everyone’s favorite cookie.

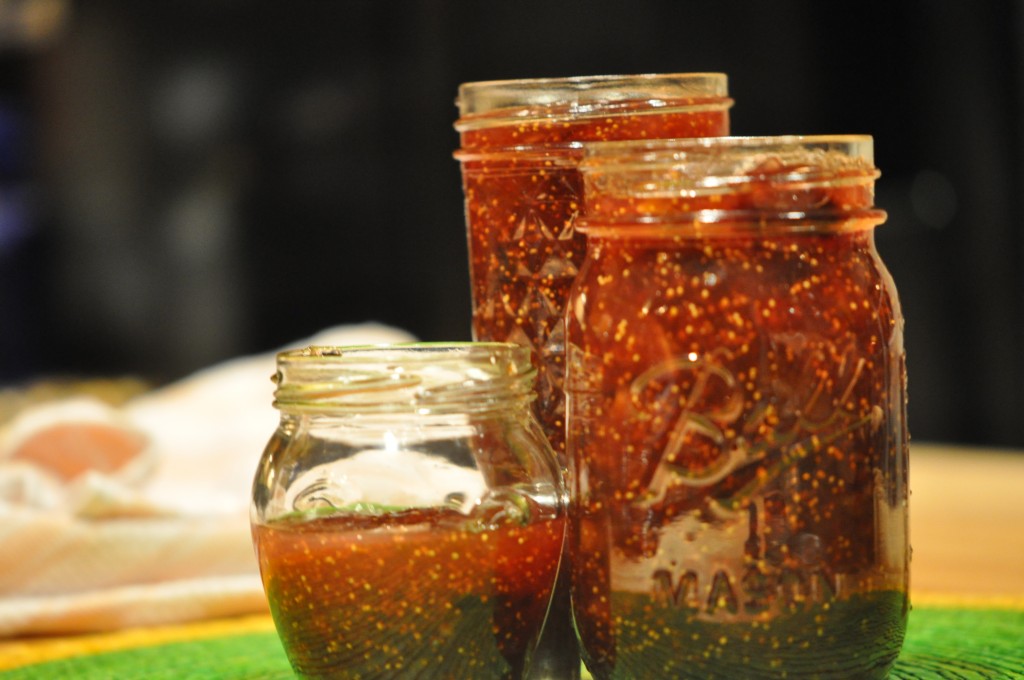
Fig Preserves

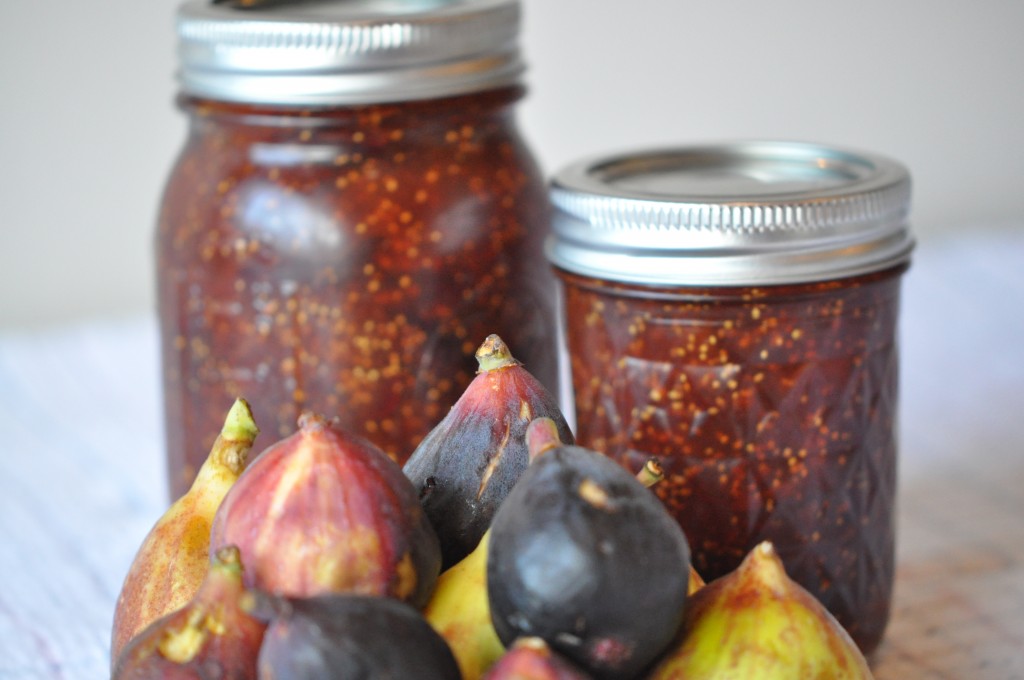
More Fig Preserves

Figs are at their peak right now.  If you wait too long they will be impossible to find.  Figs were at our table growing up and they bring me back to those great days.  Try spreading on quick bread such as the Banana-Toasted Coconut Bread or do as they do in Italy – use the preserves as a condiment with cheese and crostini.

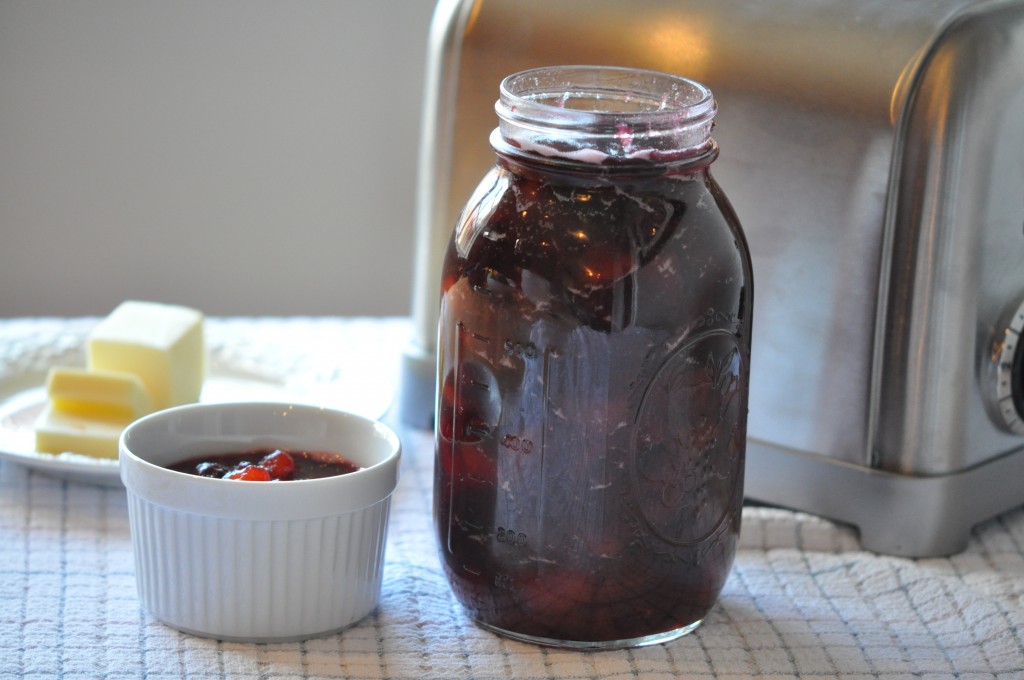
Cherry-Peach Preserves

Among the fruits at their peak are cherries, peaches and nectarines.  I always buy a lot of fruit and what we don’t eat I preserve.

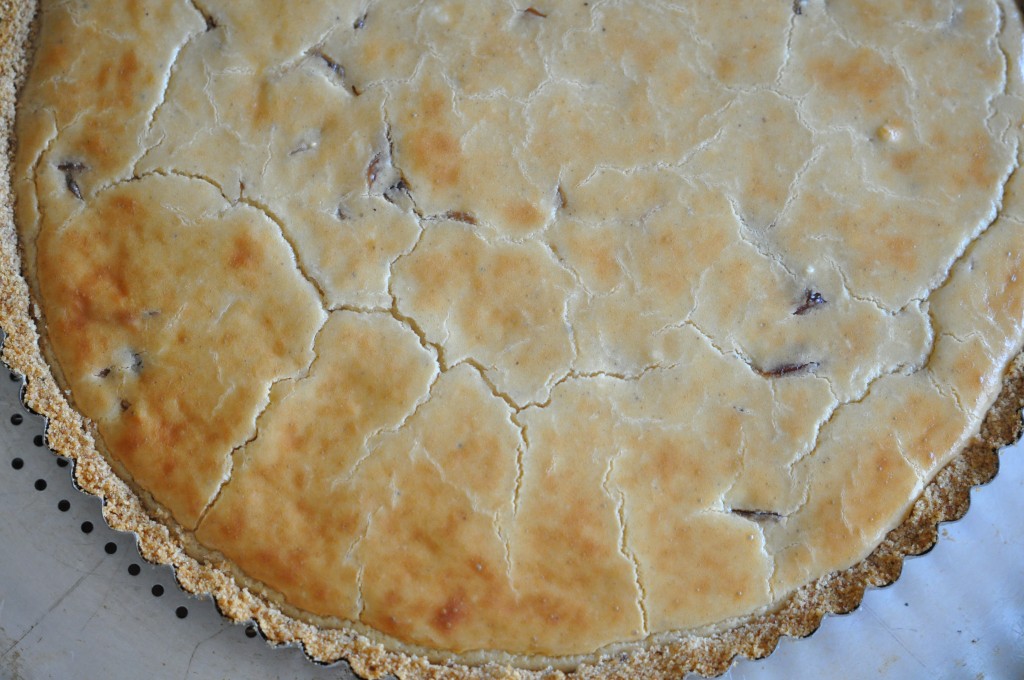
Gorgonzola and Caramelized Onion Tart

A great brunch or lunch treat is the Gorgonzola and Caramelized Onion Tart.  Instead of a pastry crust I used bread crumbs.  It is so much lighter and easy to put together at the last minute.

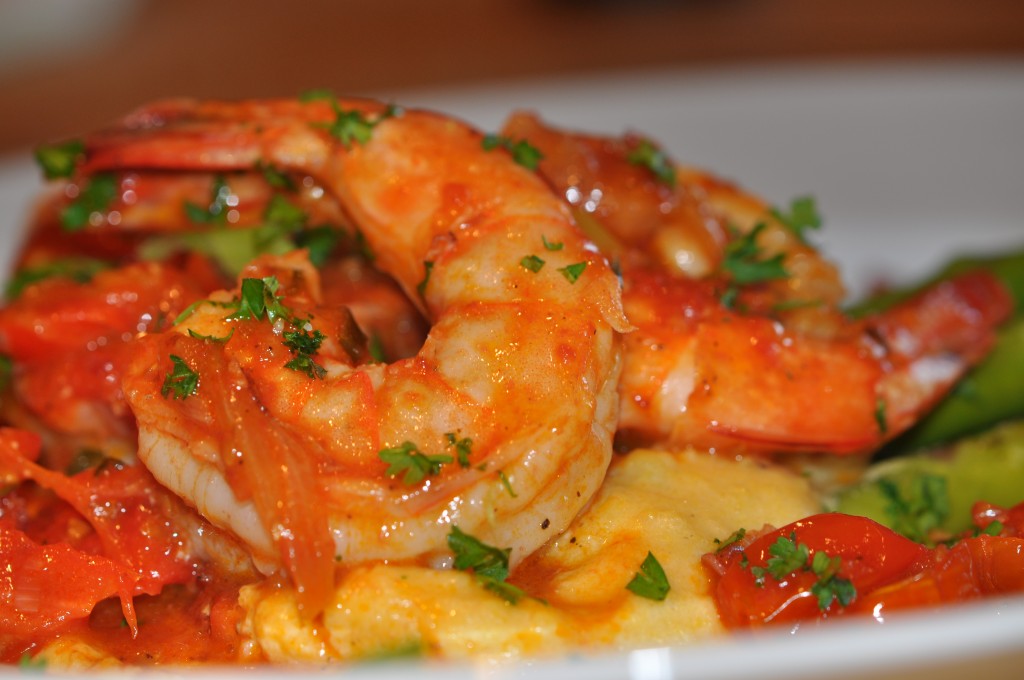
Sauteed Shrimp and Soft Polenta

Traditionally, Polenta was served in the winter since it is a stick to the ribs kind of dish.  But if I have to wait until it’s cold and blistery outside, I will never prepare it since it is always hot in Florida.  Tradition be damned!!!  Eat it when you want it.

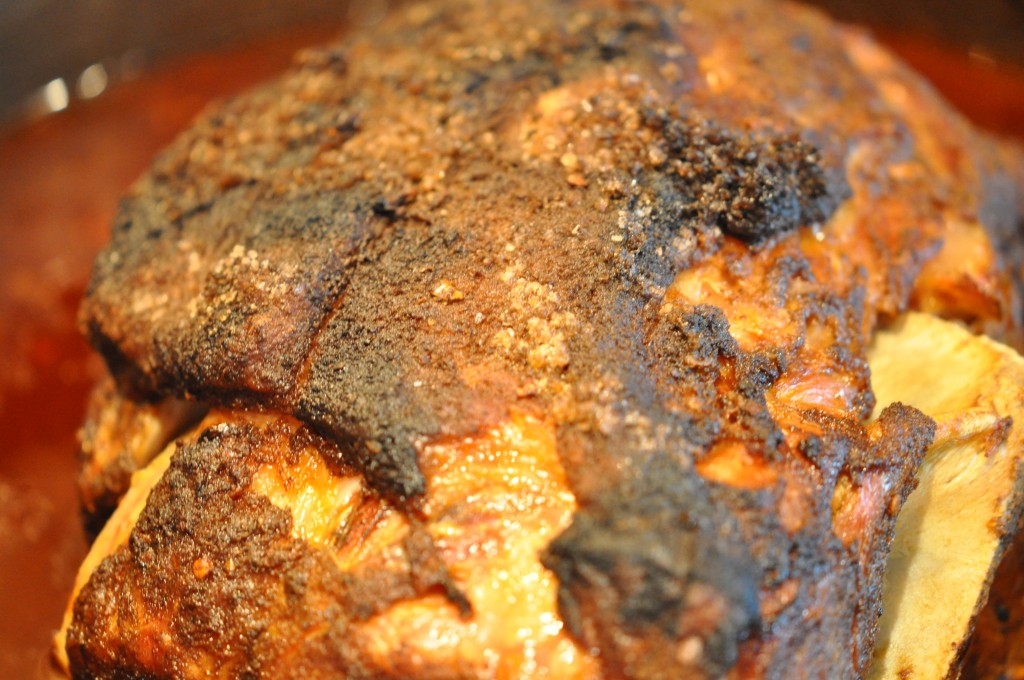
Slow Roasted Pork Butt

Slow Roasted Pork Butt makes for a great pulled pork meal.  Try it either as an entree, in a sandwich with BBQ sauce or as a soft taco with a selection of condiments to accompany this rich, luscious, tasty cut of meat.  For the recipe go to my earlier posting – May 10, 2011 – A No Stress Party Menu.

Well, there you have it.  Besides all of the above items I made this last month I also created a great recipe for Vanilla Creme Fraiche Semi-Fredo.  I’m saving this recipe and picture for the future posting I am planning on writing with Semi-Fredo and Gelato as the topic.

Here are a couple of recipes for you to try:

Yellow Cake

4        Large Eggs at Room Temperature

½       Cup Whole Milk at Room Temperature

2        Teaspoons Vanilla Extract

2 ¼    Plain Cake Flour

1 ½    Cups Granulated Sugar

2        Teaspoons Baking Powder

1        Teaspoon Fine Sea Salt

8        Ounces Unsalted Butter, Softened, Cut into 16 Pieces


Preheat oven to 350F Degrees F (325 if using a convection oven).  Place oven rack in lower middle position of oven.  Spray two 9 inch cakes pans with baking spray such as Pam for Baking.  Cover pan bottoms with rounds of parchment paper and spray with baking spray.

Beat eggs, milk and vanilla with a fork in a small bowl.  Measure out 1 cup of this mixture and set aside.  Combine flour, sugar, baking powder and salt in a bowl of a standing mixer fitted with the paddle attachment.  Mix on lowest speed to blend, about 30 seconds.  With mixer still running at lowest speed, add butter one piece at a time, mix until butter and flour begin to clump together and look sandy and pebbly, with pieces about the size of peas  Once all of the butter is incorporated beat on low for an additional minute.  Add reserved 1 cup of egg mixture and mix at lowest speed until incorporated, 5 to 10 seconds.  Increase speed to medium high (#6 on the Kitchen Aid Mixer) and beat until light and fluffy, about 1 minute.  Add remaining egg mixture (about 1//2 Cup) in a slow steady stream.  Stop mixture and thoroughly scrape sides and bottom of bowl.  Beat on medium high until thoroughly combined and batter looks slightly curdled, about 15 seconds longer.

Divide batter between the prepared cake pans, spread batter to sides and smooth with a spatula.  Bake 20 – 25 minutes, until top is light brown and an inserted skewer comes out clean.  Cool on rack 10 minutes then remove from pan and cool completely before icing.

Chocolate Ganache

Enough for a 9” Two Layer Cake

3        Cups Heavy Cream (36%)

¼       Cup Light Corn Syrup

2        Lbs. Good Quality Bittersweet Chocolate, Chopped Fine

OR    Hershey’s Special Dark Chocolate Chips

2        Cups Toasted Slivered Almonds, Slightly Crushed with a Rolling Pin

To Crush the Almonds, place between two sheets of parchment paper and roll over with a rolling pin to slightly crush.

Place the chocolate in a medium large bowl.

In a medium size sauce pan, heat the heavy cream and the corn syrup until just boiling.  Remove from heat and immediately pour over the chopped chocolate.  Let rest for 5 minutes and then whisk until completely smooth and blended.

Pour half of the Ganache into another bowl and place bowl over ice bath.

Set the other half of the Ganache to the side.  Let cool for 15 to 20 minutes, until the Ganache is slightly thickened, not hot but still pourable.

Stir the chocolate that is sitting in the ice bath until cooled to room temperature.  Once cooled, beat in the bowl of a standing mixer fitted with the paddle attachment until light and fluffy.

Set the first layer of the cake on a round cake board the exact size of the cake (9”) and place on a rack set over a half sheet pan that is lined with a sheet of parchment paper.

Spread some of the whipped Ganache onto the first layer of cake.  Top with second layer and frost the cake with the whipped Ganache using all of it on the top and sides.  Smooth top and sides with an off-set spatula.  (This is called the crumb coat.)  Place the cake in the refrigerator for about 15 minutes or until the Ganache is set.

Once the crumb coat is set, remove from refrigerator and pour the cooled Ganache over the center of the cake top.  The Ganache will gently fall down the sides of the cake.  Pour the Ganache slowly without stopping until all of the Ganache is used.  You will have a completely smooth frosted cake.  Let the Ganache set for about 10 minutes in the refrigerator.  After 10 minutes remove the cake from the refrigerator and gently press the crushed almonds onto the sides of the cake.

Remove the cake from the rack and place onto a serving dish.  Refrigerate for at least two hours or overnight.  One hour before serving, remove from the refrigerator to let the cake come to room temperature.

Hints and Tips: Using the cake board makes it easy to move the cake from the rack to the serving dish.

Resist the urge to spread the pourable Ganache with a spatula.  The wonderful thing about this is the way it goes down the sides without any help.  Help will leave marks and make the Ganache dull and not glossy as it should be.

If you think the Ganache has set too much and will not pour, microwave for 20 seconds and gently stir.

All of the Ganache that is left on the parchment paper is easy to scrape off and put into a container.  The left over Ganache will keep in the refrigerator for up to two weeks.  You can use the left over Ganache to make Chocolate Truffles.  Roll the cold Ganache into balls and then in Cocoa Powder and Finely Chopped Nuts.  Refrigerate until ready to serve.

Camille’s Chocolate Chip Cookies

Makes about 3 Dozen Medium Size Cookies

2¼ Cups All-Purpose Flour

1        Teaspoon Baking Soda

1        Teaspoon Fine Sea Salt

½       Cup Vegetable Shortening (Crisco) at Room Temperature

½       Cup Unsalted Butter at Room Temperature

¾       Cup Granulated Sugar

¾       Cup Dark Brown Sugar Firmly Packed

2        Teaspoons Pure Vanilla Extract

2        Large Eggs at Room Temperature

2        12 Ounce Packages Semi-Sweet Chocolate Chips or

Hershey’s Special Dark Chocolate Chips

Preheat oven to 375 Degrees F (350 if using a convection oven.)

In a small bowl, combine flour, baking soda, and salt.  Set aside.

In the bowl of a standing electric mixer fitted with the paddle attachment, cream together the vegetable shortening, butter, sugar, brown sugar and vanilla.  Beat until light and fluffy.  Beat in the eggs one at a time.  Gradually add flour mixture and mix well.

Put half of the chocolate into a food processor fitted with the steel blade and pulse until most of it is chopped fine.  Add the chopped chocolate and the chocolate chips into the dough and mix on low until combined.

Drop the dough onto baking sheet lined with parchment paper, or silpat, using a small ice cream scoop to measure.  Slightly press down the top of each cookie and bake for 12-13 minutes rotating the pan half way through the cooking time.  Cool completely on baking sheet before storing.

Hints and Tips:  I use a 1¾ inch ice cream scoop.  This makes a nice size cookie.  You can use a smaller scoop if you like but remember to adjust the baking time.

This last month I got all of my recipes to the Library of Congress for Copyright.  This is pretty exciting for me.  Now I can say they are copyrighted and are not to be published by anyone but me, blah, blah, blah.  You know the rest.

Let me know if you make any of the recipes by commenting on the blog or e-mailing me at  camille@camillecooksforyou.com I recently heard from a friend that she was e-mailing me to this address but I never received her e-mails.  Please let me know if this is happening to you.  I answer all of my e-mails so if you did and I didn’t then there is a problem.  I am still learning WordPress.

Posted in Bread, Chocolate, Cookies, Desserts, Food For Thought, Hints and Tips, Pork, Recipes To Share | Tagged , , , | Comments Off on A Very Busy Month

Thank You, Aunt Lena

Last month my dear Aunt Lena passed away after 91 years of being on God’s Great Earth.  Aunt Lena was my father’s younger sister in a family of nine siblings, some from an earlier marriage of my grandfather’s.  There is only one sister here among us, Aunt Mary,  the Matriarch of the family – 102 years old.

Besides being my Aunt, Aunt Lena was my Confirmation Godmother (Sponsor).  I have so many wonderful memories of this great lady.  One of the things that Aunt Lena will always be remembered for was her awesome cooking and exceptional baking. I often wondered if she had the opportunity would she have had a bakery.  Of course, things like that weren’t done in those days.

When you walked into Aunt’s home the aromas wafting through the air were always sweet  with a hint of anise.  These aromas would linger in the air and if you closed your eyes you would feel as if you had been transported to an Italian bakery.   Aunt Lena was always baking up storm, mostly for our large family gatherings:  Baptisms, First Holy Communions, Confirmations, Birthdays, Anniversaries, Bridal and Baby Showers, Weddings and just any occasion where baked goods were called for.  I remember the Sweet Tables at those occasions loaded with Italian Pizzelles, Deep Fried Choffa, Chocolate and Vanilla Filled Cream Puffs, Chocolate Chip-Coconut Cookies, Biscotti ( we call them Slices), Cobblers, Cakes, Breads and the list goes on and on.

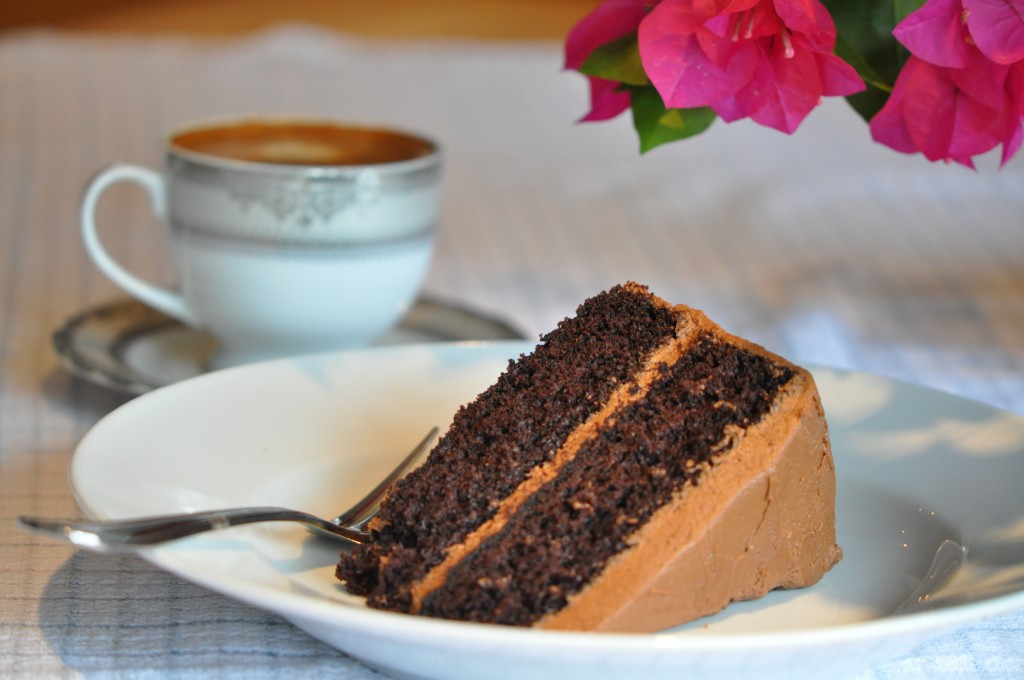
The recipe that is dearest to me is Aunt’s Dark Chocolate Cake.  This is the chocolate cake I baked for almost all of my years in the catering business.  Not only is it fabulous but so simple to make.  I am the quintessential recipe changer but I would never think of changing any of her recipes.

At the celebration of Aunt Lena’s life last month, I decided to write this blog as a tribute to her by gathering recipes, making them and sharing with you.  I really did not know where to start to get the recipes but several of my cousins and my Aunt sent me what they had.  I have my mother’s recipe box and in it were at least six of Aunt Lena’s recipes.  While I was looking through my Mom’s recipe box I remembered how I acquired Aunt Lena’s Dark Chocolate Cake recipe.  I needed to make a chocolate cake for a party I was catering and asked my mother if she had a good recipe.  She gave me her copy of Aunt Lena’s.  That was over 30 years ago and I am still using that recipe.

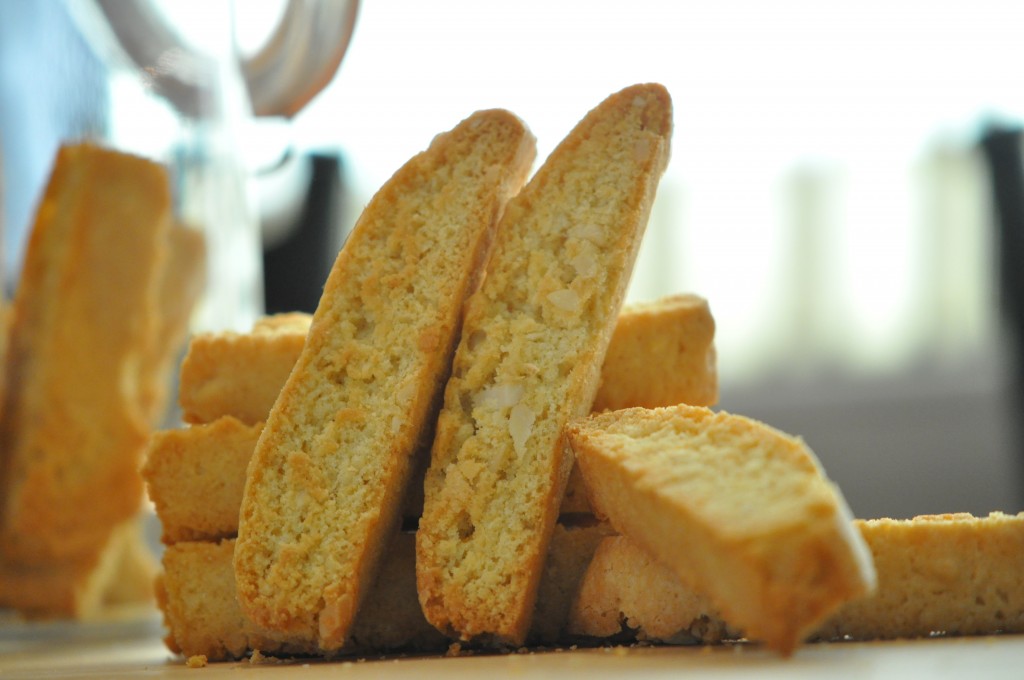
Today I made Aunt’s Almond Slices and, OMG!!, they are the best slices I have ever made or eaten.  I’ve been making slices for years using various recipes but never have I made slices this good.  No, not good, GREAT!!!  The recipe is a bit deceiving as it seems like it won’t work because the dough is more like a stiff batter.  It is difficult to work with and as I was making the logs the dough has to be shaped into for the first baking I kept thinking over and over “this is not going to work”.  But, low and behold, it did.  I am going to give you Aunt Lena’s recipes exactly as they are written.  At the end of each recipe I will give you the hints and tips that work.  Almost every recipe I have of Aunt Lena’s is very vague but be assured that I did not change any of the ingredients or amounts in any of the recipes.

Today I am going to share those two recipes, Dark Chocolate Cake and Almond Slices.  I will do more in the coming weeks.  I wanted to do several more recipes for this blog but guess who gets to eat all of these delicious sweets?  So to keep things in shape (our shapes) I decided to do a couple at a time.  I am looking forward to doing more of her scrumptious sweets in the next few weeks.  I am thinking about doing the Banana Cake with Sour Cream Frosting and the Chocolate Chip Coconut Cookies next time.  I’ll give our waists a little time to shrink before I bake again.

Dark Chocolate Cake – A Little Slice of Heaven

Aunt Lena’s Dark Chocolate Cake

Makes 1   –   9” Double Layer Cake

½          Cup Cocoa Powder

½          Cup Cold Water

½          Teaspoon Salt

2           Teaspoons Baking Soda

2/3        Cup Margarine

1  2/3   Cups Granulated Sugar

2           Large Eggs

2           Cups Sifted All-Purpose Flour

1          Cup Buttermilk

1           Teaspoon Pure Vanilla Extract

Several Drops Red Food Coloring (Optional)

Preheat oven to 375º.

Grease and flour two 9” round cake pans and line with parchment paper.  Grease the parchment paper, also.

In a small bowl mix the cocoa, cold water, salt and baking soda until smooth.  Set aside (Aunt Lena’s recipe says “Let Stand”).

In the bowl of a mixer beat margarine to soften.  Add sugar and beat until light and fluffy.  Beat in eggs one at a time and, when completely incorporated, add the cocoa mixture.  Beat until blended.  Add the flour and buttermilk alternately in thirds, beginning and ending with the flour.  Beat in the vanilla and food coloring.

Divide evenly between the prepared pans and bake for 25 – 30 minutes.  Test for doneness with a wooden skewer.  When the skewer is inserted into the middle of the cake and comes out clean the cake is done.

Remove from the oven and cool on a wire cooling rack for 20 minutes.  Remove the layers from the pans by inverting onto a wire cooling rack.  Let cool completely before icing.

Use your favorite Chocolate Frosting and if you don’t have one use mine.

Hints and Tips:  For greasing and flouring the pans I use Pam spray for baking.

One of the things that is so interesting in this recipe is that you use cold water instead of hot water when mixing the cocoa with the water.  Every recipe uses hot water except this one.  So use the cold water because it works.

If you have a mixer with a paddle attachment, use it.

Chocolate Frosting

1        Lb. Unsalted Butter at Room Temperature

2        Lbs. Powdered Sugar

1/4     Cup Heavy Cream

12      Ounces Good Quality Dark Chocolate Chips

Melt chocolate in a double boiler over slowly simmering water.  Stir once or twice to blend.  Once chocolate is melted remove from heat and let cool to room temperature.

Place butter into the bowl of an electric mixer fitted with the paddle attachment and beat until light and fluffy on medium high speed.  Lower speed and gradually add powdered sugar adding cream a little at a time.  Beat until perfectly smooth.  Add melted and cooled chocolate in a slow and steady stream.  Once again beat until well combined and perfectly smooth.

Makes enough frosting to generously cover and fill a 9 inch, two-layered cake.

Hint:  Hershey makes the best Special Dark Chocolate Chips and work great in this recipe.  One bag is 12 ounces.


Biscotti – Aunt Lena’s Almond Slices

Makes 2 Dozen Slices

4        Ounces (1 Stick) Margarine or Butter (I used Butter)

1        Cup Granulated Sugar

3        Large Eggs

1        Teaspoon Pure Vanilla Extract

2        Cups All-Purpose Flour

2        Teaspoons Baking Powder

1/8     Teaspoon Salt

½       Cup Chopped Almonds

Preheat oven to 375 Degrees F (350 if using a convection oven).

In a small bowl whisk together the flour, baking powder and the salt.

In the bowl of an electric mixer (fitted with the paddle attachment if you have a mixer that comes with the paddle) cream the butter and sugar until light and fluffy.  Add the eggs, one at a time, making sure each egg is incorporated before adding the next.  Add vanilla.  Mix in the dry ingredients.  Mix well and add the chopped almonds.  Mix well.

Transfer the dough to a parchment lined cookie sheet pan and make two long loaves, spacing several inches apart.

Bake for 15 – 20 minutes.  Remove from oven and let cool 10 minutes.  Slice the loaves into ½ inch to ¾ inch slices and lay cut side down onto a unlined cookie sheet pan.  Bake for 10 minutes.  Flip slices over onto the other cut side and bake for an additional 10 minutes or until the slices have firmed up and are toasted.  Remove from pan and cool on a wire rack.

Cookies will keep in an airtight container for at least a month.  (These slices are so good that they most likely will be eaten in a day or two).

Hints and Tips:  I have two copies of this recipe both with Aunt Lena’s name as the author but one has 15 drops of anise.  If you like anise flavor go ahead and give it a try.

The dough is extremely soft, a lot like a stiff batter.  I suggest you flour your hands when making the logs.  This will help a lot.  Making the logs was the most difficult part of this recipe.

When I baked the logs side by side with a few inches of separation, they spread out and touched each other.  At first I thought this was a problem but it turned out to be exactly what should happen.  When I took them out of the oven after the first baking I ran a knife down the middle to separate the two loaves.  When I cut the loaves into slices the fact that they were touching did not matter.  Cutting into slices was very easy.   In fact, these slices cut better than any other Biscotti I’ve made in the past.

Making these recipes puts me in quite a nostalgic mood and that’s a good thing.  It brings me back to my childhood and growing up among strong, wonderful, talented Italian women.  I can only try to emulate them as I am getting older.  To our Mothers and Aunts and all the people we love, we toast you with an Almond Slice.

camille@camillecookforyou.com E-mail me.  I love hearing from you.

Posted in Ahh Haa Moments, Desserts, Food For Thought, Recipes To Share | Tagged , , | Comments Off on Thank You, Aunt Lena

Cherry Margarita

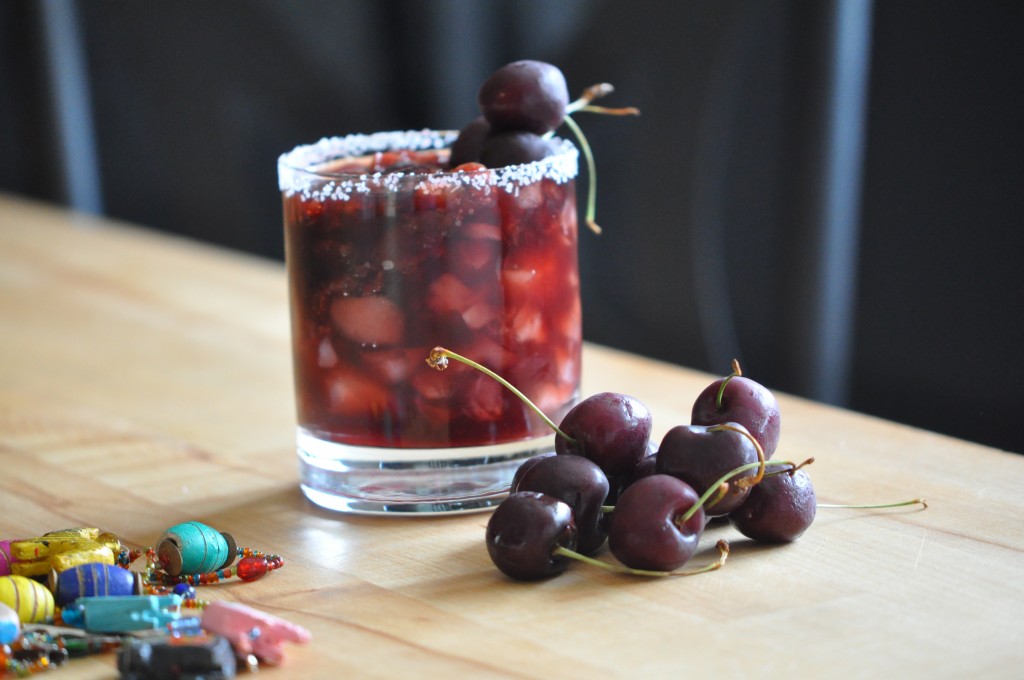
Now That Looks Good!!!!

Sunday night we had a few friends over for a BBQ and while I was preparing the food for the grill I decided I needed a Margarita. Margaritas are my favorite summertime drink:   They really ease the pain of the heat while I am grilling.  Well, actually Tequila is my liquor of choice, therefore the pain is at a minimum, if you know what I mean.  But I was in the mood for something a little different.  I had a bag of ripe cherries in the frig and everything else needed to make Cherry Margaritas.  I had never made them before so  this was  an experiment.  Oh, how I love it when an experiment works out and this experiment did just that.  Our friend, Mary, really liked the drink, told all of her friends about it and now I am going to share the drink recipe with you.  Mind you, I made it up as I went along but I managed to write it down and this recipe is the exact result.  If the picture looks a little blurry I am sure you can guess why:  Someone has to be the taste tester.

I made this drink by the pitcher.

Cherry Margarita

2         Dozen Ripe Cherries, Pitted
3        Cups Jose Cuervo Tequila Gold
1 1/2 Cups Chambord (That’s what I had so that’s what I used)
3/4   Cup Simple Syrup (Equal parts water and sugar boiled until the sugar dissolves and liquid is slightly thickened)
1        Cup Bottled Cherry Juice
Lime and Kosher Salt to Rim the Glasses
Whole Cherries with Stems for Garnish

Muddle the cherries until they become smashed and juicy (I don’t know any other way to tell you this procedure) and put into a pitcher.  Add the Tequila, Chambord, Simple Syrup and Cherry Juice to the pitcher and stir well.  Refrigerate until ready to serve.

To serve, rim a good sized rock glass with the lime and salt.  Pour some of the Margarita into a drink shaker with a little ice and shake vigorously.  Fill salt rimmed glass with ice and pour the Margarita into the glass.  Garnish with Cherries.  Drink With Caution!!!!  If you are drinking this outside of your home and driving is involved I suggest you have a designated driver.

camille@camillecooksforyou.com

Posted in Food For Thought, Fruit Drinks, Liquor, Recipes To Share | Tagged , | Comments Off on Cherry Margarita

Excitement Is In The Air

Sweet Bi-Color Corn

Can you feel it?  There is something in the air that is making people giggly and excited.  And just what is all the excitement about?  People are getting ready for that wonderful time of year – CORN SEASON!!!!!  Yes, corn season.  Being from the Midwest, corn was prevalent on our dinner table.  Corn Bread, Creamed Corn, Corn On The Cobb, Polenta, Grits (yes, grits – my dad loved grits) Corn, Corn, Delicious Corn.  Well, maybe I am not that excited.  Being city born and raised, I definitely never picked any corn or even gave it much thought when I was growing up.   But it was a part of our summer diet:  I just ate it and didn’t ask questions.  It was and still is one of my favorite grains.

On a recent trip to Chicago, I stayed with my sister in the country, about 60 miles from the city, and remembered what the Midwest is all about.  Corn!!!  My sister and her husband live in a beautiful community in the middle of corn fields.  The corn is high and just about ready to pick.  So I thought I would get you all ready for that big day, when corn is at it’s best, by sharing a couple of my delicious original corn recipes.  I love corn and two of my favorite ways to enjoy it are Corn Chowder and Corn Pudding.  I just finished making a batch of Corn Chowder using the seasons first harvested corn from the midwest.  There are a lot of varieties of corn but the one I like the best is bi-color corn.  It is super sweet, tender and juicy (milky) with small kernels.  It is so tender that when you eat it right off the cobb it comes off easily and so sweet it is like eating a corn candy bar.

Both of the recipes are incredibly easy but do require a bit of chopping time.  Having all of your mis en plac ready before you begin makes these recipes a cinch.

A couple of hints and tips will help you, so listen up.  The corn chowder recipe has chicken in it but you could easily and, OMG!!!, make it so much more interesting and delicious by using lobster.  There is nothing better than Lobster and Corn Chowder.  If you decide to use lobster, cook the lobster first the way you like to do that task or buy pre-cooked lobster meat.  You can get pre-cooked at almost any seafood store except Whole Foods.  I suggest you heat the lobster in the soup per serving.  Don’t make this big batch and throw 4 cups of lobster in it if you are not going to serve all of the soup at one sitting.  You can even use Maryland Crab Meat or Alaskan King Crab.  You get the idea.

If you use chicken as suggested in the recipe you can use roasted chicken or sauteed chicken breasts, whatever you like to get the amount you need.

The soup freezes extremely well and will keep in the freezer for about a month or even a little longer.


Corn and Chicken Chowder

Corn Chowder Garnished with Red Hot Pepper

This recipe is a perfect example of “The Layers of Flavor” I always strive for in my cooking.  You can taste every ingredient in this chowder at one time and you will be able to identify each of them individually.

Using the corn cobbs in the cooking of the chowder gives it the most corn flavor possible.

Makes About 1 Gallon, Enough for 10 Healthy Portions

8        Tablespoons Unsalted Butter

2        Cups Spanish Onions, ¼ Inch Dice

2        Cups Celery, ¼ Inch Dice

2        Cups Carrot, ¼ Inch Dice

6        Cups Fresh Corn off the Cobb (From About 8 Ears, Reserve 4 of the Ears)

4        Cups Russet Potatoes, Peeled and ¼ Inch Dice

1        Jalapeno, Seeded and Finely Minced

1        Tablespoon Coarse Sea Salt

1/2     Teaspoon Freshly Ground Black Pepper

1/2     Teaspoon Chili Powder

1/2     Teaspoon Ancho Chili Powder

1/2     Teaspoon Chipotle Powder

8        Tablespoons All Purpose Flour

7  Cups Chicken Stock, Heated

2        Cups Heavy Cream

4        Cups Cooked Chicken Breast, ½ Inch Dice

Chopped Scallions and Crème Fraiche for Garnish


In a large Dutch oven or stock pot, melt the butter over medium high heat.  When butter is hot and foamy add the onion, celery and carrot.  Reduce the heat to medium and sauté the vegetables for 8 to 10 minutes, until the onion begins to become translucent.  Add the corn, potatoes and the jalapeno and sauté for a few more minutes mixing with the other vegetables to be sure all are covered with the butter.

Add all of the seasonings and toss to coat the vegetables.  Sprinkle the flour over the mixture and stir to coat all of the vegetables with the flour.  Be sure to not let the vegetables get brown.  Cook the flour and vegetable mixture for 2 minutes, stirring continuously, to take the raw flavor of the flour out.

Add the heated chicken stock, stirring continuously, and bring to a rolling boil.  Add the reserved corn cobbs and reduce the heat to simmer and cook the chowder for 45 minutes, stirring occasionally, until the chowder begins to thicken and the vegetable are cooked through.

Add the cream and simmer for 15 minutes.  Add the cooked chicken and heat through.  Remove the corn cobbs and discard before serving.

To serve, ladle generous portions into warm bowls.  Top each serving with a dollop of Crème Fraiche and a sprinkle of chopped scallions.

Roasted Corn Pudding

Corn

Roasted Corn Pudding

This recipe has become a staple at our Thanksgiving Feast and it is also really good served at a BBQ.  You can make this a day ahead and reheat it, covered, in a 300 Degree F oven for about 30 minutes.  Test it with a thin bladed knife by inserting it into the middle of the pudding and keeping it there for about 30 seconds.  If the blade comes out warm it will be warm all the way through.

2        Tablespoons Olive or Corn Oil

6        Cups Fresh Corn Cut off the Cobb (From About 8 Ears)

2        Tablespoons Unsalted Butter

1        Cup Chopped Scallions

2        Cups Chopped Red Bell Pepper

1        Chopped Jalapeno Seeds and Veins Removed (Optional)

6        Large Eggs

2        Large Egg Yolks

1 ½    Cups Heavy Cream

1 ½    Cups Half and Half

1 ½    Cups Grated Cheddar Cheese

1 ½    Cups Grated Jack Cheese

1        Teaspoon Mild Chili Powder

1        Teaspoon Ancho Chili Powder

1/2     Teaspoon Chipotle Powder

1        Tablespoon Sea Salt

1        Teaspoon Ground Black Pepper

Pinch of Freshly Grated Nutmeg

Preheat the oven to 350 degrees F. Spray the inside of Large Baking dish (13x9x3 high) with cooking spray.  Bring a medium large pot of water to boil.

Remove corn kernels from the Cobbs.  Toss with two tablespoons corn or olive oil.  Place on a cookie sheet pan with sides and roast in oven for 10 minutes.

Melt the butter in a sauté pan and sauté onion and peppers over medium-high heat for 4 minutes.  Add chili, ancho and chipotle powders and gently sauté for 1 more minute.  Remove pan from heat and cool slightly.

Whisk together the whole eggs, egg yolks, heavy cream, and half-and-half in a large bowl.  Add salt, pepper and nutmeg.  Add the cooked corn, the onion-pepper mixture, grated cheeses and pour into the baking dish.

Place the dish in a larger pan and fill the pan 1/2 way up the sides of the dish with the boiling water.  Bake the pudding for 1 hour and 15 minutes or until the top begins to brown and a knife inserted in the center comes out clean. Serve warm.
I am looking forward to hearing how you liked these recipes.  Your input is very important to me so let me know what your thought about them by commenting on the blog or by e-mailing me at camille@camillecooksforyou.com

(In the posting about the Beer Can Chicken, many of you asked if it can be cooked in the oven instead of the grill.  I made it in the oven on Tuesday and it came out moist and delicious and had really crispy skin.  The only thing that was a little disappointing was we could not taste the beer flavor as we did when I cooked it on the grill.  When I cooked it on the grill the beer flavor was very subtle – not overpowering at all.  BUT, the chicken was the most moist chicken I have ever had with cooking in the oven. Here is what I did:  I preheated the my CONVECTION oven to 375 Degrees F, propped that baby on an opened can of Mexican Beer, placed it in a shallow pan and cooked it for one hour and 15 minutes.  It was a 5 lb. Organic Chicken. I always recommend using an instant read thermometer to be sure it is cooked properly – 185 Degrees F for the thigh and 165-170 for the breast.)

Recipes © 2011

Posted in Chicken, Food For Thought, Hints and Tips, Recipes To Share, Soup, Vegetables | Tagged , | Comments Off on Excitement Is In The Air

Summer’s Bounty

What could be more wonderful than summer fruit?  I am talking about the organic summer fruit grown in the United States, not fruit shipped in from South American or Mexico.  Right now the fruit is spectacular; peaches, nectarines, blueberries, strawberries, plums.  I can’t seem to get enough of these these sweet, delicious, juicy delicacies.  When I go to the market and see all of the fruit beauty in front of me, my eyes become bigger than my stomach.  I can’t resist because I know as fast as the fruit arrives the season will be gone even faster.  So I buy a lot and make as many wonderful fruit concoctions as possible.  I have a refrigerator full of preserves, a freezer full of fruit gelato and containers of blueberries (I am a blueberry squirrel, saving some for the non-blueberry months) .  On my counter sits a bowl full of peaches, nectarines and plums some of which have been turned into a Summer Fruit Crostada.

What I like the best about this recipe is that it cooks for just enough time to get the crust brown and super crispy but the fruit is still firm and holds its shape.  The time in the oven lets the fruit produce just enough juice to keep it from being mushy and runny.  I love that I can feel the texture of the fruit between my teeth.  I also love the rustic reform look of this tart.  It is a perfect dessert to end a light lunch on the veranda or a casual dinner such as a BBQ.

I will give you a huge tip.  Let the tart cool the whole time recommended and use two wide off-set metal spatulas to move it from the pan to your serving dish.  If you try to lift it without the help of the spatulas it will break and you really don’t want that to happen.  If you are not going to serve this to company,  it is purely for your pleasure and you don’t have the spatulas to help you move it don’t bother.  Just leave it on the baking pan.

When I make a tart such as this I use my pizza pan with holes on the bottom.  This type of pan helps the bottom of the Crostada cook and become crispy.  The parchment paper will catch any juices that may drip from the Crostada. (You can see the pan through the parchment paper in the first photo.)

As you can see by the picture, the Crostada looks beautiful.  I am doing all I can to keep from diving into it before it cools.  But I will wait and have a great dessert tonight.

Summer Fruit Crostada

Crostada Ready For The Oven


For The Pastry

Makes Enough Pastry For Two Crostadas

3½     Cups All Purpose Flour

1/2     Cup Granulated Sugar

1        Teaspoon Fine Sea Salt

8        Ounces Cold Unsalted Butter (2 Sticks) Cut Into 16 Pieces

½       Scant Cup Cold Vegetable Shortening Such as Crisco

5 – 6   Tablespoons Ice Water

For the Filling

3        Each Ripe Peaches and Nectarines Cut into 1/2 Inch Wedges

1        Cup Blueberries Stems Removed

1        Cup Cherries, Pits Removed and Cut in Half

¼       Cup Granulated Sugar

2        Tablespoon Cornstarch


1        Large Egg Lightly Beaten with 1 Tablespoon Water

2        Tablespoons Sanding Sugar for Dusting


My personal preference for making this or any pastry crust is to use my fingertips.  To make it my way, place the flour, sugar and salt in a large bowl and whisk to combine.  Add the cut up butter and blend into the flour mixture using your fingertips.  Work quickly so butter does not get too soft.  Blend until the mixture resembles coarse meal or small peas.  Add the vegetable shortening in the same manner.  When all is mixed take a small amount and press it together in the palm of your hand.  If it stays together it is time to add the water.  Start with 5 tablespoons of the ice water and pour over the mixture.  Gather the mixture together into a ball.  If it is too crumbly and won’t stay together add a little more water.  You want the mixture to come together nicely.  Not dry or wet.  Turn the dough out onto a lightly floured surface and form it into 2 balls.  Flatten each ball into a disk and wrap, separately, in plastic.  Refrigerate for one hour before rolling out.  This gives the glutens time to rest and keeps the pastry from shrinking while it is baking.  Very important to always do this when making any pastry.

If this all seems to daunting, use your food processor following this next set of directions:  Place the flour, sugar, and salt in the bowl of a food processor fitted with the steel blade. Pulse a few times to combine. Add the butter and shortening to the flour. Pulse the mixture until the mixture forms crumbs the size of peas. With the motor running, add the ice water all at once through the feed tube. Keep hitting the pulse button to combine the mixture and the dough comes together. Turn the dough out onto a lightly floured surface and form it into 2 balls.  Flatten into  disks and wrap the each disk separately in plastic.  Refrigerate for one hour.

(If you are planning on making only one crostada, wrap the second disk in double plastic wrap and put into a plastic freezer bag.  It will last in the refrigerator for one week or in the freezer for up to two months.)

Remove from the refrigerator 30 minutes before rolling.  If the disk of dough is too cold it will crack when you roll it.  You don’t want that to happen.  Bringing it to room temperature won’t hurt it at all as long as it got to rest for 1 hour in the refrigerator.

Preheat the oven to 425 degrees F. (400 if using a convection oven.)  Line a baking sheet with parchment paper.

Roll the pastry into an 13-inch circle on a lightly floured surface. Transfer it to the baking sheet.

In a large bowl mix all of the fruit with the sugar and cornstarch.  Place the mixture in the middle of the pastry leaving a two inch border.  Gently fold the border up over the edge of the fruit being careful not the tear the pastry.  Brush the folded edge with the egg wash and sprinkle with sugar.

Bake on the rack in the middle of the oven for 25-35 minutes or until the pastry crust is golden brown.  Remove from the oven and let cool on the pan on a cooling rack for 30 minutes.  Using two wide aluminum or stainless spatulas, carefully transfer to a serving plate and serve warm or at room temperature with Crème Fraiche, Ice Cream or Whipped Cream.

I hope you will give this a try.  You can post comments to this recipe right here on the blog or you can e-mail me at camille@camillecooksforyou.com

Posted in Desserts, Food For Thought, Fruit Desserts, Hints and Tips, Recipes To Share | Tagged , , , | Comments Off on Summer’s Bounty

Where Have I Been?

It has been over a month since I posted an article on my blog.  Why? some are asking.  June was an incredibly busy month.  For the first part of June I had family visiting.  There were 9 of us having a hell of a great time.  We ate, drank, went to the beach, saw the Marlin’s loose to the Atlanta Braves, shopped and laughed, laughed, laughed.  A real highlight of the week we were together (at least a highlight for me and Jim) was our Frisbee throwing day at Holiday Park.  What a RIOT!!!  The greatest part of Frisbee in the park was my 82 year old Zia Angie getting out there on the field with the rest of us.  She was amazing.  I can’t wait to do that again.

After the family left, Jim and I went to New York to celebrate our wedding anniversary.  We started to make it a food and museum specific trip but abandoned the food part.  Odd, I know, for us to do that, but there were so many restaurants and we had only 3 days.  We ate some great food but didn’t visit any of the “popular” or “trendy” places.  We pretty much stuck to the well known:  A late night dinner at the Plaza, an anniversary dinner at Balthazar, pizza at John’s (an old popular pizza place serving traditional NY style pizza.  Soooo Good!!!!)  The rest of the food involved two meals at Eataly (The joint venture of Mario Batali and Lidia Bestianich), Stage Deli, lunch at The Museum of Modern Art  and a hot dog cart.  So we did eat good and with no pressure of making the wrong restaurant decision.

Eataly was a true food experience.  There is so much to Eataly and the best way for you to understand what it is all about is for you go to their great site.  http://www.eataly.com

The concept for Eataly started in 2007 with stores opening in Italy then on to Japan and now New York City.  Take a look if you like by going to the links listed below.

Once we returned from the city I immediately reported for Federal Jury Duty.  A truly enlightening experience.  Seeing our judicial system at work was amazing and so reassuring to me knowing we have a system such as ours.  There is none other equal.

The trial ended just in time to celebrate the 4th of July weekend.  And what a great weekend it was.  This is the first year in five previous we did not have a 4th of July BBQ.  It felt pretty good to have the weekend to party and not have to work the whole time.  Jim and I spent the weekend at home, barbecuing, watching movies, throwing the Frisbee around and just generally having a great time together.  I cooked two tremendous meals:  Beer Can Chicken and Grilled Whole Maine Lobster.  I also made a delicious blueberry bread (Perfect time of the year for this sweet delicacy).

So there you have it.  In a nutshell, I am having a great summer.

I want to share a few of the recipes I wrote and made this holiday weekend.  My hope is that you will try them.  If you do, please let me know how they worked for you, as I need the feed-back to how I am doing with my recipe writing.

Oh, yes, one other question people have been asking is “How is the the book coming?”  This past Tuesday I sent all of my original recipes to legal for copyright.  This is one step closer to the finished product.  I am looking for all kinds of possibilities for publishing.  The one possibility that looks the best is on-line publishing.  I will keep you all posted.

Beer Can Chicken

Beer Can Chicken

Chicken cooked over a can of beer is the most succulent chicken I have ever tasted.  I doubt if I will ever cook a roasted chicken in any other manner.

1    Can Imported Beer, Pop Top Pulled

1     5 LB. Roasting Chicken

1/4 Cup XVOO

1    Tablespoon Coarse Sea Salt

1     Teaspoon Freshly Ground Black Pepper

1     Tablespoon McCormick’s Montreal Seasoning

If using a charcoal burning grill, build a split fire.  Light the fire and when the coals turn white and you can hold your hand over it by 5 inches for only a few seconds you have a medium hot fire.  Place the grill over the coals.  If using a gas grill, heat the grill to medium high leaving the center burner off.

Meanwhile, rinse the chicken with cold water and pat dry with paper towels.  Rub the olive oil all over the chicken and sprinkle the salt, pepper and Montreal seasoning inside and outside of the chicken.  Place the chicken over the OPENED can of beer.  Place the chicken sitting on the beer can onto the grill.  Place the cover on the grill (or close it if using a gas grill) and cook the chicken for 1 hour to 1 hour and 15 minutes or until an instant read thermometer registers 185 when inserted into the thickest part of the thigh and 165 when inserted into the thickest part of the breast.  Carefully remove the chicken and beer from the grill onto a platter.  Lift the chicken off of the can and let the chicken rest for 15 minutes before carving.

I served the Beer Can Chicken with Vegetable Couscous.  It is a perfect summer side dish and, even better, you can prepare it in advance.

Vegetable Couscous

with Beer Can Chicken

Vegetable Couscous

2        Tablespoons Extra Virgin Olive Oil

1        Small Red Onion Diced

1        Sweet Red Pepper Diced

1        Lb. Asparagus Trimmed and Sliced Crosswise into ½ Inch Pieces

2        Ears Fresh Corn Shucked

2        Cups Couscous

2        Cups Water, Chicken Stock or Vegetable Stock

1        Teaspoon Sea Salt

1/2     Teaspoon Freshly Ground Black Pepper

2        Tablespoons Fresh Herbs, Chopped (Such as Basil, Oregano, Flat Leaf Parsley,     Tarragon, Dill, Your Choice)

Heat the oil in a heavy Dutch oven over medium high heat.  Add onion and sauteé until wilted and transparent, about two minutes.  Add red pepper, asparagus and corn and sauté sauteé for two more minutes.  Add salt and pepper and any herbs you like.  Add liquid and bring to a rolling bowl.  Take the pan off of the heat, add the couscous and stir until well blended.  Cover for 5 minutes.  Remove cover and stir with a fork to loosen.  Serve immediately or cool completely and serve at room temperature with a touch of Balsamic vinegar.

Grilled Maine Lobster with Herb Butter, Corn on the Cobb and Tiny Potatoes

Grilled Lobster

Serves 4

4          Whole Live Maine Lobsters Each Weighing 1½ Pounds

½         Cup XVOO

1          Tablespoon Coarse Sea Salt

2          Teaspoons Freshly Ground Black Pepper

2          Lemons Cut in Half Crosswise

1          Pound Tiny Red and Yukon Gold Potatoes

4          Ears of Corn on the Cobb, Husk and Silk Remove and Each Cut in Half Crosswise

2          Sticks Unsalted Butter, Slowly Melted

1          Tablespoon Fresh Chives, Finely Chopped

1          Tablespoon Fresh Cilantro, Finely Chopped

1          Tablespoon Fresh Basil, Finely Chopped

1          Teaspoon Fresh Oregano, Finely Chopped

1          Teaspoon Fresh Thyme, Finely Chopped

Make a charcoal fire and when the coals are mostly white with ash, hold your hand 5 inches above the coals.  You will know the coals are ready when you can no longer keep your hand over the coals after 3 seconds.  This is a medium to medium high heat.  This is perfect to cook everything without having to reload the fire.  If using a gas grill, heat to medium high.

Meanwhile, as the coals are getting hot, place the corn on a double sheet of foil and the potatoes on their own double sheet of foil.  Bring the foil up around the corn to make an open packet.  Do the same with the potatoes.  In each packet pour the rest of the XVOO over each, add ½ cup of water to each packet and sprinkle each packet with the rest of the salt and pepper.  Bring the foil up each packet and crimp but leave it partially open.

Place the potato packet on the grill, cover grill and cook the potatoes for about 20 minutes.  After 20 minutes place the corn packet on the grill and cook for 15 minutes.  After 15 minutes test the potatoes to be sure they are done by inserting a thin bladed knife into a potato and if the blade goes in and out of a potato easily when pierced they are ready.  Remove the potatoes and corn from the grill and tightly close the packets to keep warm.

While the potatoes and corn are cooking, bring a large pot of water to a boil and add lobsters to boiling water one at a time.  You may be able to fit only 1 or 2 lobsters in the pot.  Bring the water back to a boil and cook the lobsters for 3 minutes.  Remove the lobsters from the water and pull off the claws and gently remove the tails.  Cut the lobster tails in half lengthwise and, with a mallet, crack the claws slightly (this will make it easier to cook the claw meat and remove from the shell).  Put the lobster pieces and the lemons into a large bowl and toss with ¼ cup of the XVOO and half of the sea salt and 1 teaspoon of pepper.

Place the lobster on the grill with the flesh side of the tails facing the grill and cook for about 2 minutes to lightly char.  Add the lemons flesh side down.  Turn the tails flesh side up, turn the claws over and cook for about 5 or 6 minutes.

Remove all from the grill and place lobster, lemons, corn and potatoes in to a very large bowl.  Pour the melted butter over everything and add the fresh chopped herbs.  Toss to combine and place decoratively onto a large platter.

That’s it.  This should keep you busy.  I think I will save the Blueberry Bread recipe for a later time.  Enjoy!!!  And please leave a comment on this blog.  It helps me realize who is reading it.  I have made it easy for you to leave a comment: No signing up or joining anything.  If you prefer not to leave a comment on the blog and still want to make one you can also e-mail me at camille@camillecooksforyou.com

Posted in Chicken, Food For Thought, Hints and Tips, Recipes To Share, Seafood, Vegetables | Tagged , , | Comments Off on Where Have I Been?

Pasta Fagioli – Deliciouso!!!

Pasta Fagioli Topped with Parmesan Cheese

Meaty Ham Bone Makes a Great Pasta Fagioli

When I cleaned out my freezer the other day I found the ham bone from Easter Brunch.  It didn’t take much for me to decide to make a delicious pot of Pasta Fagioli.  I am going to pass the recipe on to you with a few hints and tips that are time savers and really work.

Most people soak their beans overnight or do the quick soak of boiling for two minutes then letting them sit in the water for an hour and THEN boil them for another hour or so.  Not me.  I have always hated all of those steps.  There is no inspiration for me when I have to wait to do something I want to do immediately.  A long time ago I decided to skip the soaking steps and went directly to cooking.  What did I find out?  I found out that the beans cooked exactly like the soaking method.  WHERE IS THE MYSTERY?  So try it my way and see what you think.

Never salt the beans when they are cooking.  If you salt them too early they cook up just a little too mealy and loose their creamy texture.

Many people like to go through the hassle of pureeing part of the bean soup to make it creamy.  I don’t.  I found that when I cook my bean soup slowly and stir often the beans become creamy on their own.  Besides I love the texture of soups that aren’t pureed.  When pureed, the soup (any pureed soup) becomes one dimensional.  It then looses all of its layering that I strive for in every recipe I make (no matter what it is).

I don’t add my cooked pasta to the soup until I am ready to serve it.  If you add the pasta too early, or cook it in the soup too long, it will suck up all of the moisture and the soup will be too thick.  So, I suggest you cook only the amount of pasta you will need at the moment.  And the amount of pasta in the soup is, for sure, a personal thing.  I like a lot of pasta in my soup but most people do not.  So add what you think will work for you and whomever you are serving.  You definitely do not want to put any of the soup in the freezer with the pasta.  Not a good thing.

Often you will see in a Pasta Fagioli recipe the addition of Parmesan Cheese Rinds into the soup while it is cooking.  Yes, you can do that.  I don’t because I am not crazy about the flavor it imparts.  The rinds seem to take over and, once again, I loose the layering of flavor that I am always talking about.

The finished product will be not thick and not soupy – somewhere in between.  The soup thickens up on its own even when it is sitting on the counter cooling.  If it is too thin for you just add a little stock when reheating.

I like to top off a bowl of soup with parmesan cheese or, to make it really special, add a dollop of Pesto just before serving.  You can also drizzle a little XVOO on top of that wonderful bowl of Pasta Fagioli.

So there you have it.  A few tips and hints that I find really important and know for sure work.

If you decide to make this recipe please let me know your results.

Pasta Fagioli

Makes about 6 Quarts

For the Beans

2     14 Ounce Bags Dried Cannelini Beans (White Kidney Beans)

For the Ham Stock

1     Whole Ham Bone, Meat Removed, Diced and Reserved for Soup (Leave     the fat on the bone)

1     Large Onion, Skin Left On, Cut Into Quarters

4     Carrots, Skin Left On, Cut Into Half

6     Celery Stalks with Leaves, Cut Into Half

6     Garlic Cloves, Left Whole

2     Bay Leaves

1     Teaspoon Whole Black Peppercorns

For the Pasta Fagioli

2    Cups Cooked Ham, Diced

1     Lb. Pancetta, Rind Removed and Diced

2     Cups Spanish Onion, Diced (About 1 Large Onion)

2     Cups Celery, Diced

2     Cups Carrots, Diced

6     Garlic Gloves, Finely Minced

4     Cups Russet Potato, Peeled, Diced

1     35 Ounce Can Plum Tomatoes, Drained, Chopped, Juice Reserved

2     Tablespoons XVOO

3     Teaspoons Course Sea Salt

2     Teaspoons Freshly Ground Black Pepper

½    Teaspoons Crush Red Pepper

6     Cups Ham Stock or Homemade Chicken Stock or Low Sodium Chicken Broth

4     Cups Bean Cooking Water

1     Cup Reserved Tomato Juice

1     Bouquet Garni

Cooked Ditalini Pasta

To Cook the Beans

Rinse the beans and pick them over to remove any stones or dirt that may be present.  Place the beans in a large pot, such as a Dutch oven, and cover with cold water by about three inches.  Bring the beans and water to a boil, cover with a lid, reduce heat to simmer and cook for 1 to 1½ hours.  You will know when the beans are cooked when they a not crunchy or hard when bitten into.

Remove the beans from the heat and drain reserving the liquid.  Rinse the beans and set aside.

To Make the Ham Stock

While the beans are cooking make the stock.  Place all of the stock ingredients in a large pot, such as a Dutch oven, and cover with cold water.  Bring the stock to a boil, cover with a lid, reduce heat to simmer and cook for at least 1 to 1½ hours.  Remove from the heat, drain the stock into a bowl and discard the vegetables.  Set aside.

For the Bouquet Garni

In a double layer of cheese cloth, place two bay leaves, several sprigs of fresh parsley, basil, thyme, oregano and sage.  Gather the edges of the cheesecloth to form a pouch like parcel and tie the pouch with kitchen twine.

To Make the Pasta Fagioli

In a large pot, such as a Dutch oven, over medium heat, heat the XVOO and add the Pancetta.  Cook the Pancetta until the fat is rendered and the Pancetta just starts to crisp.  Add the onion, celery, carrot, and garlic and gently sauté the vegetables until the onion begins to become translucent, about 10 minutes.  Add the potatoes and sauté the vegetables for 5 minutes more.  Add the plum tomatoes, the tomato juice, the ham stock and the bean water.  Add the cooked beans, diced ham, salt, pepper and crushed red pepper.  Bring to a boil and add the bouquet garni.  Reduce the heat to simmer and continue to cook for 1½ hours stirring often to be sure the mixture does not burn or stick to the bottom of the pot.  (I like to cook the soup with a lid half way on the pot.  This helps to keep the soup from reducing too much.)  Taste the soup for seasoning and adjust accordingly.

When ready to serve, heat the amount of soup needed and add as much of the cooked Ditalini as you like.

Although the recipe is long and at first read it may seem daunting, don’t let it get in the way of how easy it really is to make.  If you have any suggestions or comments please don’t hesitate to let me know.  I welcome your input.  My whole purpose in doing this blog and writing recipes is to make you interested enough to prepare my food.  If there is any way to make you more interested and tempted I want to know.

camille@camillecooksforyou.com


Posted in Food For Thought, Hints and Tips, Pasta, Recipes To Share, Soup | Tagged , , | Comments Off on Pasta Fagioli – Deliciouso!!!

A No Stress Party Menu

Last Thursday evening Jim and I celebrated Cinco de Mayo by having a fabulous feast consisting of Pulled Pork Soft Tacos with all the trimmings:  Black Bean Salsa, Tomato-Green Chili Salsa, Corn Relish, Sliced Avocado, Fresh Jalapenos, Creme Fraiche, Cheddar and Jack Cheeses and Flour Tortillas.  While we were enjoying this great feast we thought how wonderful these soft tacos would be for a crowd pleasing casual dinner.

First off, you have to make a pretty good size pork butt to make it all worth while.  The bigger the piece of pork butt, the longer the cooking time and the more tender the meat.  I used a 7 pound Pork Butt with the blade bone, cooked it for six hours, slow and low, and the result was a tender, moist, flavorful roast.

In June, we are having family in from out of town for a week and I know I will be doing a lot of cooking.  I want to cook for everyone, but I don’t want to spend all day in the kitchen while everyone is at the beach.  This menu will be perfect for achieving a low stress, limited time in the kitchen kind of a day.

What’s so great about this menu is that I can make all of the accompaniments the day before and cook the roast on the day of the party.  It is especially helpful if you have an oven with a delayed start time and a timed cook control.  You can put it in the oven, set it and forget it.  My kind of cooking for sure.  All you have to do on the day of the event is cook and pull the pork and set out the accompaniments at the time of serving. (You can even cook the rice the day before and reheat it in the oven before serving.) Continue reading

Posted in Food For Thought, Menus, Pork, Recipes To Share | Tagged , , | Comments Off on A No Stress Party Menu