The Cookbook

You haven’t heard from me for over a month because I have been diligently working on my cookbook.  This is an incredibly daunting task.  I honestly did not know what I was getting myself into when I decided to take on this project.

I have been writing recipes for over 25 years and my recipe writing style has changed and, actually, evolved over the years.  I always use my recipes when I cook and  never really noticed the style changes but now that I am reviewing, editing, correcting and just plain reading the recipes I see how much work I have to do.  I have one very big section just about complete and several of my family members and friends have so kindly volunteered to help me proof.  I’ve set some deadlines for myself and one of them is getting the book completed and to the publisher by the end of the year.  I might make my “self imposed” deadline and working towards it is the reason I haven’t been blogging.  I am not even doing any dinner parties since I am spending 6 to 7 hours daily working on the book.

There really is no downside to the process as each day is a new learning experience and I am enjoying every minute of it.  But I will say this to all of you that are working in an office: How the heck do you stand it?  Sitting for hour after hour in front of the computer is enough to make me crazy.  I’ve been doing physical labor all of these years and never realized just how much I love it.

Anyway, I don’t want any of you to forget me while I am working on the book and not blogging so much.  To make sure that doesn’t happen I am posting some recipes to help keep me in your thoughts.

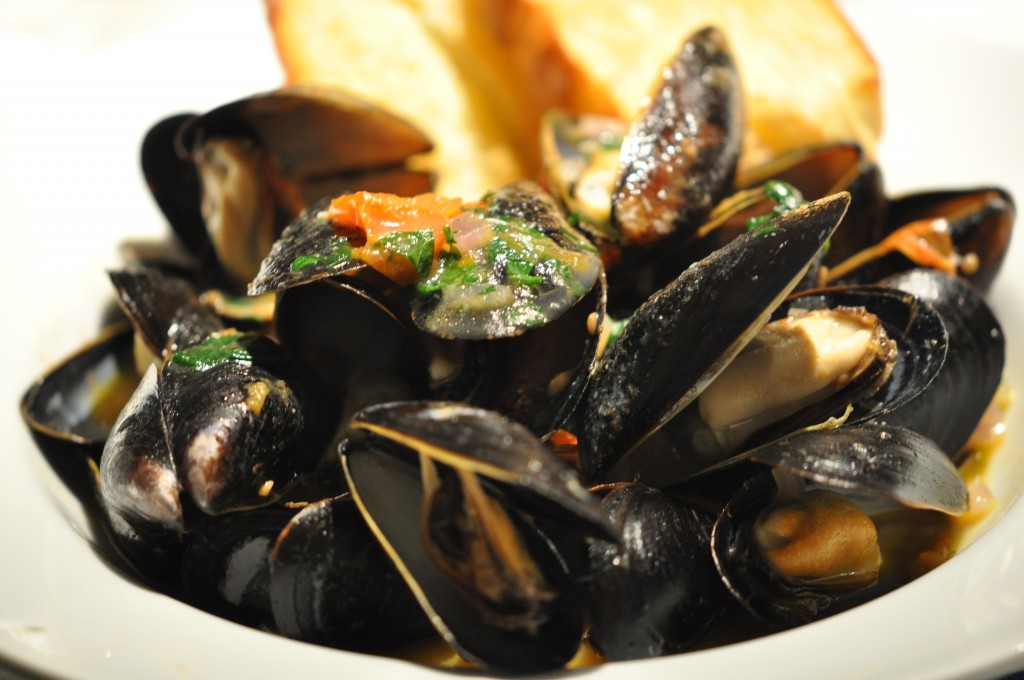
I am cooking dinner 4 or 5 nights a week and with being at the computer most of the time I am not thinking of what to prepare until about an hour before my husband gets home from work.  Lately I have become the queen of the quick meal.  Here is one of those quick meals from just the other night.  I made a quick trip to the fish market, Finster Murphy’s here in town, and picked up a bag of mussels.  It took no time to get it together since I had some of the ingredients already prepared:  For instance, the cherry tomato compote and chicken stock were already in my refrigerator.   If you don’t have homemade chicken stock on hand you can always use a low sodium chicken broth from the grocery store. The cherry tomato compote is simple to make and will add only a little more prep time to this mussel recipe.  I made the mussels and a salad for us in less than an hour including the trip to the store.

Hope this peaks your interest and maybe you’ll make it for dinner tonight.

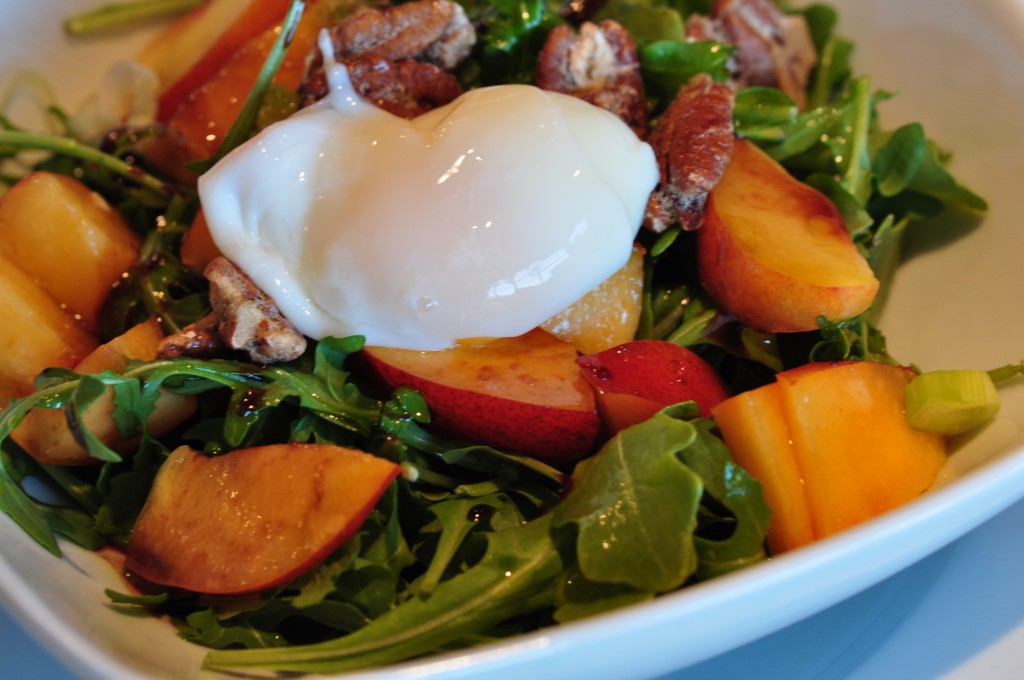
This is a simple salad of arugala, ripe nectarines, candied pecans (I always have these on hand) and poached egg dressed with XVOO and Balsamic Vinegar.  No cheese on this salad as I never serve it with fish or seafood.

Arugala, Nectarines, Poached Egg

Mussels with Cherry Tomato Compote

Mussels In Tomato Compote

When buying mussels be sure to tell your fish monger you want clean mussels with beards removed.  If you are purchasing the mussels at a busy,  reputable fish market most likely this will already be done.  Buy the mussels in the mesh bag and check for the date of harvesting.  Mussels should not smell fishy but should have the aroma of the sea; sweet and fresh smelling with a slight fragrance of seaweed.  My favorite mussels are from Prince Edward Island, Nova Scotia.  They are small and sweet and tender and just wonderful.

Serves 4 As A First Course

2          Tablespoons XVOO

½         Cup Red Onion, Thinly Sliced

4          Roasted Garlic Cloves, Smashed

½         Cup Madeira Wine

½         Cup Home Made Chicken Stock or Low Sodium Canned Chicken Broth

1          Cup Cherry Tomato Compote (Recipe Follows)

1          Teaspoon Coarse Sea Salt

½         Teaspoon Freshly Ground Black Pepper

Pinch of Crushed Red Pepper Flakes

2          Lbs. Small Mussels, Cleaned and Beards Removed

1          Tablespoon Finely Chopped Flat Leaf Parsley

4          Thick Slices Crispy Garlic Crostini

Heat the oil in a large sauté pan over medium heat.  Add the red onion and roasted garlic and sauté until onions just begin to soften.  Add the wine and stock and reduce by half.  Add the cherry tomato compote, salt, pepper, and crushed pepper flakes and bring to a rapid boil.  Lower the heat and simmer slowly uncovered for 10 minutes.

Add the mussels to the pan and toss to get the mussels and compote incorporated.  Bring to a boil and cover the pan.  Cook until the mussels are completely open, about 3 to 5 minutes.

Divide the mussels and sauce between 4 bowls and sprinkle with chopped parsley.  Put the Crostini on the edge of the bowl with part of it in the mussels.

Serve immediately.

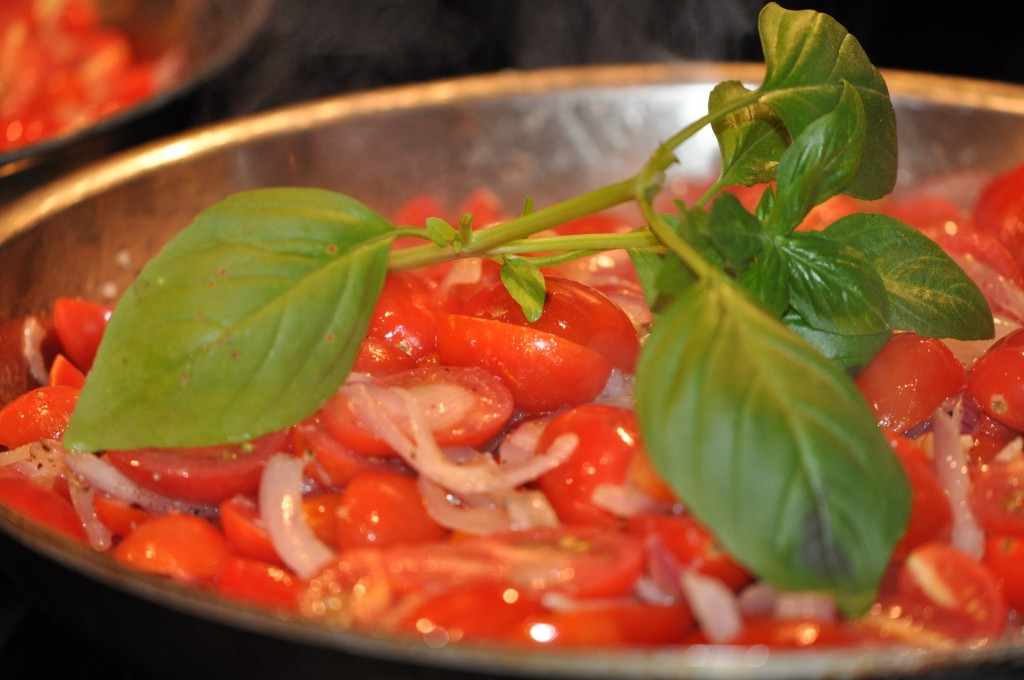
Cherry Tomato Compote

Cherry Tomato Compote

This great sauce is super easy to prepare and wonderful on grilled or sautéed chicken, shrimp and fish.  You can add just about any chopped fresh herb you like at the end.  I put the whole sprig of basil into the sauce at the beginning and let it cook with the sauce until the very end when I take the sprig out and discard it.  I leave it whole because I like how the basil infuses the sauce and if you do this with chopped basil from the get go the basil turns dark grey.  I like the super bright parsley for color.  Even if you put chopped basil in at the end, it will still turn dark.

Makes About 3 Cups

3          Tablespoons XVOO

4          Tablespoons Unsalted Butter, Divided in Half

3          Garlic Cloves, Minced

1          Medium Red Onion, Thinly Sliced

2          Pints Red Grape or Small Cherry Tomatoes, Cut in Half Lengthwise

1          Cup White Wine

1          Sprig Fresh Basil

2          Tablespoons Chopped Fresh Flat Leaf Parsley

1          Teaspoon Coarse Sea Salt Total

½         Teaspoon Freshly Ground Black Pepper Total

Pinch of Crushed Red Pepper Flakes

Heat the XVOO and 2 tablespoons of the butter in a large sauté pan over medium high heat until butter is melted and bubbly.  Add the minced garlic and the red onion, half of the salt and pepper and all of the red pepper flakes and sauté until onion is translucent, about 5 minutes.

Add the tomato halves and the basil sprig and stir to combine.  Sauté the mixture until the tomatoes begin to soften and add the rest of the salt and pepper.  Add the wine and reduce by about a third.  Lower heat and cook until the sauce begins to thicken and the tomatoes are very soft and have fallen apart, about 20 minutes.

Remove from heat and stir in the remaining 2 tablespoons of butter a little at a time until the butter is incorporated.  Stir the shopped parsley through the sauce.

There you have it, a quick dinner recipe.  Speaking of dinner it’s getting near that time and I better get my thoughts in order as to what I will make tonight.  I think I’ll just wait until I get to the market to decide.

Bon Appétit

camille@camillecooksforyou.com is where you can get a hold of me anytime.

Posted in Accompaniments, Ahh Haa Moments, Eggs, Food For Thought, Fruit, Hints and Tips, Menus, Recipes To Share, Salad, Seafood | Tagged , , , | Comments Off on The Cookbook

Cooking Momofuku Cookbook

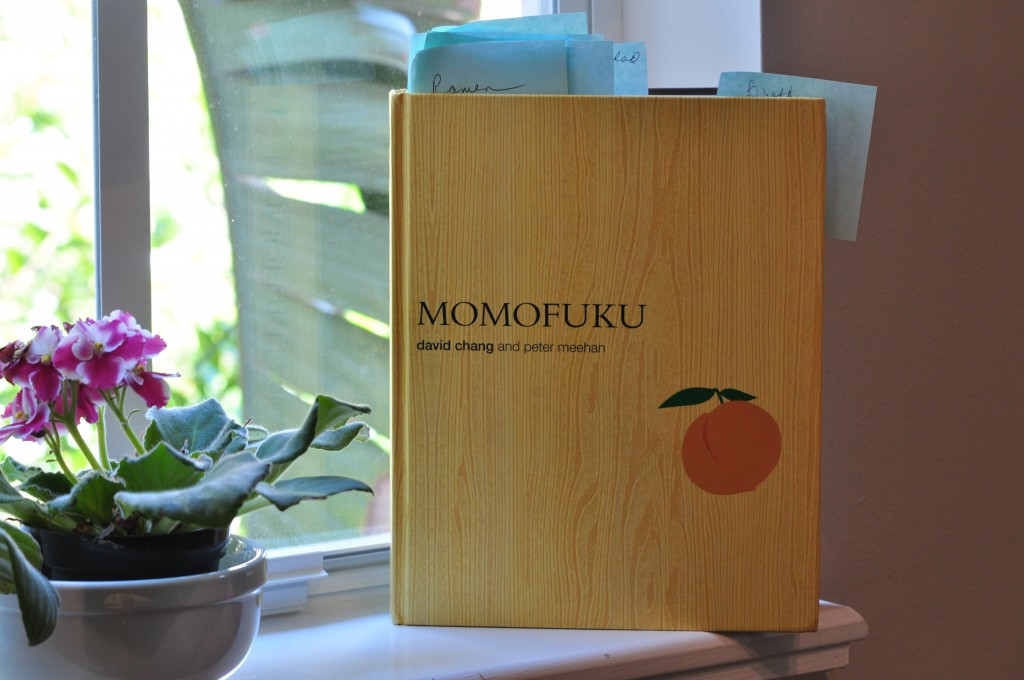
David Chang's Momofuku Cookbook

We recently visited New York City for nine fabulous, fun filled gastronomic days.  We visited this wonderful city last year for a quick weekend and since our time was so short we did not make it a food trip.  We visited museums mostly and ate nowhere of importance.  The best dinner we had in NYC last year, on the quickest weekend ever, was at Balthazar.   After spending such a short time in this glorious city, we immediately decided to visit it again, but the visit would be longer and totally food centered.

We did just that this summer and we ATE OUR WAY through the city.  In between restaurants we visited all of the major museums, explored Central Park and walked a different neighborhood each morning before breakfast.

I would love to fill you all in on our excursions but that would be a book in itself and you would be way to worn out after reading about all of our walks.  I will tell you this though: We walked over 100 miles in 9 days.  Most likely close to 125 miles.

When I began writing this post I was hell bent on telling you every restaurant we visited and every meal we ate.  When I finished writing the post I realized how boring it was: Who really wants to know everything we did and ate?  No one I am sure.  So I changed the scope of the post to writing about one of the best meals we ate while in New York.

Every meal was beyond exceptional but the most “beyond exceptional” were two places: Mario Batali’s BABBO and David Chang’s MOMOFUKU NOODLE BAR.  They were both innovative, creative, different and perfectly perfect.  But of the two perfectly perfect dinners, for me, the best was Momofuku Noodle Bar.  Why, you may ask?  Because it was different from anything I have ever cooked or eaten.  There is no restaurant in Fort Lauderdale that offers food like David Chang’s.

While we were eating this unbelievably wonderful food I decided right then and there that I wanted to recreate our meal when we got back to Fort Lauderdale.  I did just that: I bought the Momofuku cookbook, invited 12 friends, and spent one whole week preparing a delicious dinner.  I decided to make this dinner for my husband’s birthday since his wish was to go back to the Noodle Bar for his birthday dinner.  Because that wasn’t going to happen, I decided to bring Momofuku to him.  His words “I was Momofuku-ized”.

First of all, I have to say that the Momofuku cookbook is most likely one of the best written cookbooks I have read.  Before I use a cookbook I read it cover to cover as if it were a novel.  Once I started reading David Chang’s cookbook, I couldn’t put it down.  The book is not for the faint of heart or the easily scared out of the kitchen cook.  For me, the recipes were easy to prepare but very involved.  Lots of hunting for ingredients and a lot of steps in each of the recipes.  I took my time:  I had to since there was not one recipe I was familiar with.

Let me give you a little back ground about the author.  David Chang is a Korean-American who is, and has always been, fixated on noodles.  Oh, wait!!!  I am an Italian-American fixated on pasta.  Hmm!!  I’m starting to get the connection.  To not give away the plot of this great reading book, I will give you a summary of Chang’s noodle experience.  He grew up eating noodles, went to Japan to study with the noodle king of that country and brought back his knowledge to the states.  He opened Momofuku Noodle Bar and several other Momofuku restaurants.  It wasn’t as easy as that:  There was education, hard work and family dedication before he opened his first restaurant.

Now, many restaurants later, he seems to have found success and a loyal following.  I am one of the followers.  All of the Momofuku restaurants are on my list of places to dine. And there are quite a few spots.  The menu at Noodle Bar is mostly Japanese with a lot of twists and turns.

This is the menu I prepared for us and our friends last Saturday Night:

Jim’s Momofuku Birthday Dinner Menu

Appetizers                Chicken Wings in Japanese “BBQ Sauce” and Roasted Cauliflower                                            Tossed with Fish Sauce Vinaigrette

First Course             Pork Steamed Buns (Chang is very well known for these delicacies)                                         Served with Roasted Mushroom Salad

Second Coarse         Momofuku Noodle Bowl with Smoked Chicken, Slow Poached Egg,                                         Collard Greens, Bamboo Shoots, Fish Cake, Noodles and The World’s                                     Best Broth

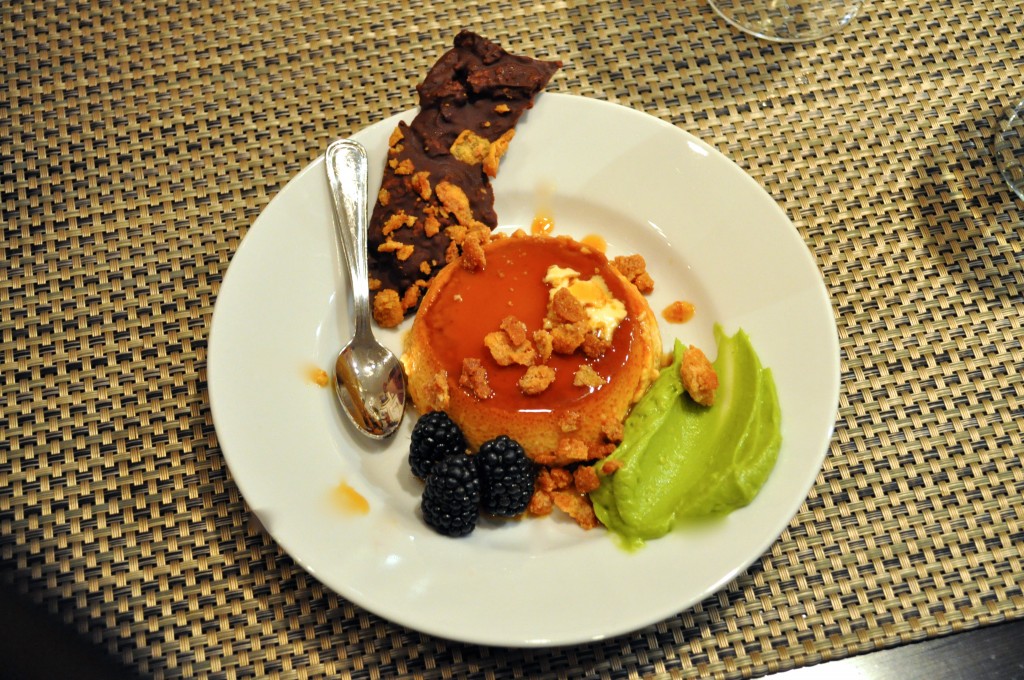
Dessert                   Cereal Milk with Lightly Sweetened Avocado Puree and Chocolate-                                        Hazel Nut Thing

What? What?  What’s so great about this menu.  Well, let me tell you, I had the time of my life preparing each of these dishes.  With the exception of the dessert (I will explain soon) I followed each and every recipe exactly as David Chang wrote them.  No changes because I know so little, actually nothing, about Japanese, Korean or Vietnamese cooking.  These are areas of cooking I have never explored and diving in head first on these complex recipes was a true learning experience.  This learning experience is what I have been longing for for oh so many years.  I can’t explain to you how I felt cooking this food.  As I said, the book is so well written I felt as if I was cooking along side this genius of a chef.

Within each recipe there is an ingredient that needs to be made before you can go on to completion.  For example the salad has an ingredient of poached pistachio nuts and the nuts are poached in a liquid called Dashi.  And that Dashi needs to be made, as well as the BBQ sauce for the wings (Tare’ which means sauce in Japanese). I made the steamed buns from scratch, brined the pork belly for the buns, made all of the special ingredients called for in the recipes (Chang tells you often that you can buy the ingredient instead of making it from scratch, but my theory is to take the challenge and make it.)

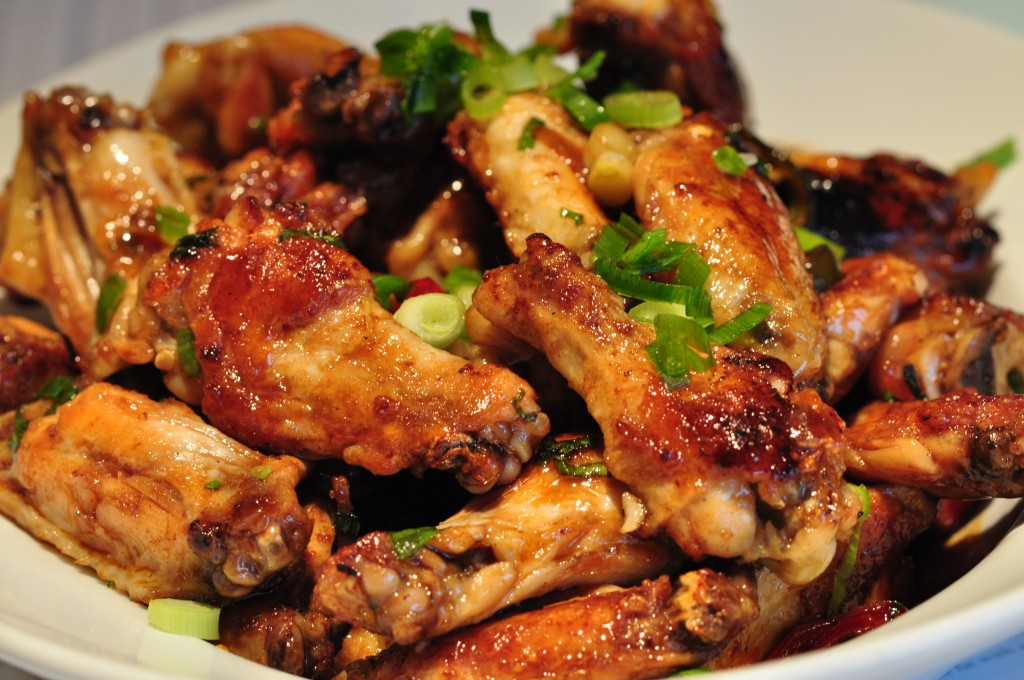
Chicken Wings in Japanese Tare'

The wings were probably the best I’ve had in a long time.  Everyone who was here for dinner will tell you the same as well.  What makes them so good is that after cold smoking the wings you confit them much like confitting (is that even a word) duck legs. Tender, juicy and delicious.

Roasted Cauliflower with Fish Sauce Vinaigrette

The roasted cauliflower was really good with the fish sauce vinaigrette.  I have never been a fan of Vietnamese fish sauce but this vinaigrette changed my mind forever.

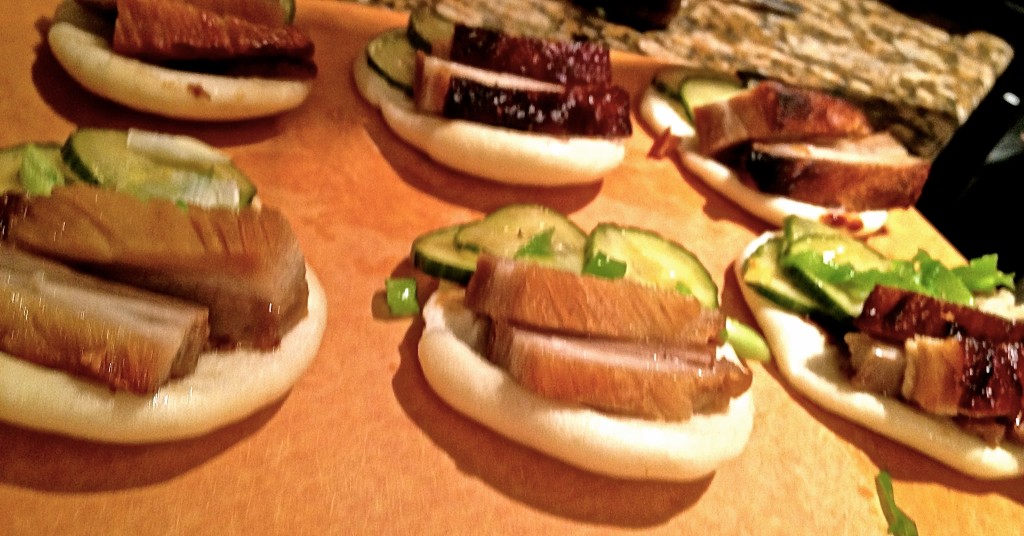
Pork Steamed Buns

The steamed buns are Chang’s specialty.  I made the buns from scratch instead of buying them (if I had chosen to buy I would have had to order them from New York since I live in a food wasteland)  Pork Belly is what the buns are tucked around along with pickled cucumbers, hoisin and scallions.  We all decided these were hands down the best we’ve ever had.  We’ve only had them one other time from a Food Truck Round Up in Miami and they were pretty awesome but not nearly as awesome as Chang’s.

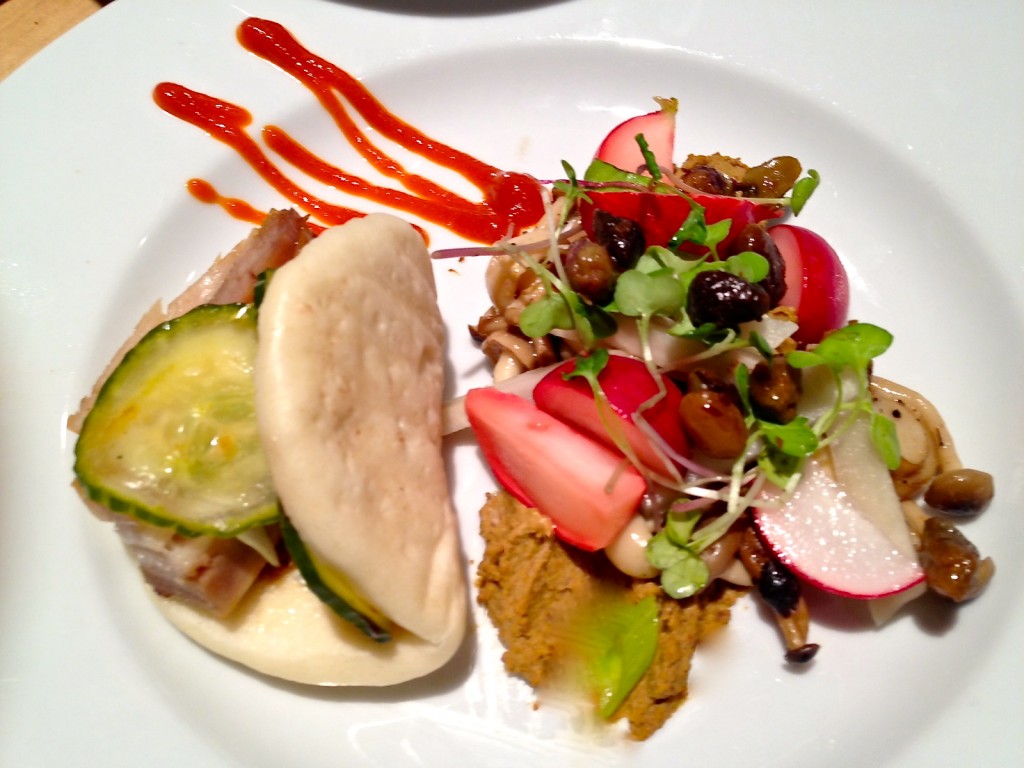
Steamed Buns with Roasted Mushroom Salad

The salad was Roasted Mushrooms (Oyster and Enoki) on a shmear of pistachio paste (homemade), with pickled sunchokes, quick pickled radishes and microgreens.  It was dressed with a warm sherry vinaigrette made in the pan with the mushrooms.  Delicious!

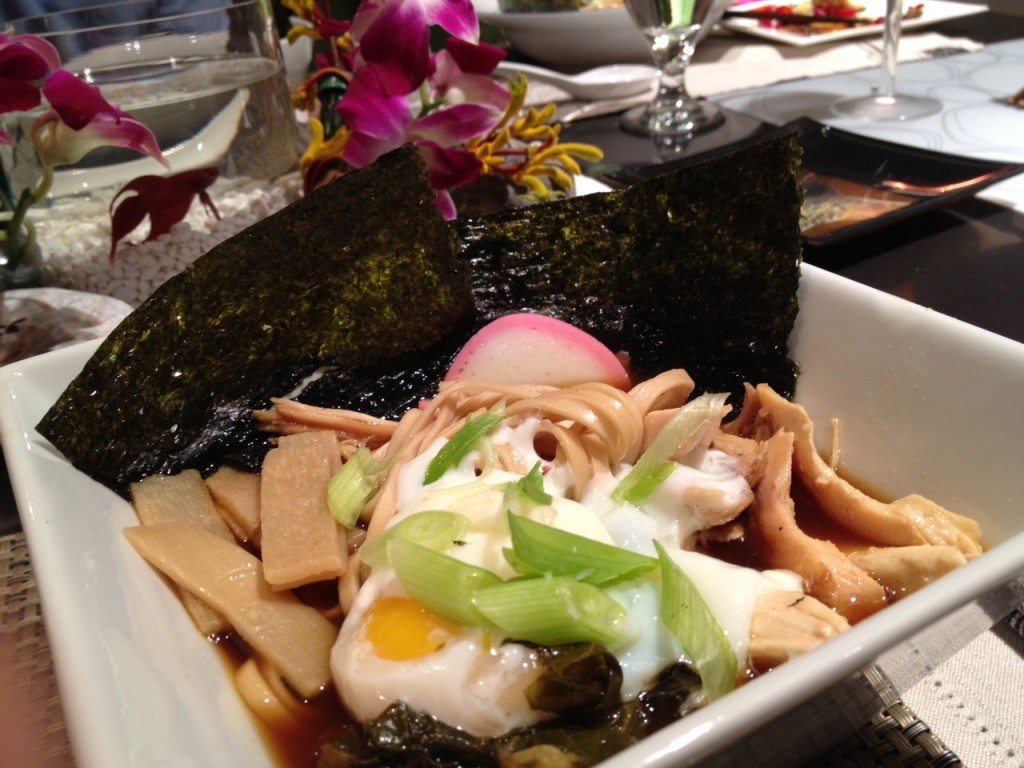
Ramen Noodle Bowl

Then came the noodle bowl.  When we ate it in New York Jim had it with pork and I with smoked chicken.  I decided to go with the smoked chicken, so I smoked three and served them exactly as David does with all of the fixings topped off with a slow poached egg.  I have never seen anything like this crazy egg.  You slow poach the eggs in a water bath for 40 minutes at a constant 140-145 degrees F.  When they are ready, you crack the egg and out comes a perfectly poached yolk.  Unbelievable.  You put the egg on top of the noodle bowl and when you are served you break the egg into the broth.  The egg is poached so perfectly that it thickens up the broth and makes it even richer than it is already.  The broth is by far the best broth for this dish.  It is a combo of whole chicken, bacon and pork bones along with kombu (seaweed) scallion and carrots.  It cooks for around 7 hours which is not really that long.  I cook my stock for at least 12 hours so I can get the most flavor but with all of the meaty bones and chicken that go into Chang’s stock the seven hours is plenty of time to get flavor intensity.

My Version of Cereal Milk

Now for dessert.  The cereal milk dessert is from a menu at one of his other restaurants. It looked interesting except for the addition of gelatin.  Sorry, David Chang, but I have been a chef for a long time and I have never used gelatin, ever.  I hate it.  Even when I coat a chilled poached salmon with gelatin, that gelatin is a reduced and clarified natural gelatin from the fish bones.  Anyway, I spent countless sleepless nights on what to do.  I wanted to make this interesting dessert but didn’t want to use the gelatin.  Let me step back for a moment.  What makes this dessert so interesting is his use of corn flakes as an enhancement.  Yes, that’s right, good old fashioned corn flakes.  He makes a crunchy topping with corn flakes, powdered milk, sugar and butter, then soaks the corn flakes in the milk and cream used for the custard. There is a sweetened avocado puree and a chocolate-hazelnut bark to accompany the custard.  I decided to make my creme caramel instead of the gelatin dessert.  I soaked the corn flakes in my cream mixture first to stay a little on track with the recipe.  Great idea!!!  The creme caramel was perfect.  The addition of the caramelized sugar raised the level of the dessert.

So there you have it.  My learning experience and good eating all rolled into one.  I am not giving away his secrets or printing the recipes.  I can’t do that since they are not mine but I suggest you pick up the cookbook if you are daring enough to try something really different.  Better yet, go to New York and eat at Momofuku Noodle Bar and you will taste exactly what I am talking about.

For more information on David Chang, his restaurants and his cookbook go to http://www.momofuku.com

As always, if you would like to comment on this posting please do so right here or go to my email                camille@camillecooksforyou.com

A comment about the pictures:  Most of them were taken by our friends.  The only picture I took was of the Wings.  So thank you Jodie, Mary, Samantha and Randy for doing a great job.  I was much too busy to even think about taking pictures!!

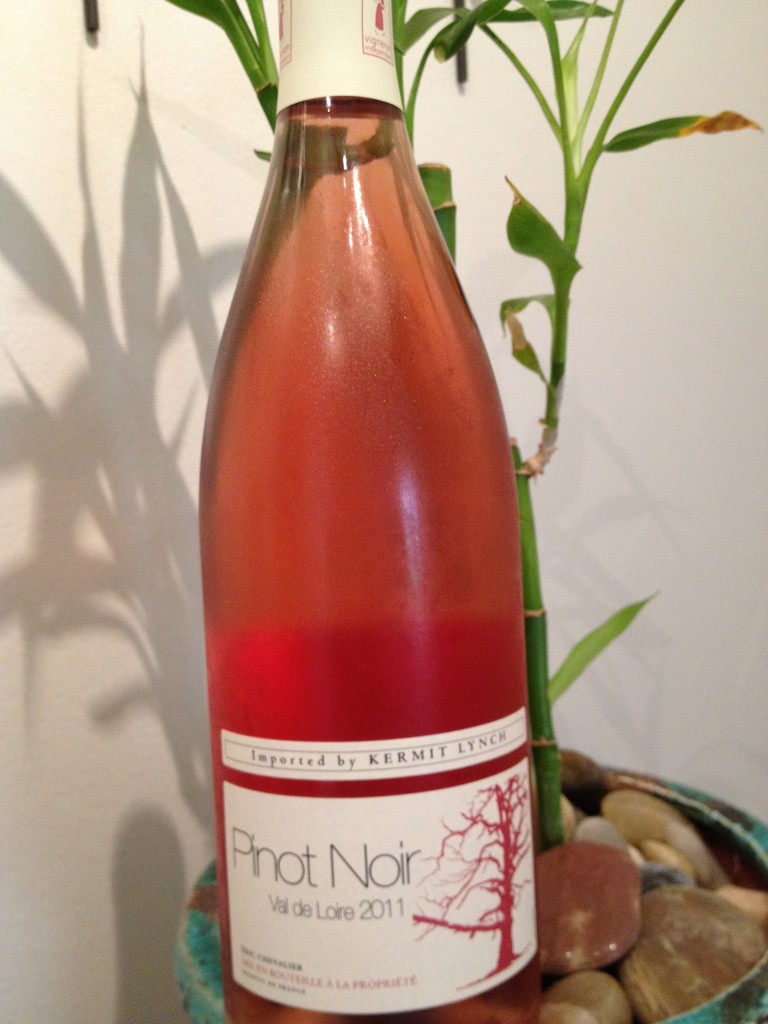
Randy also did some heavy research on wines that are served at Momofuku Noodle Bar. He came up with a great Pinot Noir.  This is what he had to say about the wine:

Wine With Dinner

Personal wine tasting in preparation for Chef Camille’s private dinner recreation of David Chang’s Momofuku menu tomorrow night. Thought the Loire Peneau D’Aunis Rose from Touraine (from Momofuku’s wine menu) would be a perfect match however. none to be found in Miami. So selected these three close relatives. The closest being Eric Chevalier’s elegant and luscious Pinot Noir imported by Kermit Lynch would probably suffice. Chevalier is a rising star in the Nantais of the Loire Valley. French wines in particular are all about terroir – where they are grown is what they taste like. Or at least have a hint of it. For ten years, Eric sourced fruit in the Touraine (where the wine I was looking for was from), until In 2005, when he returned to his hometown of Saint-Philbert de Grandlieu, just southwest of Nantes, to his family’s 4th generation domaine, Domaine de l’Aujardière, which is where this wine is from. The Nantais has a maritime climate and the vineyards are not far from the Atlantic Ocean. Consequently, there is an interesting variety of sedimentary, igneous and metamorphic rocks, as this area once was ocean floor.

Thank you Randy and Manita for bringing this fabulous wine.

Posted in Accompaniments, Ahh Haa Moments, Appetizers, Chicken, Confit, Desserts, Eggs, Food For Thought, Menus, My Favorite Cook Books, Pork, Soup, Vegetables, Wine | Comments Off on Cooking Momofuku Cookbook

Roasted Leg of Lamb

My last post was over a month ago.  Where have I been?  I’ve been working, entertaining and traveling.  All three activities were centered around food, of course.  My first activity was a cocktail party for 100 people.  The purpose of the cocktail party was a post wedding reception:  The wedding took place a few weeks before in NYC and the parents of the groom wanted to give them a party in Florida.  It was a wonderful party. The only problem was the flight that the bride and groom were to take was cancelled at the very last minute.  The party went on without them but they were very much missed by all.

The food for the party needed to be different since I have cooked for most of the guests in the past and I did not want to repeat any previous menus. That was a huge challenge. Besides not doing any repeats I also wanted the menu to be spectacular and memorable as always. It had to be casual and delicious, interesting and easy to eat (there were no forks or knives).

I believe I accomplished the mission I set out to do since the response from the guests was overwhelmingly wonderful.  Here is the menu.

Passed Hors d’oeuvres

Key West Conch Fritters with Key Lime Chili Sauce

Chilled Jumbo Cocktail Shrimp with Cocktail Sauce and Curry Sauce

Jerk Chicken Skewers with Apricot-Horseradish Dipping Sauce

Southwest Blue Corn Cakes Topped with Duck Confit, Tomatillo-Corn Chutney and Smoked Gouda

Vegetarian Pot Stickers with Ancho Chili-Fig Preserve Dipping Sauce

Carving Station

Roasted Fresh Ham Served with Tortillas, Black Bean Salsa, Green Chili-Tomato Marmalade, Queso Fresco Blanco (Soft Taco Style)

Roasted Leg of Lamb Served with Pita Bread, Tzatziki and Cucumber-Tomato Relish (Gyros Style)

Roasted Breast of Turkey Served with Cranberry-Kumquat Compote, Mustard Sauce and Small Rolls for Sandwiches

Dessert

Traditional Chocolate Chip Cookies

Oatmeal Cookies with Dried Cranberry and White Chocolate

Triple Chocolate Brownies

Lemon  Bars

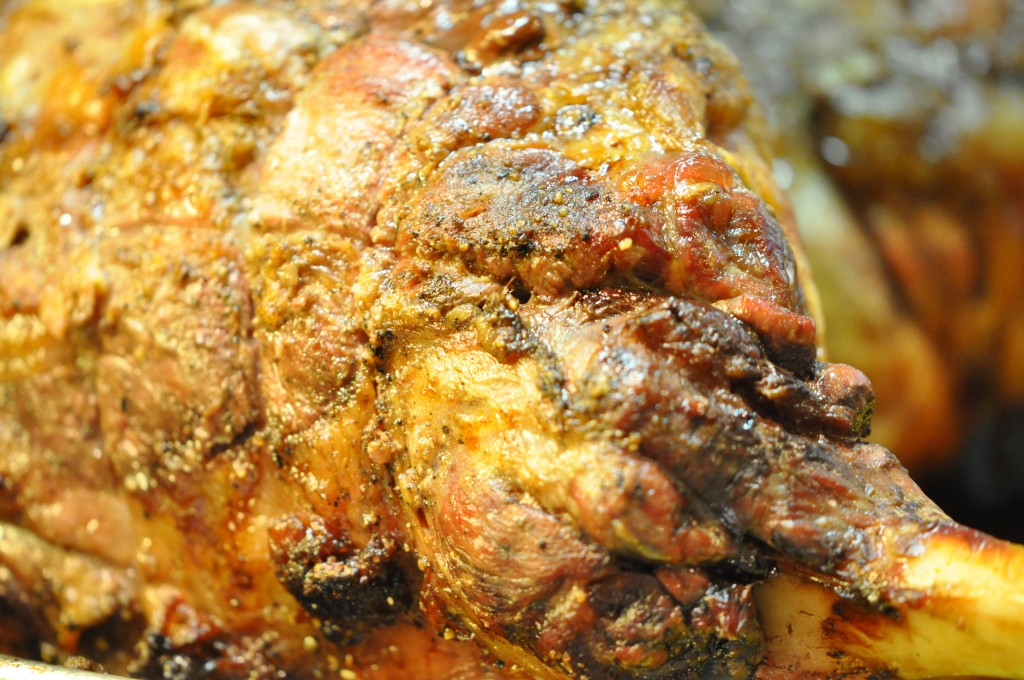
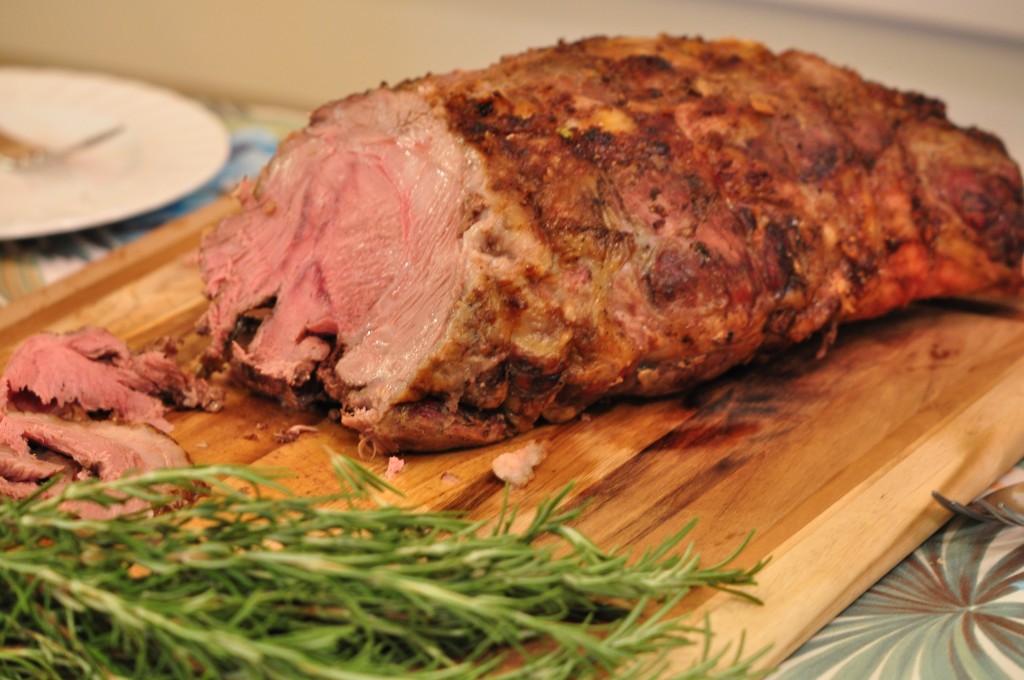
People were asking for the recipes for many of the items but the one that got the most requests was the Leg of Lamb.  I will be happy to share the recipe.

Roasted Leg of Lamb

Roasted Leg of Lamb

Roasted Leg of Lamb

I am a proponent of marinating meat without acids such as wine, vinegar, soy or lemon juice.  Using an acidy liquid to marinate will eventually begin to “cook” the meat making it tough and leathery.  By using olive oil, herbs and black pepper you give the meat great flavor and the oil helps break down the tough muscle making it more appealing in texture and flavor.  Don’t use salt in marinating because this will draw out the juices of the meat causing it to be dry and tasteless.

Ask your butcher to remove the aitchbone and gland and to leave the end of the bone intact.  Removing the aitchbone and leaving the end bone intact makes it much easier to carve:  The end bone acts as a handle when carving.  Discard the gland (the butcher will do this for you).

1          7 to 8 Pound Semi-Boneless Leg of Lamb, Aitchbone Removed, Fat Trimmed to ¼ Inch and Leg Tied (Ask your butcher to make it “Oven Ready”)

¾         Cup Extra Virgin Olive Oil (XVOO)

12       Roasted Garlic Cloves, Smashed

1          Bunch Fresh Flat Leaf Parsley, Rinsed

1          Bunch Fresh Oregano, Rinsed

4          Sprigs Fresh Rosemary, Rinsed

2          Teaspoons Freshly Ground Black Pepper

1          Tablespoon Coarse Sea Salt

Place the Leg of Lamb in a non-reactive dish or pan.  Score the Lamb by making shallow cuts all over the fat and rub ½ cup of the olive oil and roasted garlic cloves all over the lamb and sprinkle with the pepper.  Lie the parsley, oregano and the springs of rosemary on top of the lamb and pour the rest of the olive oil over the herbs.  Do this the night before you are going to cook the Lamb.  Loosely cover the Lamb with plastic wrap and refrigerate overnight.

Preheat oven to 425 Degrees F (400 if using a convection oven) with the oven rack placed on the lowest third of the oven.

Take Lamb out of refrigerator one hour before roasting and place on a rack in a roasting pan large enough to hold it.  Use a shallow sided pan.  This will allow the heat to circulate around and under the Leg of Lamb.  Bringing it to room temperature will allow for more even cooking.  Remove the herbs from the Leg of Lamb and place them on the bottom of the pan.

Sprinkle the Leg of Lamb with the Coarse Sea Salt.

Roast the Leg of Lamb with the high heat for 20 minutes.  Turn the temperature of the oven down to 375 Degrees F (350 if using a convection oven) and cook the Leg of Lamb for approximately 1¾ to 2 hours or until an instant read thermometer inserted into the thickest part of the Leg registers 140 Degrees F.  Be sure to not hit the bone.

Remove from the oven and let stand for at least 30 minutes loosely covered with foil (loosely means just laying over the meat).  The Leg will continue to cook and reach 145 Degrees F for medium.

Thinly slice the Leg of Lamb and serve either as a dinner entrée or on Greek pita (not the pocket stuff) as a Gyro with Tzatziki and Cucumber-Tomato Relish.

If you would like any of the recipes from this menu please let me know either through making a comment on the blog or by emailing me at

camille@camillecooksforyou.com

My traveling event was a 9 day stay in New York City.  More on that later as I have so much to say about all of the wonderful food we ate.  And, OMG, did we eat!!!  I have to find photos of the food since we lost our camera in a taxi ride from Stage Deli to the Metropolitan Museum of Art.  We had taken a ton of pictures of everything we ate.  We lost the camera at the very end of the trip.  So Sad!!!.

Posted in Food For Thought, Hints and Tips, Lamb, Meat, Recipes To Share | Tagged | Comments Off on Roasted Leg of Lamb

My Favorite Friends Recipes

I will admit that I am a bit of a snob when it comes to my recipes.  I often think I have the best recipe and no other can compare.  I do have some exceptions to my snobbiness: Three in particular are Cousin Kathy’s Pound Cake, Drew’s Cheese Cake and Mike’s Fallen Chocolate Soufflé Cake.  I have asked all three if I can share their recipes with you and got a big thumbs up from each.

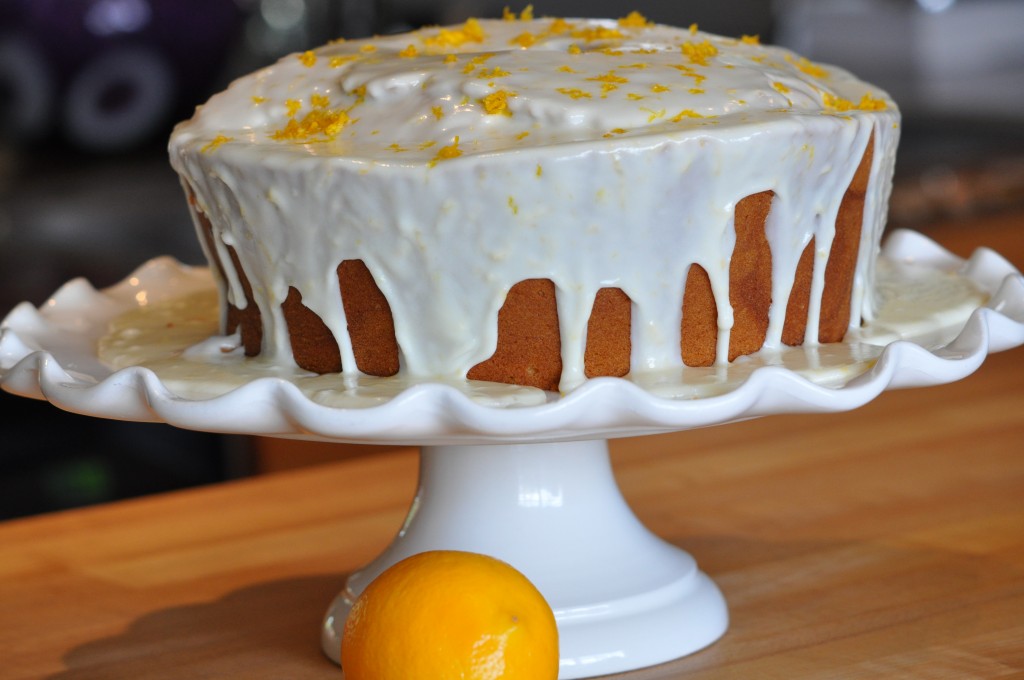
I’ll start with Cousin Kathy’s Pound Cake.  Growing up, my Mother’s go to cake, when she needed a dessert in a pinch, was pound cake.  But no matter how many times she made it, the results were NEVER the same.  Not to say that any of the results weren’t great but this pound cake was cause for much head scratching on Mom’s part.  I think she made it so often because she wanted to get repeat results just once.  If you have been reading my blog you know that Mom was an excellent cook.  Everything she cooked came out great. She could go to a restaurant, order something exotic and announce to us she would be making that same dish for dinner very soon.  Without any recipe she would do just that, only it tasted better.  The point here was the pound cake and no two ever being alike.  My Cousin Kathy’s Pound Cake recipe is a different story.  It always turns out and the results are always the same; perfect, perfect, perfect.  So this has become my go to cake when I want something in a jiffy and don’t really want to think about it.

Cousin Kathy’s Cream Cheese Pound Cake

This recipe is perfect just the way it is:  I wouldn’t change a thing and that includes being tempted to use butter instead of margarine.  I;ve made it with butter and it just isn’t as good.

3   Sticks Imperial Margarine, Room Temperature

1   8 oz. Package Philadelphia Brand Cream Cheese, Room Temperature

3   Cups Granulated Sugar

6   Large Eggs, Room Temperature

3   Cups Sifted Cake Flour (NOT Self-Rising)

1   Teaspoon Vanilla

Preheat oven to 325º.

Position the oven rack to lowest third of the oven.  Spray a standard tube pan (an Angel Food Cake Pan with removable bottom) with Pam Spray for Baking.

In the bowl of an electric mixer fitted with the paddle attachment, cream the margarine, cream cheese and sugar on high until light and fluffy.  Turn the speed of the mixer down to medium and add the eggs into the fluffy mixture one at a time being sure each egg is fully incorporated before adding the next.

With the speed on low, slowly add the flour and beat until the flour is fully blended into the fluffy mixture.  Add the vanilla and beat on low until incorporated.  Spoon the batter into the prepared tube pan and smooth the top with an offset spatula.

Bake 1 hour 45 minutes.  The pound cake is done when a cake tester (a long wooden skewer is best for this step) inserted into the middle of the cake comes out clean.

The best way to cool the cake is to perch it on the neck of a bottle.  As the cake cools the side of the pan will slip down.  (I am sure many of you remember your mother or grandmother using this method to cool an Angel Food Cake.)  Once completely cool, gently remove the rest of the tube pan.  Sprinkle with powdered sugar or glaze with a powdered sugar glaze (recipe below).

Powdered Sugar Glaze

1   Box (1 Pound) 10X Powdered Sugar

4   Tablespoons Freshly Squeezed Orange Juice or Lemon Juice

2   Tablespoon Freshly Grated Orange or Lemon Zest

Gradually mix the juice into the sugar until a soft, smooth, runny glaze is achieved.  Add half of the zest.  Carefully pour the glaze in a steady stream over cake moving around the top.  The glaze will flow down the sides and the center.  Sprinkle with the rest of the zest.

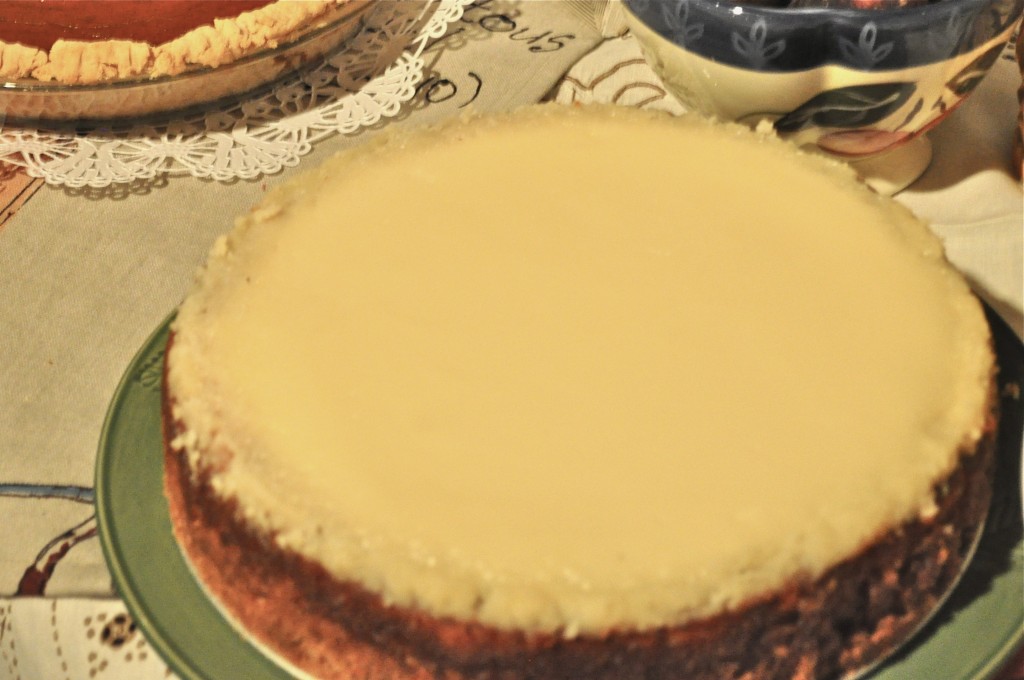
Another of my Friend Favorites is Drew’s Cheese Cake.  There is no other cheesecake in the world that is as good as this.  At least not in my world.  It is a little time consuming but the end result is more than worth it.  Drew first made this cheesecake for us when he came to our home for Thanksgiving Dinner in 2003.  Since then it has been a tradition each year even if Drew doesn’t join us for dinner.  When he doesn’t make it for dinner our friend Jodie makes his cheesecake and it tastes exactly like Drew’s.

Drew’s Cheesecake

Drew’s Cheesecake

For the Crust

1          Cup Graham Cracker Crumbs

¾         Cup Finely Ground Pecans

½         Cup Sugar

4          Ounces Unsalted Butter Melted (1 Stick)

For the Cake

4          Large Eggs

1          Cup Sugar

24       Ounces Cream Cheese at Room Temperature(3 – 8  oz Packs)

1/2      Cup Half and Half

Topping

16       Ounces Sour Cream

¾         Cup Granulated Sugar

1          Teaspoon Pure Vanilla Extract

Preheat oven to 350º.  Spray the bottom and side of a 9” Spring Form pan with Pam Spray for Baking.

Blend Graham crackers, butter, sugar and pecans.  Mix well and press firmly on bottom and half way up the side of the pan.

In the bowl of an electric mixer fitted with the paddle attachment cream the sugar, cream cheese and half and half on medium high speed until well blended.  With the mixer speed on low add eggs one at a time being sure each egg is blended in before adding the next. Pour into prepared pan and place on a baking sheet to catch butter that will leak out of pan. Bake at 350 degrees for 45 min.  Turn oven off and leave cake in oven for 35 minutes.  Remove from oven and cool for 35 minutes.

Turn oven up to 450º and preheat.  Mix topping ingredients well, pour over cake and smooth with a small offset metal spatula.  Return to oven and bake for 15 minutes in preheated 450 Degree (or 425 IUCO) oven.  Remove from oven and place cake on a cooling rack for 15 minutes.  After 15 minutes of cooling, use a very thin small knife or small metal spatula to loosen the side from the pan.  Remove the springform side and cool completely before placing in refrigerator.  After completely cooled the cake will easily come off of the springform bottom.  You can then place on a serving dish and garnish with fresh berries.

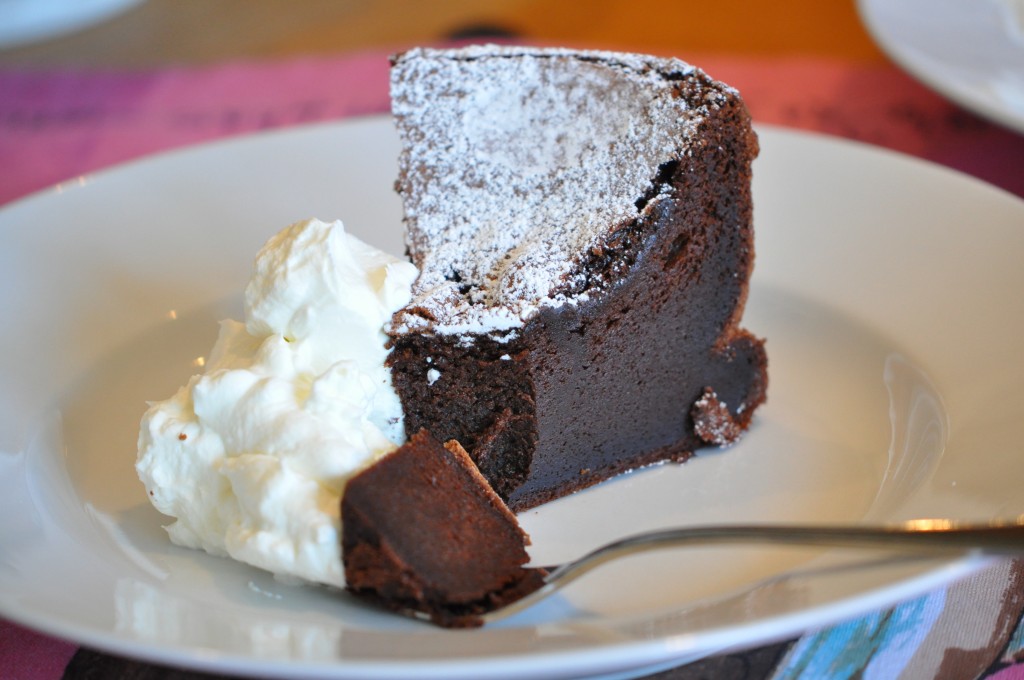
And last but certainly not least is my good buddy, pal, cooking soulmate and fabulous chef Michael Killip’s Fallen Chocolate Soufflé Cake.  I love this cake as it never ceases to amaze me.  It rises super high and then collapses into a dense, delicious, luscious cake.  I have used this recipe in several cooking classes and everyone marvels at the rise and fall of this great cake.

Mike’s Fallen Chocolate Soufflé Cake

8     Ounces Unsalted Butter

8      Ounces Semi Sweet Chocolate Chips

6      Large Egg Yolks

3/4  Cup Granulated Sugar

8      Large Egg Whites

Preheat oven to 325º.

Prepare an 8” springform pan by spraying with Pam for Baking.   With a piece of parchment paper form a collar to line the inside of the pan.  Spray the inside of the collar as well.  The collar should be about 4 inches higher than the top of the pan.

Melt the butter with the chocolate in a double boiler.  Stir to combine once all is melted.  Set aside to cool to room temperature.

Beat the yolks and the sugar in the bowl of an electric mixer fitted with the whisk attachment until pale in color and slightly thickened.

In a clean bowl beat the whites until stiff but not dry. Gently fold the yolk mixture into the chocolate to combine thoroughly.

Gradually incorporate whites into chocolate-yolk mixture in thirds by gently but thoroughly folding with a rubber spatula.

Pour batter into prepared pan and bake for 50 – 55 minutes.  Cake will look like it is going to explode.  Remove cake from oven and let stand for 10 minutes before releasing the side of the pan.  Cake will fall.  Cool completely. Dust with powdered sugar and serve with White Chocolate Cream.

White Chocolate Whipped Cream

12       Ounces White Chocolate Chips

1          Cup Heavy Cream

1          Teaspoon Pure Vanilla Extract


1          Quart Heavy Cream

1/2      Cup Granulated Sugar

Put Chips in a large heat proof bowl.

In a medium sized sauce pan heat heavy cream until just ready to boil.  Remove from the heat and pour over the white chocolate chips.  Let stand for 5 minutes.  Stir to completely combine.  Cool to room temperature.

In the bowl of an electric mixer fitted with the whisk attachment, beat cream slowly for about 30 seconds (this adds air to the cream and makes it fluffier).  Add the sugar and beat on high until stiff peaks form.  Add cooled white chocolate in a stream to whipped cream and beat until incorporated.  Refrigerate at least 4 hours before using.

Leave a comment!!!!


Posted in Ahh Haa Moments, Cheesecake, Chocolate, Desserts, Food For Thought, Recipes To Share | Tagged , , , , , , , , , | Comments Off on My Favorite Friends Recipes

The Most Requested Recipe

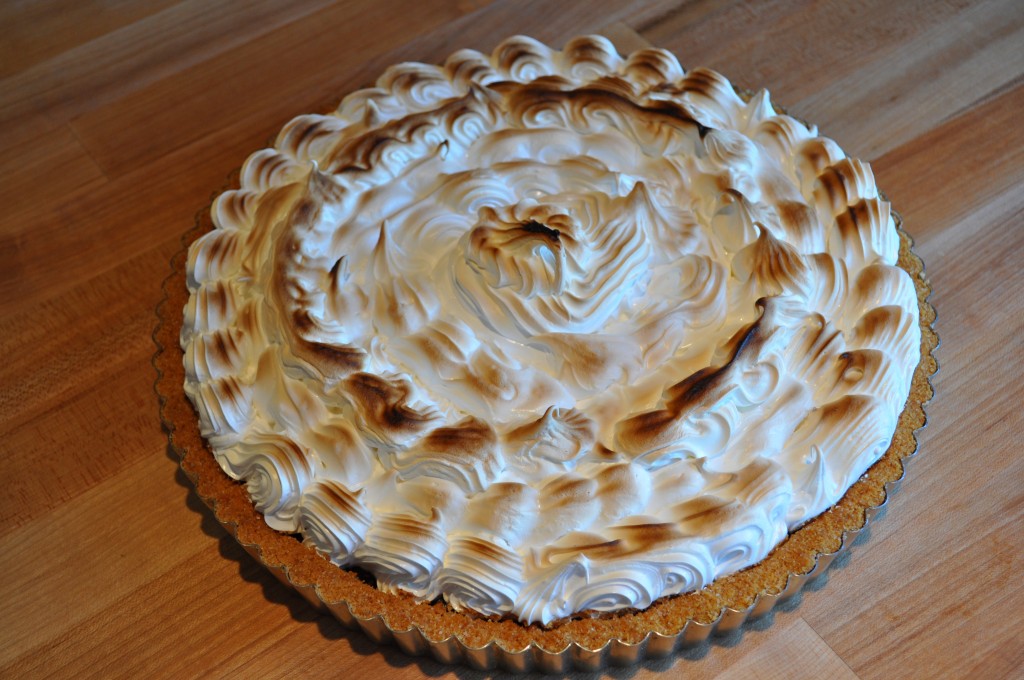
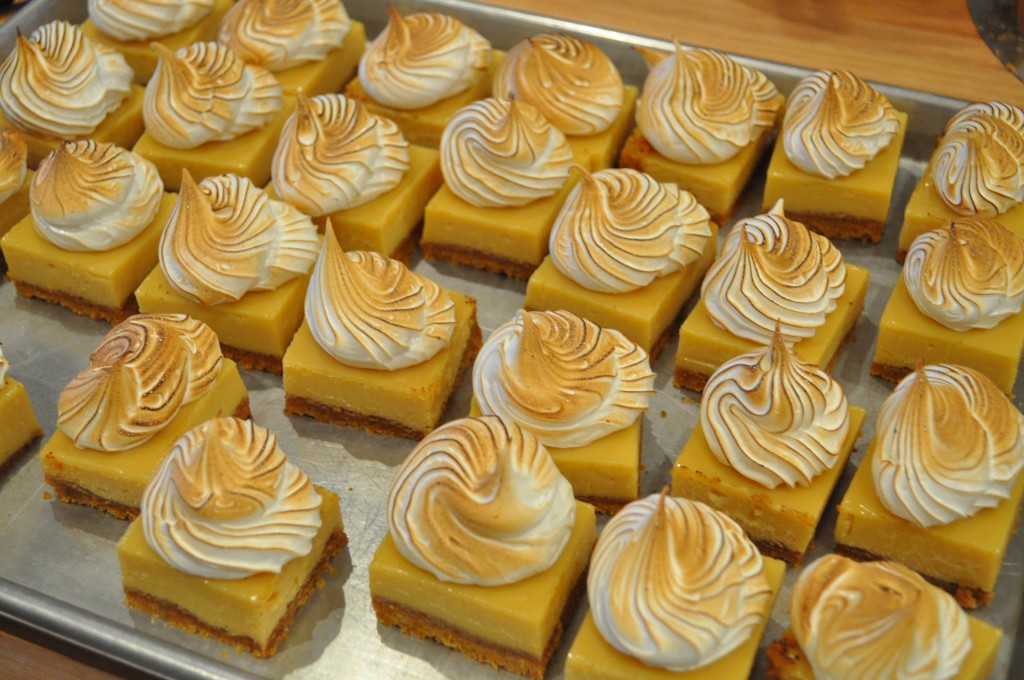
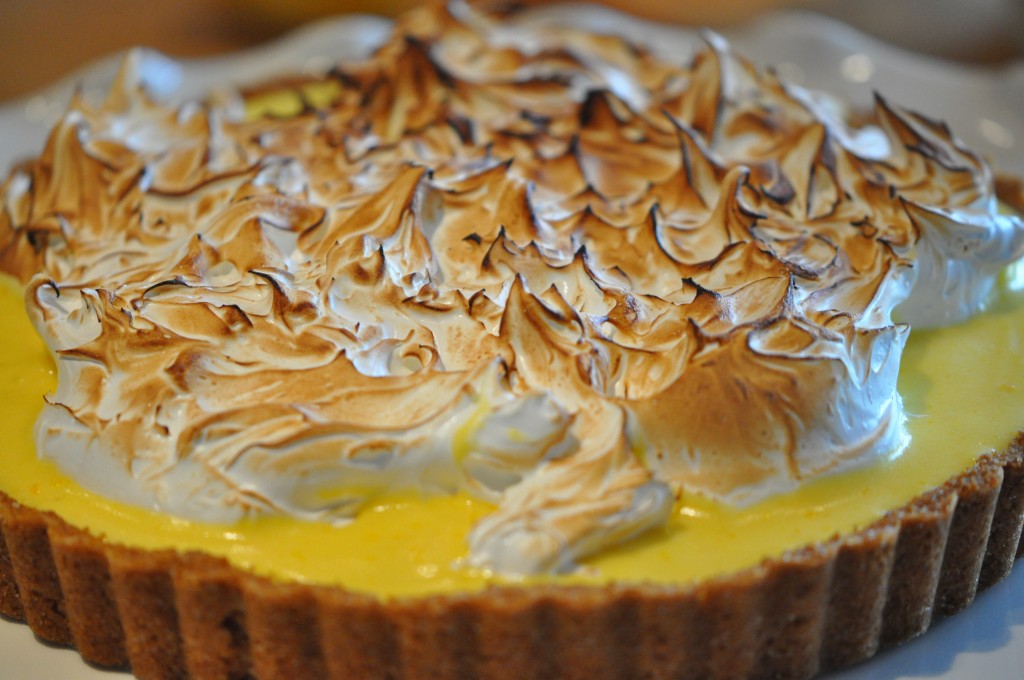
Key Lime Tart Topped With Italian Meringue

Key Lime Tart Cut Into Bars

Free-Form Topped With Meringue

Here it is, the most requested recipe of all of the recipes I have written:  KEY LIME TART.  This recipe will be in the book (I am close to the finish) but so many people are requesting this recipe that I decided to publish it on the blog.  Now let’s see how many actually make it.  Go ahead.  Give it a try.  It’s super easy (I know.  I say that all of the time, but it is that easy.)  Make it, share it, share the recipe and remember it is copyrighted so you will have to give me credit.

I prefer to use fresh key lime juice.  Living in Florida makes the key lime an easy find.  If you are unable to find fresh key limes you can substitute with bottled key lime juice.

If you are a coconut fan, add 1/4 cup ground coconut to the crust.  Pack the coconut in a 1/4 cup measure, then grind in a food processor fitted with the steel blade.  This will add yet another dimension to the finished product.

I like topping my key lime tart with Italian Meringue.  It gives the tart the perfect balance of sweet to tangy.  The sweet in the meringue and the tang of the key lime were meant to live together.  I have included the recipe for the Italian meringue but if you don’t want to spend the time making the meringue, top the tart with fresh whipped cream.  Please don’t use anything but the real deal.  Need I say more?  I’m going to:  If you use the fake whipped cream (is there really cream in that chemical mess?) please don’t use my key lime tart recipe.  Sorry if that sounds snobby but that’s how I feel.  After all, everyone that has been asking for the recipe has either eaten it topped with Italian meringue or fresh whipped cream.

You can also cut the tart into bars and serve as a finger dessert.  I cut the bars first and then top of the Italian Meringue.  Once cut, topped and browned you can place in individual paper liners to make it easier to pick up.  (When I am making bars I use a square tart pan with a removable bottom.  If you don’t have a square pan you can just have some odd shaped “bars”.)

Key Lime Tart with Graham Cracker-Macadamia Nut Crust Topped with Italian Meringue

For the Crust

1 1/4   Cup Graham Cracker Crumbs

1/2     Cup Macadamia Nuts Finely Ground

1/4     Cup Sugar

1/4      Cup Shredded Sweetened Coconut, Packed Then Ground (Optional)

1/3     Cup Unsalted Butter, Melted (5 1/3 Tablespoons)

For the Key Lime Mixture

6        Large Egg Yolks (Reserve the Egg Whites for the Meringue)

2        14 Ounce Cans Sweetened Condensed Milk

1        Cup Fresh Key Lime Juice

Preheat oven to 350 degrees F (325 if using a convection oven).

For the Crust: Mix the cracker crumbs, ground macadamia nuts, ground coconut (if using), sugar, and melted butter together until well combined.  Press the mixture into an 11” tart pan with removable bottom.  Set aside.

For the Key Lime Mixture: In a large bowl, mix the egg yolks with the sweetened milk using a wire whisk and mix well.  Add the lime juice in a stream into the egg mixture, whisking the whole time.  Combine well.  Pour into prepared tart pan.  Bake in the preheated oven for 20 – 25 minutes until set.  Remove from oven and cool on a wire rack.  Refrigerate overnight or at least 4 hours.

After cooled in refrigerator top with Italian Meringue by using a pastry bag fitted with the French tip.  Use your imagination on the design.  If you prefer to go free-form just put dollops of meringue on top of the tart using an ice cream scoop.  With an off-set spatula touch the meringue and lift up making little spikes (see photo #3).  When completely topped with the meringue, lightly burn the topping with a kitchen torch or place the tart under a hot broiler 6 inches from the heat source and lightly burn the meringue.  Don’t take your eyes off of the tart.  The meringue topping burns super fast.  Remove from the oven and cool.

Return to the refrigerator for at least an hour or up to overnight before serving.

As always, let me know how it turns out.  I’d love it if you would make a comment right on this blog.  Go to the section at the bottom of this article and directly under my e-mail address you will see a list all of the categories, etc., and click on “Leave a comment” (it should be at the very end of the categories).  It will bring you to the comment page.  If you haven’t left a comment before it will ask for your e-mail address.  This information is not shared with anyone EVER!!!  So don’t be shy about filling it in.

You can also send me a message at camille@camillecooksforyou.com

Posted in Ahh Haa Moments, Desserts, Food For Thought, Hints and Tips, Recipes To Share | Tagged , , , , , | Comments Off on The Most Requested Recipe

Easter Calzone and Frittata

Easter Eggs and Easter Bonnets.  Easter Mass and Easter Brunch.  These are the memories I have of Easter as a child growing up in Chicago.  Easter was a holiday my Mother cherished.  I can say with confidence that Easter was her favorite holiday:  She loved it because there was more than food to make this a special day.  My Mother, being a devout Catholic, followed the religious traditions and guidelines which went along with this holiest time of the year.  For the 40 days previous to Easter, we did not eat meat on Friday, attended Mass every morning before school, gave up something we loved for Lent (for me it was ice cream), did the Stations Of The Cross” on Friday afternoons, and practiced fasting, instead of feasting, for most meals.  “We have to sacrifice something,” Mom would say, “since Christ sacrificed his life for us.  It’s the least we can do.”

All through the 40 days, Mom would talk about Easter.  It was Easter “this and that”. When Easter Week finally arrived, Mom would begin to prepare for the Big Day.  First there were Easter dresses, pastel car coats, frilly hats, patent leather shoes and ruffled stockings to buy for me and my sister.  A new suit for my little brother.  A new outfit for Mom as well.  And Dad.  Well, Dad just got to sit back and watch the frenzy.  After all of the Easter outfits were purchased, she would then concentrate on Easter Brunch and Dinner.

We would start Easter day with attending 9:00 Mass dressed in our Easter finery.  Before Mass there were pictures to be taken of us, in our Easter pastel clothes, in front of the house, then we would walk the three blocks together to Mass, weather permitting (I remember snow one year).  After Mass we would come home to a table set with our traditional Easter brunch.  A brunch Mom would start to prepare on Friday.  That Friday of preparation was a day of making Grandma Lucia’s Satoni (aka Calzone, Easter Pizza, Easter Pie)  I’m still not sure of the spelling and we pronounced Satoni as Shatone.  But the spelling doesn’t matter nor does the pronunciation.  What did matter was the amount of time it took to make the Satoni (usually 6 pies) and the way they looked.  We knew they would taste great but the look had to be just perfect.  No cracked crust for my Mother.

On Saturday Mom would make the Frittata.  The question always was “How many eggs?”.  The answer, always, “24”.  Twenty four eggs, one pound of ricotta, one pound of Italian sausage, one pound of ham.  No salt, no pepper, no spices.  The giant Frittata’s flavor came solely from the sausage and ham.  The sausage always homemade by either Mom or Grandpa and the seasoning of the sausage with salt, pepper and fennel seed always perfect.  In the picture  below you will see the beauty of the Frittata.  Cooking it today is so much easier than when Mom labored over it since the non-stick pans didn’t appear in our home until late in the 60’s.  She would stand over that pan for what seemed like hours, stirring it to make sure it did not stick.  It would cook over the lowest of heat.  She timed it perfectly so it would not turn into scrambled eggs.  What a job.  Flipping it was another chore.  It became a family project especially when my sister and I got a little older.  Now, with today’s non-stick pans and my re-creation of the preparation using the stove top and the oven, this is no longer a huge ordeal.

The rest of the brunch would consist of a Baked Ham and Hot Cross Buns (the ham bone would make it’s way to the pot later in the week when Mom would make minestrone).  Mom would buy the buns at a local bakery early on Easter morning.  That was a time when bakeries were open on holiday mornings.

Along with the five of us, Grandpa, Uncle Dom, Aunt JiJie and her husband Epol where at the brunch table.  Sometimes other relatives would join us but usually the rest of the family would gather later in the day for Easter Dinner: not always at our house.  Dinner was another story, Pasta, “Gravy” Meat, Leg of Lamb, Potatoes, Vegetables…………  On and On it went.

Dinner was always great but it’s the Easter Brunch I remember the most.  Sometimes I re-create that wonderful brunch using only my Mother’s recipes.  So here you go.

Grandma Lucia’s Satoni

Satoni Ready For The Oven

Satoni Sprinkled With Jimmies

Sliced Satoni Ready For Brunch

For the Dough

1        Package Active Dry Yeast (1/4 Ounce, Not Instant)

6        Large Eggs

8        Tablespoons Granulated Sugar

4        Tablespoons Vegetable Oil

2        Drops Pure Anise Oil

1        Teaspoon Fine Sea Salt

6-7     Cups All-Purpose Unbleached Flour

For the Filling

4        Lbs. Whole Milk Ricotta, Drained

1.5     Lbs. Italian Sausage, Cooked and Cut into Small Dice

1.5     Lbs. Ham Steak, Cooked and Cut into Small Dice

4        Large Egg Yolks

6        Tablespoons Granulated Sugar

1        Teaspoon Fine Sea Salt

½       Teaspoon Freshly Ground Black Pepper

For the Glaze

2        Large Eggs

1        Tablespoon Water

1        Cup Pastel Candy Jimmies

Make the Dough

In the bowl of a standing mixer fitted with the dough hook, dissolve the yeast in ½ cup warm water (110 Degrees F).  Set aside until yeast begins to foam, about 5 minutes.  Lightly beat the eggs with a fork.  Add the sugar, vegetable oil, anise oil and salt to the eggs and add this to the yeast.  With the mixer on low, gradually add the flour one cup at a time.  Add enough flour to make a soft dough.  You may not need all seven cups.  With the mixer still on low, knead the dough until smooth and soft.  Transfer dough to a large bowl that has been lightly oiled with a small amount of vegetable oil, cover with a tea towel and let rise in a warm, draft free, place until double in volume, about 1½ to 2 hours.  Punch down the dough, divide into 6 equal pieces.  Shape the pieces into balls.  Set aside on two trays lined with plastic wrap and let rest for 30 minutes.

Make the Filling

While the dough is rising, make the filling.  Mix all of the filling ingredients together until well combined.  Set a side at room temperature.

Forming and Baking the Satoni

Preheat oven to 350 Degrees F (325 if using a convection oven).

On a lightly floured board, roll each piece of dough into a 10” to 12” Round.

Divide the filling between the six rounds, placing the filling on one side of the round.  Leave at least a two inch boarder.  Mix the 2 eggs with the water and brush a little of the egg wash on the boarder.  Fold the dough over the filling and decoratively crimp the edges being sure to completely seal the filling.  Brush the top of each of the Satonis with a little egg wash.  Poke three small holes on top of the Satoni with a thinly bladed knife.  This helps the steam escape and will prevent cracking.  Transfer the Satonis to 3 cookie sheets lined with parchment paper.  Bake each pan separately (unless you have a convection oven) until golden brown, about 25-35 minutes.  Rotate the pans half way through the cooking time.  (You can either roll out and fill two at a time and while one pan is baking you can roll out the next OR keep the filled waiting Satoni at room temperature until ready to bake.)

Cool on a wire rack.  Once completely cooled, very lightly brush some of the egg wash onto each Satoni and sprinkle with the pastel jimmies.  Be sure the Satonis are completely cooled through and through before sprinkling with the jimmies.

Store the Satonis overnight at room temperature.

Easter Frittata

Easter Frittata

Serves 15 Generously

24      Large Eggs

1        Lb. Whole Milk Ricotta, Drained

1        Lb. Italian Sausage, Cooked and Cut into Small Dice

1        Lb. Ham Steak, Cooked and Cut into Small Dice

1        Tablespoon XVOO

Preheat oven to 350 Degrees F (325 if using a convection oven).

In a large bowl, gradually beat the eggs into the ricotta.  Beating two or three eggs at a time into the ricotta will keep the lumps away.  Add the sausage and the ham to the egg mixture and thoroughly combine.

Over medium low heat add the oil to a Non-Stick 10” skillet with 3” high sides.  Heat the oil until warm and add the frittata mixture to the pan.  With a heat-proof rubber spatula, gently begin pushing the sides of the frittata towards the center, flattening out the frittata as you go.  Do this over and over until the frittata begins to set, about 15 minutes.  After it is loosely set, transfer the frittata to the oven and bake until completely set and golden brown on top, about 20 – 30 minutes.

You will know it is done when a thinly bladed knife inserted into the center comes out clean.

Remove from oven and let rest in pan for 15 minutes.  Invert frittata to a serving platter.  Serve immediately or cool to room temperature before serving.  Either way is wonderful.

If you have any questions please let me know either through a comment on the blog or through my e-mail:

camille@camillecooksforyou.com

Happy Easter!!!!


Posted in Ahh Haa Moments, Brunch, Calzoni, Cheese, Easter Pie, Easter Pizza, Egg Dishes, Eggs, Food For Thought, Ham, Hints and Tips, Italian Sausage, Menus, Recipes To Share, Ricotta Cheese | Comments Off on Easter Calzone and Frittata

Corned Beef Revisited

When I wrote last year’s article about Corned Beef and Cabbage for St. Patrick’s Day I never thought I would get such a great response from my loyal readers.  I was overwhelmed with the number of people who followed the recipes for this traditional feast, and even more overwhelmed with the over the top favorable reviews.

I am posting the article once again for all of the new followers of my blog and for all of the people who asked me to give it another whirl.

St. Patrick’s Day Feast

A St. Patrick’s Day Feast would be incomplete without Irish Soda Bread.  This Irish Soda Bread recipe is my version of my sister-in-law Kathy’s mother Peggy’s recipe.  I changed only a few things in the recipe.  Peggy’s recipe uses margarine, I use butter.  Butter gives it a richer flavor.  I added caraway seeds because my very Irish customer asked me to when I made it for her family.  We all loved the results.  It adds another layer of flavor.

Irish Soda Bread

Peggy's Irish Soda Bread

Makes 1 Loaf

4          Cups All Purpose Flour

1/3       Cup Granulated Sugar

1          Teaspoon Fine Sea Salt

2          Teaspoons Baking Powder

1          Tablespoon Caraway Seeds, Optional

4          Tablespoons Unsalted Butter, Cold and Cut into 8 Pieces

2           Cups Golden or Dark Raisins  (THIS JUST IN:  Kathy said her mom soaked the raisins in whiskey first.  This is optional but it sounds so good.  In a small bowl, pour 1/4 Cup Whiskey over the raisins and let them soak for a few minutes.  Drain well before using.)

1 ½     Cups Buttermilk

1          Large Egg

1          Teaspoon Baking Soda

1          Large Egg Yolk (For the Glaze)

1          Tablespoon Heavy Cream (For the Glaze)

Preheat oven to 350 Degrees F (325 degrees F if using a convection oven.)  Line a sheet pan with parchment paper.

In a large bowl whisk together the flour, sugar, salt, baking powder and the optional caraway seeds.

Cut in the butter with your finger tips or a pastry cutter.  (Using your fingers is the most efficient way to cut in the butter.  Just be sure the butter is super cold.)  Add the raisins and stir until evenly distributed.

In a small bowl, lightly beat the egg with a fork and add the buttermilk.  Add the baking soda and stir to combine.  Pour the buttermilk mixture into the flour mixture all at once and combine with a fork until all of the liquid is absorbed and the mixture starts to hold together.  Turn the dough out onto a lightly floured surface and gently knead until the dough comes together.  Don’t over work it or it will be a tough bread.

Form the dough into a round, domed shape 7 to 8 inches in diameter.  Place on prepared sheet pan.

In a small bowl mix together the egg yolk and cream and brush the top of the bread all over with the egg wash.  Cut a cross into the top of the bread about half an inch deep.

Place the sheet pan in the oven and bake the bread for 60 to 70 minutes, rotating the pan half way through the cooking.  Bake until the bread is golden brown and a wooden skewer comes out clean when inserted into the center.

Remove from the oven and transfer to a wire cooling rack.  Cool completely before cutting.

Oven Braised Corned Beef with Irish Beer and Irish Whiskey

When buying the corned beef be sure to buy the flat end.  This is the largest part of the brisket, the most evenly marbled and the tenderest.  The tip end is stringy and not very flavorful.  I had to look really hard through the meat section to find a large piece like I use in this recipe.  There seemed to be only two to three pound pieces and that, to me, is hardly worth the effort.  Besides, the shrinkage factor is crazy.  You can buy your corned beef a week in advance as there will be a better selection in size and, as long as you keep it in the bag it comes in, it will fine.  This size corned beef will serve six but there will not be any left over.

You might think that with all of the beer and whiskey in the recipe it will have a strong alcohol flavor.  But it doesn’t.  In fact there is no beer or whiskey flavor at all.  The beer does wonders for the taste and texture of the corned beef and the whiskey mellows the taste even more giving it a subtle sweetness.  If you prefer not to use beer or whiskey you can substitute a light, no sodium chicken stock.  My result was a delicious, melt in your mouth corned beef.

If there is a packet of seasoning in the bag the corned beef comes in, use it.  You can never add too much flavor.  Don’t use any salt as the corned beef has enough in the brine to flavor everything in the pan.

Corned Beef Nestled In The Pot


A Beautiful Array Of Veggies For The Pot


Dinner Is Served


Serves 6

1        4 ½ to 5 Pound Corned Beef Brisket, Flat End
6        Garlic Cloves, Smashed
2        Large Onions, Thickly Sliced
2        Tablespoons Pickling Spice

2      Bay Leaves
2      12 Ounce Bottles of Beer (Not Light Beer) Such as Harps Lager
1/2  Cup Irish Whiskey (Or Canadian Club)
12    Medium Size Carrots, Peeled, Cut Crosswise on an Angle Into 1″ Pieces

6        Medium Size Yukon Gold Potatoes, Unpeeled and Cut Into Quarters

1       1 Lb. Bag Boiler Onions, Peeled and Left Whole with Root End Attached 1      Large Head Savoy Cabbage, Cut Into Six Wedges with Core Left Intact (Leaving the core intact keeps the cabbage leaves together making it easier to handle and it looks good as well.)

Preheat the oven to 325 Degrees F. (300 Degrees F if using a convection oven.)

Rinse the corned beef with cold water to remove all of the brine the meat has been sitting in.  Place the corned beef into a large roasting pan. Add the garlic, onions, pickling spice, bay leaves, beer and whiskey. On the stove top bring the liquid to a boil.  (It is always good to put a hot pan into the oven when cooking something such as this.  It removes all of the time in the oven being wasted to get the pan and its contents hot.)  Cover with a lid and place in the oven. (If you do not have a lid for the pan, cover the meat with a sheet of parchment paper and then with foil.  Be sure to seal the edges of the foil tightly around the pan.)  Braise 3 hours, turning the meat in the pan half way through the cooking time.

At the end of the 3 hours, remove the pan from the oven, turn the meat again, add the carrots and potatoes, scattering them around the meat. Replace the lid (or foil) and place back in the oven for an additional one and a half hours.

Remove the pan from the oven, add the onions and the cabbage, being sure to nestle the cabbage in the liquid and spoon some of the liquid over each wedge.  Replace the lid (or foil), place back in the oven and continue braising for 30 to 40 minutes.

Remove the pan from the oven and let everything rest in the pan, covered, for 20 minutes.

Trim off some of the fat from the corned beef.  Slice the meat against the grain and decoratively arrange meat and vegetables on a large platter.  Drizzle some of the pan juices over the meat and vegetables.

Serve with prepared horseradish (I like the hot horseradish) and coarse whole-grain mustard.

I am looking forward to your comments, so please feel free to make a comment on this or any of my posts.  You can also send an e-mail to me at  camille@camillecooksforyou.com

Posted in Accompaniments, Ahh Haa Moments, Beef, Bread, Food For Thought, Hints and Tips, Liquor, Menus, Recipes To Share, Vegetables | Tagged , | Comments Off on Corned Beef Revisited

Decadence At It’s Best!!!!

YUMMY!!!! Lobster Mac And Cheese

There is only one word for Lobster Mac and Cheese – Decadence!!!! I recently catered a party at which the Lobster Mac and Cheese was the headliner on the menu.  I made this outrageously deliciously creamy dish for 60 people.  I spent countless sleepless nights before the event putting the recipe together in my mind.  So many questions needed to be dealt with before I spent the gazillion dollars it cost to make this dish:  How much to make?  How can I infuse the lobster flavor into the sauce without making a traditional stock?  When do I add the cheese and mascarpone?  When do I add the lobster meat?  To bake or not to bake?  That was a really big question and I chose not to bake so as not to dry out the lobster meat.  Each question was answered and the recipe thought out perfectly before I made the dish.  My obsessiveness paid off as everyone seemed to like it.  I got a boat load of compliments on the dish.

I have taken my huge quantity recipe and cut it down to a reasonable size.  The new version will feed 8-10 generously or 16-18 as a side dish.

There are some things which are kind of up to you.  I put a good amount of lobster meat into the recipe but you might want more.  More won’t hurt and there need not be any recipe adjustments made.  Just add more lobster.

I chose a cheese of not too much intensity, Vermont White Cheddar, in combination with the rich and creamy mascarpone because I did not want to hide the flavor of the lobster infused milk.  You will notice I also did not add any herbs at the end of the dish.  I just want that lovely lobster taste to linger in my mouth.  No Herbus Interruptus.

So enjoy and let me know what you think.

A Milk Bath For The King of Shellfish

Lobster Mac and Cheese

Serves 8-10

1        1.5 to 2 LB Maine Lobster

4        Cups Whole Milk

4        Cups Half and Half

2        Cups Heavy Cream

3        Stalks Celery, Coarsely Chopped

3        Carrots, Unpeeled, Coarsely Chopped

1        Medium Spanish or Vidalia Onion, Skin On, Coarsely Chopped

1        Bay Leaf

1        Teaspoon Whole Black Peppercorns

1        Cup Flat Leaf Parsley Left Whole

1        Sprig Fresh Whole Sage Leaf

2        Tablespoons Tomato Paste

½       Cup Madeira Wine

8        Tablespoons Unsalted Butter

8        Tablespoons All-Purpose Flour

12      Ounces Grated Vermont White Cheddar Cheese

8        Ounces Mascarpone at Room Temperature

1        Teaspoon Coarse Sea Salt

½       Teaspoons Freshly Ground Black Pepper

¼       Teaspoon Freshly Grated Nutmeg

1        Lb. Cooked Maine Lobster Meat, Coarsely Chopped (In addition to

lobster meat pulled from the whole lobster)

2        Lbs. Shell Pastas

Buttered Bread Crumbs (Recipe Follows)

Bring a large pot of salted water to a boil.  Plunge the lobster, head first, into the boiling water.  Bring water back to a boil, turn heat down to simmer and cook the lobster, covered, for 8 minutes.  Remove the lobster from the simmering water and immediately immerse it into an ice bath.  Cool the lobster completely in the ice bath, about 10 minutes.  Remove from the ice bath and carefully remove all of the lobster meat from the tail, claws and knuckles and coarsely chop.  Reserve all of the shells.  Cut the body in half and remove all the insides of the lobster.  Set the body and the rest of the shells to the side.

In a large pot, bring the milk, half and half, cream, celery, carrots, onion, bay leaf, peppercorns, parsley sage, tomato paste and Madeira wine to a slow simmer.  Add the lobster shells and body to the simmering mixture and continue to simmer covered for 1 hour.  Be careful to not let it come to a full boil (intense boiling could make it curdle).  After an hour, strain the mixture through a fine sieve into a large bowl.  Discard the solids.

In a large heavy pan, melt the butter over medium heat until bubbly.  Add the flour and cook for a few minutes stirring continuously to cook out the raw taste of the flour.  Slowly add the warm milk, cream, half and half mixture whisking continuously.  Add salt, pepper and nutmeg.  Bring to a slow boil and cook until thickened, about 5 minutes, always whisking.  Remove from heat and stir in cheese and mascarpone, being sure to completely combine. Fold in the lobster meat.  Set aside.

Meanwhile, bring a large pot of salted water to a boil.  Add the shell pasta and cook until al dente following package instructions.  Drain the pasta, shaking the colander to get rid of excess water.

Place pasta in a large bowl and blend in the sauce, coating the pasta completely.  Spoon into pasta bowls and sprinkle with some of the buttered bread crumbs.  Serve immediately.

Buttered Bread Crumbs

1        Stick Unsalted Butter

2        Cups Panko Bread Crumbs

1        Teaspoons Sea Salt

1/2     Teaspoons Freshly Ground Black Pepper

In a large sauté pan melt the butter over medium heat.  Add the Panko crumbs, salt and pepper and cook, stirring the whole time, until golden brown.  Remove from pan immediately.

You can always reach me by leaving a comment on the blog or e-mail me at

camille@camillecooksforyou.com

Posted in Ahh Haa Moments, Cheese, Food For Thought, Hints and Tips, Lobster, Pasta, Recipes To Share, Seafood | Tagged , , , , , , | Comments Off on Decadence At It’s Best!!!!

Perfectly Perfect Prime Rib

There is nothing better than a Roasted Prime Rib of Beef, Veal, Pork or Lamb for an elegant dinner party, a hearty winter meal or just because you  have a taste for roasted meat.  I just recently roasted all of the above mentioned and they were so delicious that I want to share a few of the secrets that made the meat moist, tender, delectable and really good.

BUY LOCALLY

The most important tip I can give you to achieve a wonderful roast is to start with a very good grade of meat.  When buying a rib roast this is the time to splurge and not cut cost.  I suggest you go to a neighborhood butcher instead of a grocery store or a big box store.  Why?  Forming a relationship with a local butcher is what makes buying meat a pleasure.  In fact, my practice is to buy all fresh food from a neighborhood or local purveyor.  That goes for seafood, poultry and produce as well as meat.

A relationship with your butcher, fish monger and produce person will give you confidence in what you are buying.  Once you form the relationship with these people you are always going to be happy with the product.  When you walk in to a local purveyor’s store they know your name, your likes and dislikes and will listen to what you have to say – what you are looking for – and if you’re not sure what you want, they can guide you in the right direction.  For instance, I had a dinner party the other night and just could not decide what to have for the entree.  I went to my local butcher shop and they made suggestions that led me to a Rack of Pork.  My butcher sells only prime meats unlike the grocery stores which sell only choice, select and standard (select and standard are very low on the chain of grading).

Following is a little primer concerning meat grading:

Meat Grading

  • U.S. Prime – Highest in quality and intramuscular fat, limited supply. Currently, about 2.9% of carcasses grade as Prime.
  • U.S. Choice – High quality, widely available in foodservice industry and retail markets. Choice meats are a little over half of the fed cattle total. The difference between Prime and Choice is largely due to the fat content in the beef. Prime typically has a higher fat content (more and well distributed intramuscular “marbling”) than Choice.
  • U.S. Select (formerly Good) – lowest grade commonly sold at retail, acceptable quality, but is less juicy and tender due to leanness.
  • U.S. Standard – Lower quality, yet economical, lacking marbling.

There are four other grades, Commercial, Utility, Cutter, and Canner.  Commercial is super low quality, lacks tenderness and is produced from older animals.  I am not sure where this grade of meat is sold but I can guess.  The other three grades are rarely used in foodservice operations and primarily used by processors and canners.

I find that local purveyors sell meat, seafood and poultry that is steroid, hormone and anti-biotic free and  produce that is not dusted with pesticides and is chemical free.

I think I just got a little long winded on meat grading and buying.  Let’s go on to cooking a really great Prime Rib of Beef.
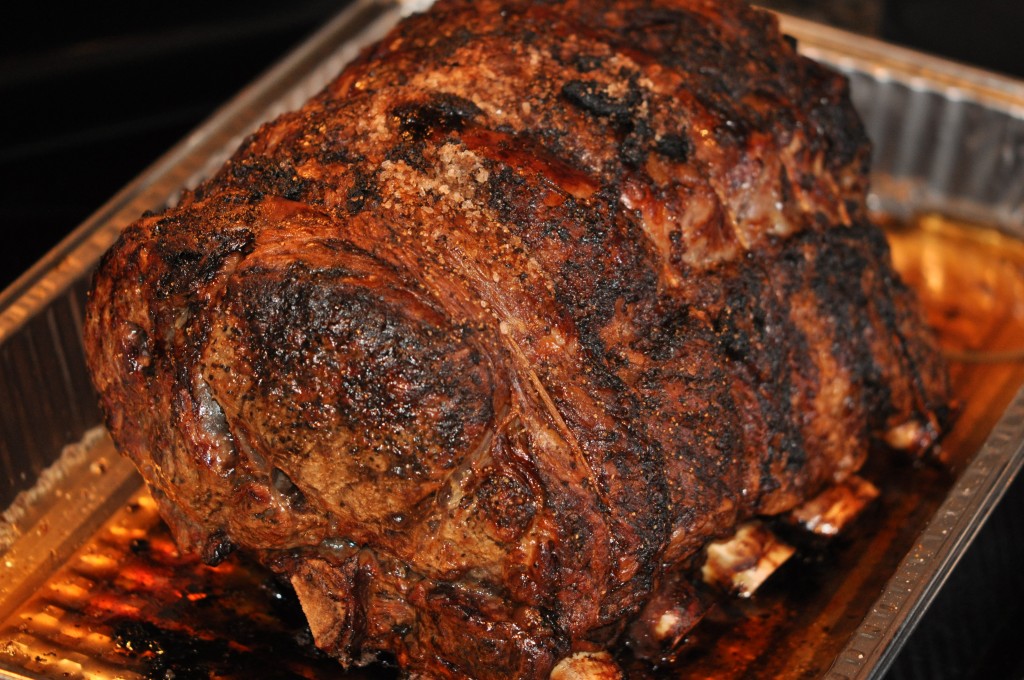
Perfectly Perfect Roasted Prime Rib of Beef Au Jus


Serves 10 to 12


1        15 Lb. Prime Rib (About 5 Ribs)

½       Cup XVOO

2        Tablespoons Coarse Sea Salt

1        Tablespoon Coarse Ground Black Pepper (Butcher’s Grind)

1        Tablespoon Garlic Powder

1        Cup Good Red Wine

3        Cups Homemade Beef Demi-Glaze or Good Quality Beef Stock


Preheat oven to 350 Degrees F (325 if using a convection oven).

Place the Prime Rib in a shallow roasting pan.  Pour the XVOO all over the meat, sprinkle with the salt and pepper and rub everything all over the meat including the sides of the roast.

Roast the Prime Rib until the internal temperature registers 128 Degrees F for medium rare on an instant read thermometer when inserted in to the middle of the Roast (about 3 hours).

Remove the roast from the oven, place the roast on a serving platter and let rest for 30 minutes before carving.  In the mean time, pour off all of the fat left in the roasting pan and over high heat, de-glaze the pan with the red wine scraping up all of the bits on the bottom of the pan.  Bring to a boil and reduce by half.  Add the beef demi-glaze or stock to the pan and bring back to a boil.  Reduce slightly (by about 1/3).  Strain Au Jus and serve with Prime Rib.  Serve Horseradish Creme Fraiche as an accompaniment.

Horseradish Crème Fraiche Sauce


My version of this classic sauce is on the “horseradish hot” side.  You can easily tame it by using less horseradish and less Tabasco.


Makes 3½ Cups


3        Cups Crème Fraiche or Sour Cream

¼       Cup Plus 2 Tablespoons Prepared Horseradish, Drained

1        Teaspoon Tabasco

1        Tablespoon Worcestershire Sauce

1        Teaspoon Coarse Sea Salt

½       Teaspoon Coarse Ground Black Pepper (Butcher’s Grind)


Gently fold all ingredients together until well blended.


Hints and Tips: Ask your butcher to trim the Prime Rib leaving some of the fat cap on and to remove the chine bone.  Removing the chine bone makes it easy to carve.   Have him cut the meat away from the rib bones and then tie it back on.  This, also, makes it easy to carve and tying the meat insures even cooking.  The meat will not pull away from the center muscle.

If you have a Probe that attaches to your oven, this is the time to use it.  If you don’t have one, I suggest you invest in a Remote Probe which can be purchased at a kitchen store such as Williams-Sonoma or Sur La Table.  Using a meat probe will insure a perfectly cooked roast.  What I especially like about the probe is because it automatically gives you the internal temperature, you will be opening the oven door less keeping the heat where it should be – in the oven.  I can’t stress this tool strongly enough.  With a meat probe you can cook any kind of roast and always get perfect results.  If you do only one thing I suggest in this recipe, make it this – USE A MEAT PROBE.  (You won’t need to use an instant read thermometer if you use a Probe.)

Remember, it’s not about the time it takes to cook the meat but the internal temperature of the meat.  Everyone’s oven is different so if it takes a little longer or a little less time it doesn’t matter, just as long as you get the right internal temperature.

If you use a Probe, do not take the probe out of the meat until you are ready to carve.  If you do take it out when the meat comes out of the oven, the juices will run out.  Not a good thing.

I use garlic powder, instead of fresh garlic, because fresh will get too dark and have a bitter and burned taste when used on a roast this size.  Three hours is too much cooking time for fresh garlic.

If you want a thicker sauce, add a little cornstarch that has been dissolved with water.  Use only 2 or 3 teaspoons of cornstarch to about 2 tablespoons of water.  Dissolve the cornstarch in the water by using your finger tips.  You don’t want any lumps.  When the Au Jus comes to a boil, gradually add the cornstarch-water mixture stirring with a whisk the whole time until you reach a slightly thicker consistency.  You want a thin sauce, not gravy.

I hope I have made cooking Prime Rib a less daunting task.  You will be so happy I have spent these many years perfecting my Prime Rib Cooking Skills.  As I said above, the key to a great Roast is two fold:  A Great Piece of Meat and a Cooking Probe.

Happy Roasting!!!  Let me know how it turns out.

camille@camillecooksforyou.com

Posted in Accompaniments, Ahh Haa Moments, Beef, Food For Thought, Hints and Tips, Recipes To Share | Tagged , , | Comments Off on Perfectly Perfect Prime Rib

Chirstmas Time is Sugar Cookie Time


Less than two weeks until Santa makes a visit to our home, but that’s only if Jim and I have been good and not naughty.  I know we have been exceptionally good this past year so we are expecting a full Santa sack at our home.  It’s a good thing we don’t have a chimney:  If we did he would not be able to fit himself or the huge sack of presents in that chimney.

I don’t doubt that he will be at our house because it has always been our custom to leave cookies and hot chocolate for the jolly old guy.  The tradition will continue this year as well.  I just finished baking a batch of sugar cookies and I am now getting ready to ice them with wonderfully sweet and velvety royal icing.  It seems most people are squeamish when it comes to decorating sugar cookies with royal icing.  Well, I am here to make it easy for you (that’s the point of this blog).  Once you make sugar cookies and ice these delicious delights you will always find a holiday, or reason, to make Decorated Sugar Cookies.

Sugar Cookies


2 Large Egg Yolks

3 Tablespoons Heavy Cream

3 ½ Cups All Purpose Flour

1 Cup Granulated Sugar

2 ½ Sticks (10 Oz.) Cold Unsalted Butter, Cut Into 1 inch pieces


Preheat oven to 350 degrees F. (325 degrees F if using a convection oven.)


In a small bowl, whisk the egg yolks with the cream.  In a standing electric mixer fitted with the paddle attachment, combine the flour and sugar.  Add the butter and beat at low speed until the mixture resembles crumbs, 2 to 3 minutes.  Add the cream-egg mixture in a slow steady stream, beating at low speed until the ingredients are just combined.  Divide the dough into 2 equal pieces, shape into disks, wrap in plastic and refrigerate at least 2 hours or overnight.  Let the dough stand at room temperature for 30 minutes before rolling.


Line several baking sheets with parchment paper.  On a lightly floured surface, roll out the dough to a ¼ inch thickness (thickness is important) and cut out shapes.  Place on the parchment lined baking sheets and bake for 16 to 18 minutes, or until pale golden (13 to 14 minutes if using a convection oven.)  Cool on the trays.

When cookies are completely cooled, frost them with Royal Icing.  Let cookies sit overnight uncovered.  This gives the icing time to set.  Cookies can be stored in tins for a long time, 3 to 4 weeks.

Royal Icing


5 Tablespoons Meringue Powder

1 Box (1Lb.) Confectioners Sugar (10X)


Place Meringue Powder and scant 1/2 Cup water in bowl of electric mixer fitted with the whisk attachment and mix on low speed until blended.  Add Confectioners Sugar and mix on low speed until soft peaks form, about 10 minutes, scraping down sides periodically.  At this point you can add more liquid a drop at a time to make the icing perfect for icing cookies.  Add food coloring and mix until well blended.

To ice the cookies use the flooding technique by outlining the cookie with the icing in a pastry bag fitted with a very small plain pastry tip and then flood the cookie.    Do not outline all of the cookies first because the outline will harden and you will not be able to blend the flooding.

Hints and Tips:  You can purchase Meringue Powder at a baking supply store or Williams-Sonoma.  I have purchased Meringue Powder from both Williams-Sonoma in the store and CK Products on line.  http://www.CKproducts.com

To color the icing, divide it into smaller containers and use food color to achieve the colors you would like.  I use food color paste which you can buy at a baking supply store such as CK Products, Williams-Sonoma or Michael’s Craft Store.  I don’t like the liquid type of food color you can easily get at the grocery store because it will change the consistency of the icing:  It actually makes the icing too thin to work with.  The paste is much better.  Keep the icing covered with a lid or plastic wrap when not in use.  It hardens faster than you think.

If you have any questions don’t hesitate to contact me either by leaving a comment on the blog or by e-mailing me at camille@camillecooksforyou.com

Later this week I am going to write a blog about Prime Rib, the quintessential holiday main course.  I’ll let you know when it’s done.

Happy Holidays to all!!!!  Enjoy the days before Christmas.  For me, they are the most fun time of the holiday.


Posted in Ahh Haa Moments, Cookies, Desserts, Food For Thought, Hints and Tips, Recipes To Share | Tagged , , | Comments Off on Chirstmas Time is Sugar Cookie Time